
Always when we take an iPhone, iPod touch or iPad out of Cashier (or when we restore the device from “zero”, without recovering the previous backup), the system comes with several disabled settings, in which many people end up not knowing how to change.
Therefore, we have made an overview of the 10 main basic configurations that will make your life easier when handling your new device. ?
These tips are based on the assumption that you have already configured the initial settings when switching the device on for the first time, such as putting it in Portuguese, activating iCloud, Wi-Fi password and others.![]()
❖ Setting 1 – Activate the battery percentage
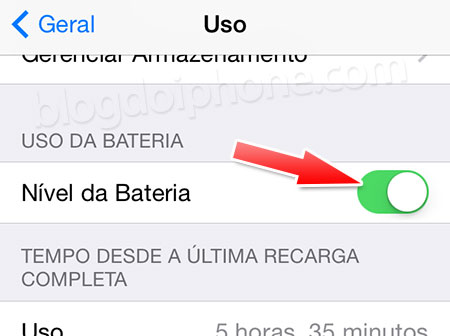
Both the iPhone and the iPad do not come with the percentage enabled at the factory. But activating it is easy:
– Go in Settings ▸ General ▸ Use and activate.
❖ Adjustment 2 – Configure your iCloud
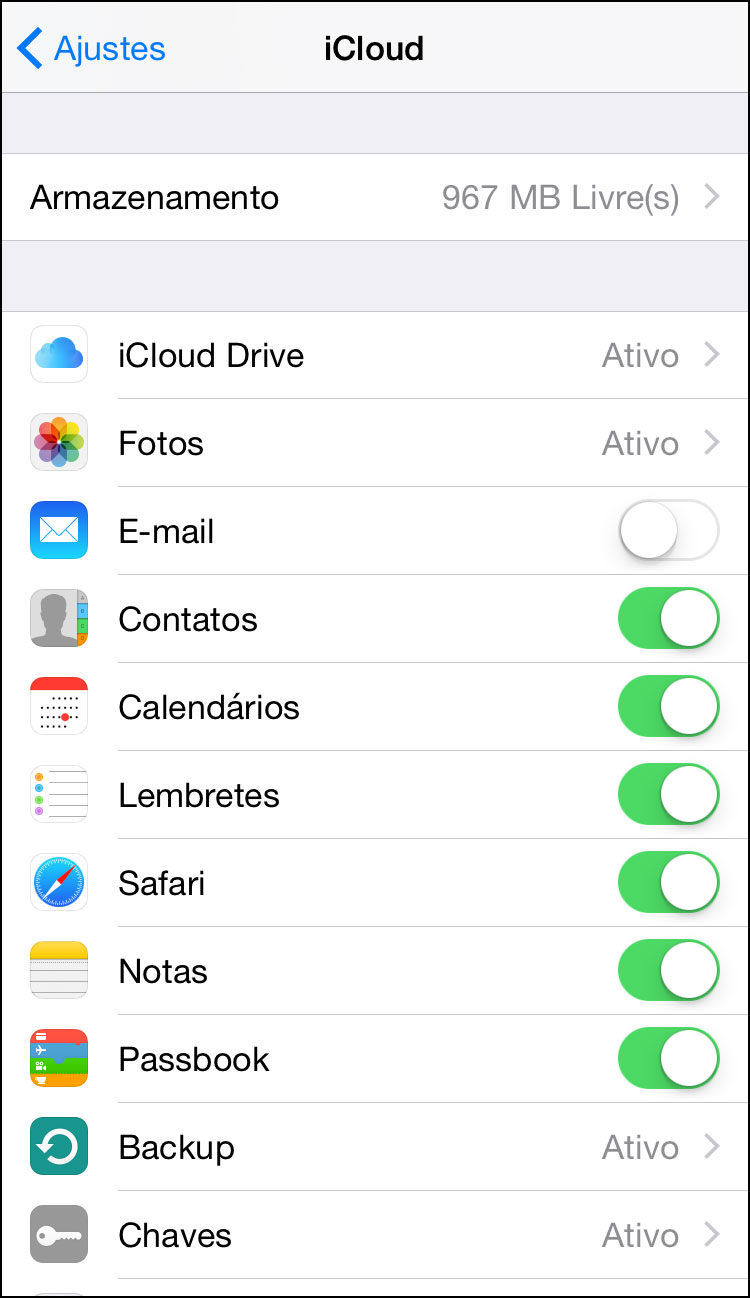
When activating the device you already had to activate an iCloud account on it. But some settings you still need to make, such as enabling automatic backup or turning off email @ icloud.com, in case you don’t use it. Go in Settings> iCloud and turn on or off what you think is best. Make iCloud your own.
❖ Setting 3 – Sort the contact list by name
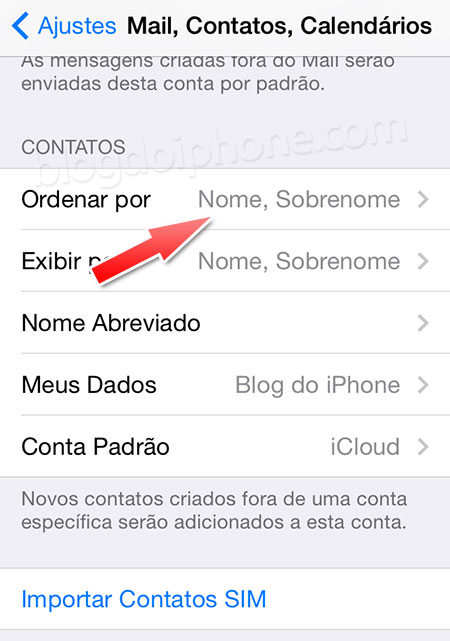
In the Brazilian standard, our contacts are classified by first name and not by last name. In iOS standard, it comes unlike factory. To change that, just follow this path:
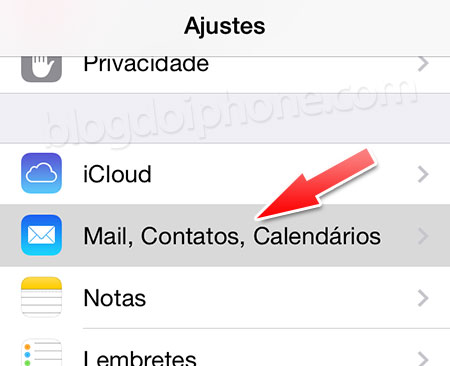
– Go in Settings and select the menu Mail, Contacts, Calendars:
– In Contacts, you can choose whether to sort and display by first or last name.
‣ ▶ Sort the iOS contact list by first name, not last name
❖ Adjustment 4 – Enable Calendar alerts
For a reason you can’t understand, iOS Calendar event alerts are not active on the system. To enable them:
– Go in Settings and select the menu Mail, Contacts, Calendars:

– In Calendars, tap where it says Standard Alerts. Configure notices for Birthdays and Events.
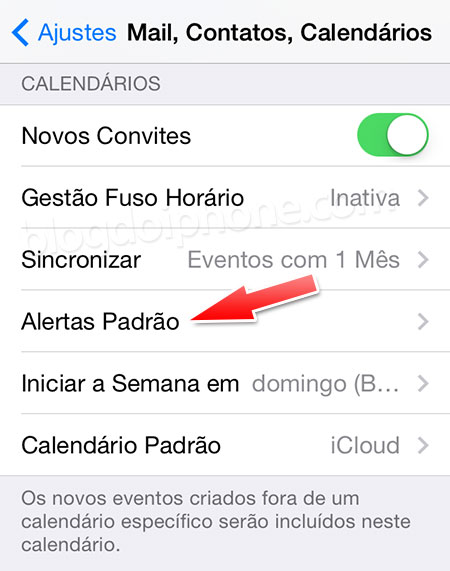
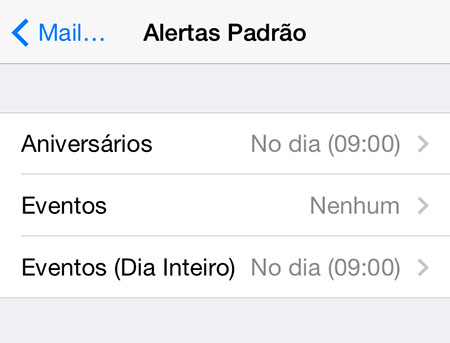
There, now you will always be warned before birthdays. Do you know how to add them to the Calendar?
‣ ▶ How to add birthdays to the iOS calendar
❖ Setting 5 – Create a device password
There are people who don’t worry about it, but creating a lock password for the iPhone or iPad is very important, so that your data is not accessed if you lose or steal the device.
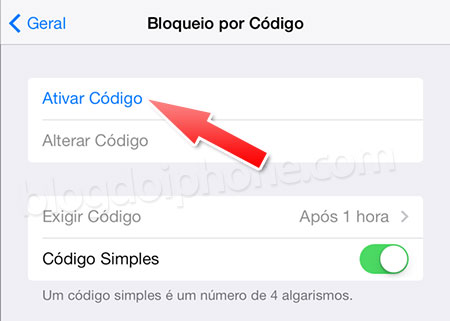
– Go in Settings ▸ General ▸ Code Lock.

– Touch Activate Code. Type a 4-number password twice (don’t forget it, as there is no way to recover it).
‣ ▶ Put password on your iPhone without having to type it at all times
❖ Adjustment 6 – Activate restrictions
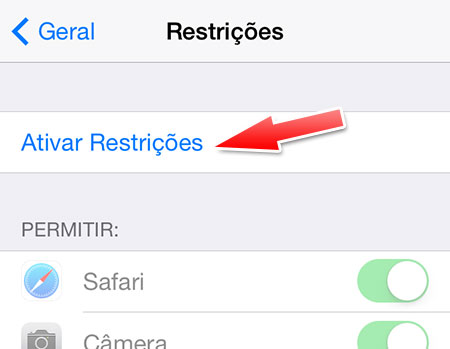
You may want to activate some restrictions, for example, forbid making internal purchases in the applications (useful when you have children) or prevent email accounts from being changed. You can do this in Restrictions:
– Go in Settings ▸ General ▸ Restrictions.
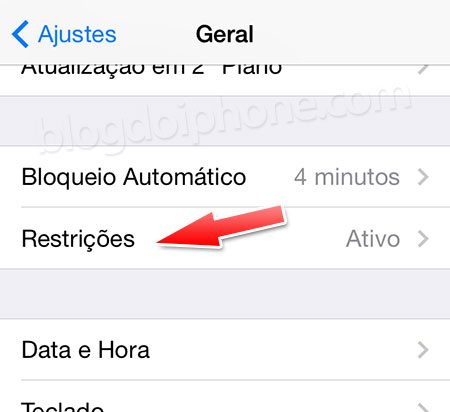
– Touch Enable Restrictions. Enter a 4-number password twice (don’t forget her, otherwise you will not be able to recover it).
❖ Adjustment 7 – Enable iMessage
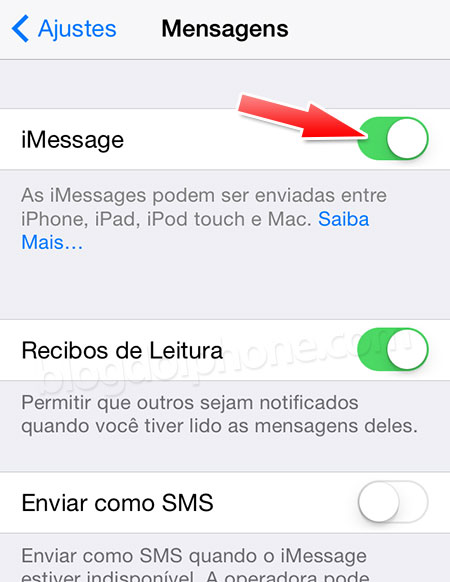
The iMessage service is not activated at the factory. To make them active:
– Go in Settings ▸ Messaging and activate iMessage. Take advantage and disable the option Send as SMS (on iPhone), so you don’t have extra costs if the internet network doesn’t work.
‣ ▶ Get to know iMessage in detail, the messaging service between iOS users‣ ▶ Learn how to associate an email address with your iMessage on your iPhone or iPad
❖ Adjustment 8 – Enable automatic password filling in Safari
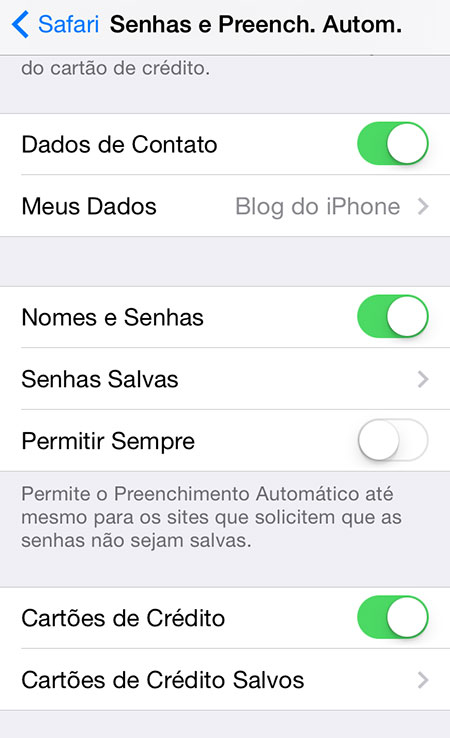
You must activate it only if you have set a protection password on the device (Setting 5). It facilitates internet browsing by saving passwords for the websites you visit, filling in automatically whenever you return to them.
But if you share the device with someone else, consider whether you want your password to be recorded on the device. If you have no problem, follow the steps:
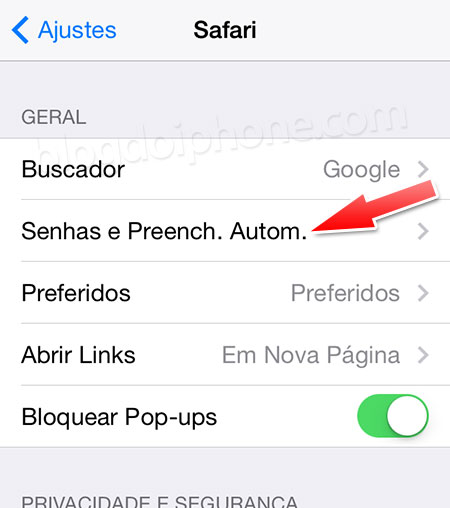
– Go in Settings ▸ Safari ▸ Fill. Auto and enable Names / Passwords. With iOS 7, you can also securely register credit card numbers in Safari.
‣ ▶ How to search for words on a Safari page on your iPhone, iPod, or iPad
❖ Adjust 9 – Adjust the Spotlight search
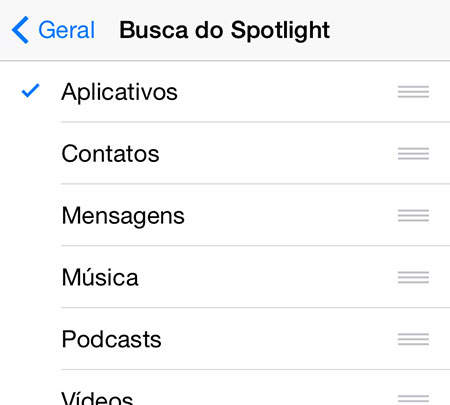
You can optimize searches on your device by leaving only what you usually look for in the system enabled in Spotlight.
– Go in Settings ▸ General ▸ Spotlight search.
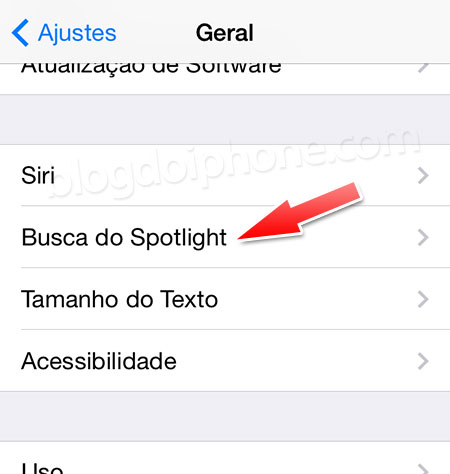
– Uncheck the options you don’t want to appear in the search by tapping the list. This will make searching the device faster.
To learn more about it:
‣ ▶ How to optimize the search for some information on the iPhone, iPad or iPod touch
❖ Adjust 10 – Place the iPhone Blog from your application screen
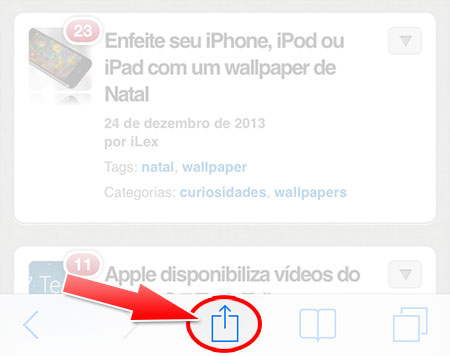
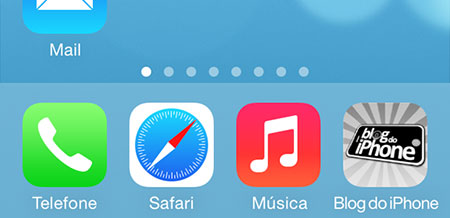
To always stay on top of tips, news and news about your iPhone or iPad, nothing better than always having a shortcut on hand that brings you here to the Blog. You can leave a website icon on your Home screen, as if it were an application. See how:
– On your iPhone, iPad or iPod touch, open the page blogdoiphone.com on Safari.

– Touch the arrow located in the bottom menu of the screen. Choose the option “Add to Home Screen“.
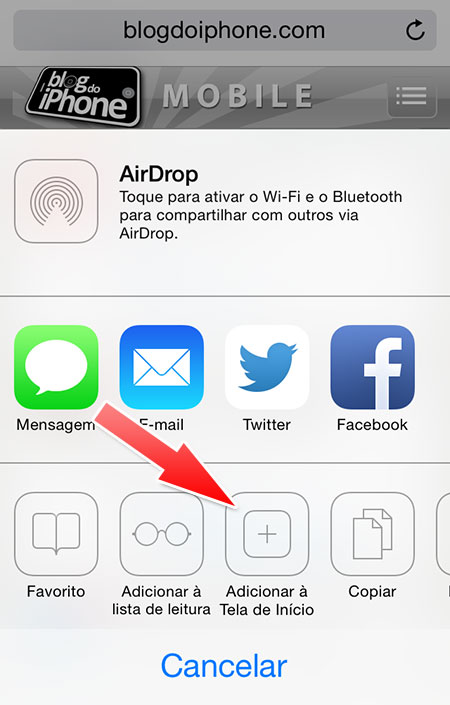
– Change the name that appears to “IPhone Blog“.
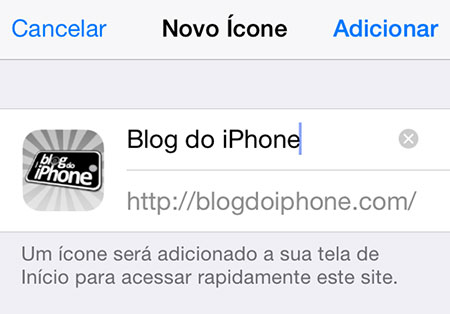
Ready. Whenever you want to quickly access the Blog, just tap the icon. ?
To see a video of the process, step by step, visit:
‣ ▶ How to add a web page icon on your iPhone, iPad or iPod touch screen
Original content © iPhone Blog
