READ: WhatsApp releases emojis with your face; see news
In the following tutorial, find out if Lightroom CC is a good app for editing photos on your phone. The procedure was performed on an iPhone XR with iOS 13, but the tips are also valid for users of devices with the Google system.
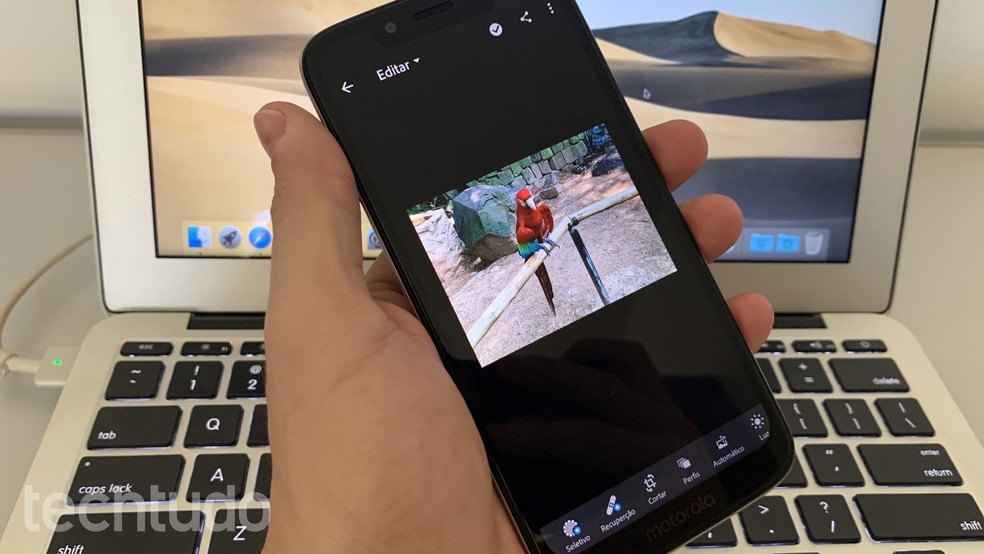
Learn how to use Lightroom CC to edit photos on your phone Photo: Helito Beggiora / dnetc
Want to buy cell phones, TV and other discounted products? Meet Compare dnetc
How to add effect to images with the Lightroom CC photo editing app
Step 1. Install Lightroom CC on your phone. When opening it for the first time, swipe the introduction screens to the left or touch "Ignore". Then log in or register for free using one of the options;
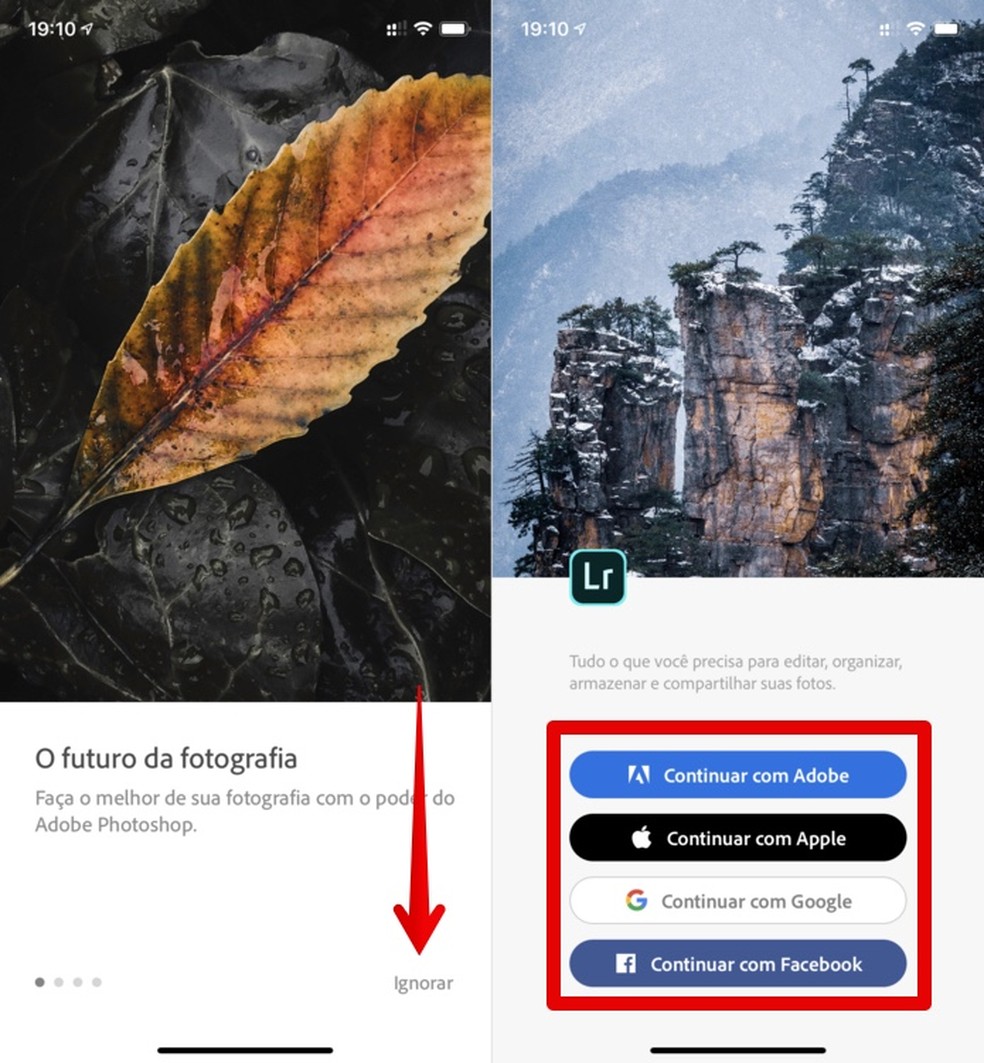
Adobe Lightroom CC introduction screens Photo: Reproduo / Helito Beggiora
Step 2. On the main Lightroom screen, tap "Start" or the "Import" icon and locate the photo you want to edit. The image will open in the editor and you can apply automatic adjustments by tapping "Auto.";
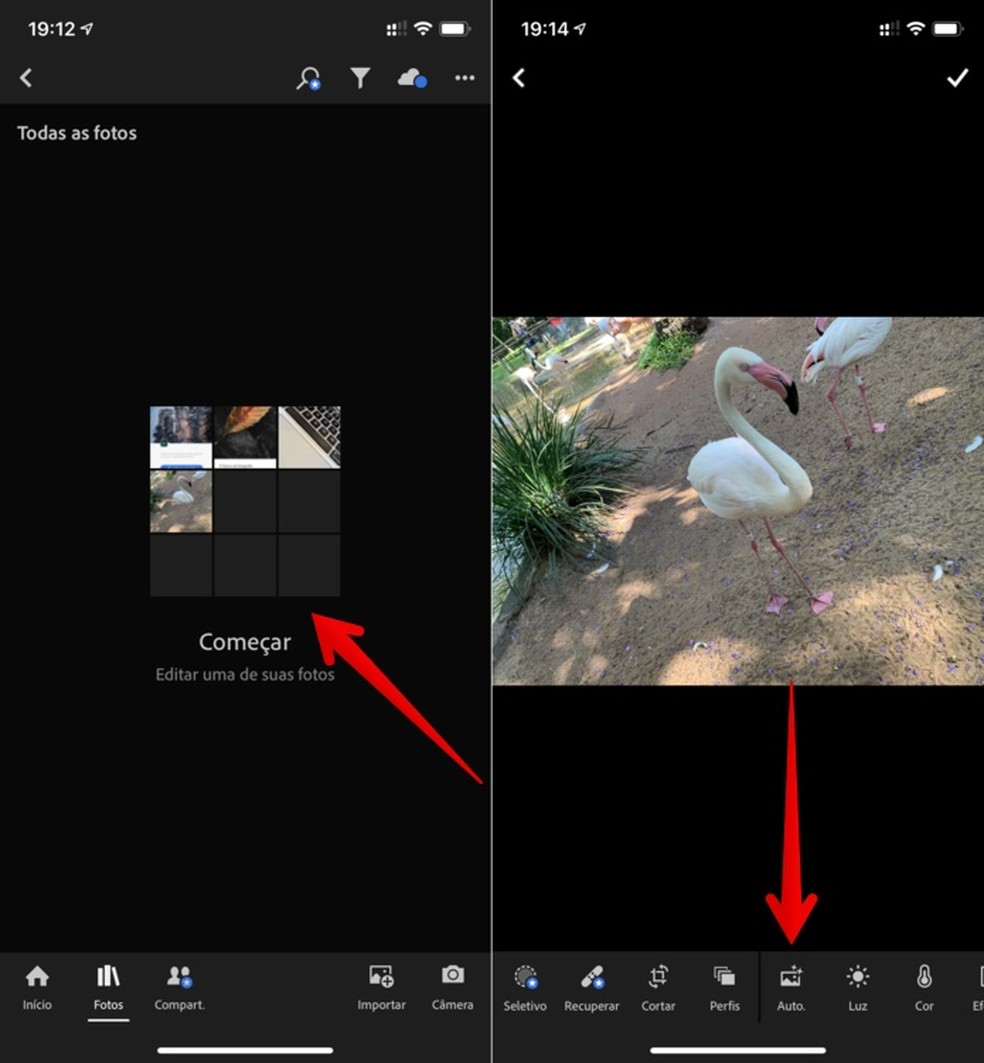
Editing photo in Adobe Lightroom Photo: Reproduo / Helito Beggiora
Step 3. To make manual edits, use the commands at the bottom of the screen. Note that the star cones are part of the premium version of the app. The first option, "Crop", serves to adjust the image's frame, rotate, change the aspect ratio of the photo, invert and more. After making the desired edits, touch the indicated confirmation button to apply;
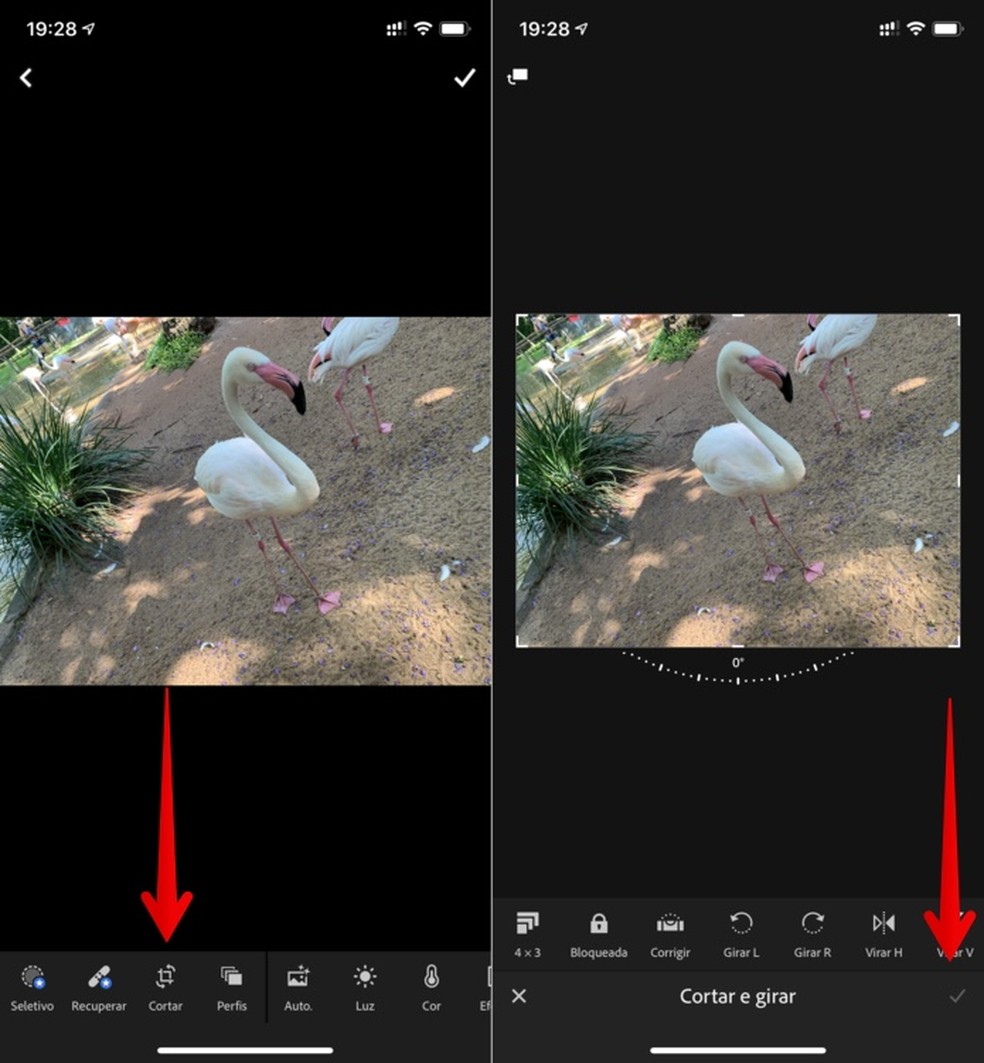
Cropping photo in Adobe Lightroom Photo: Reproduo / Helito Beggiora
Step 4. In "Profiles", you can change the profile of the image to color or black and white (monochrome). Tap on "Favorites" to display the list with all options. After making the desired adjustments, touch the indicated confirmation button to apply;
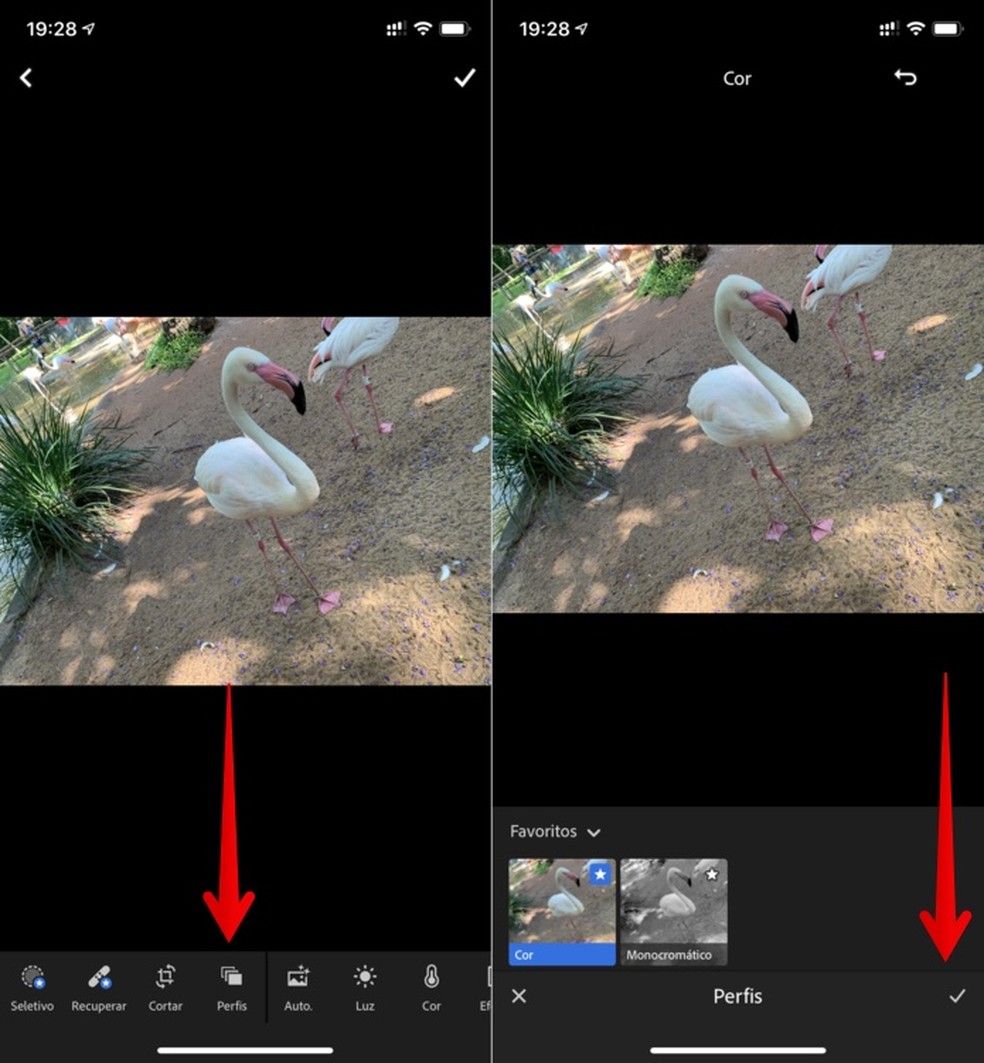
Applying photo profiles in Adobe Lightroom Photo: Reproduo / Helito Beggiora
Step 5. In the item "Light", it is possible to make adjustments for exposure, contrast, highlights, shadows, white and black. After making the desired edits, touch the indicated confirmation button to apply;
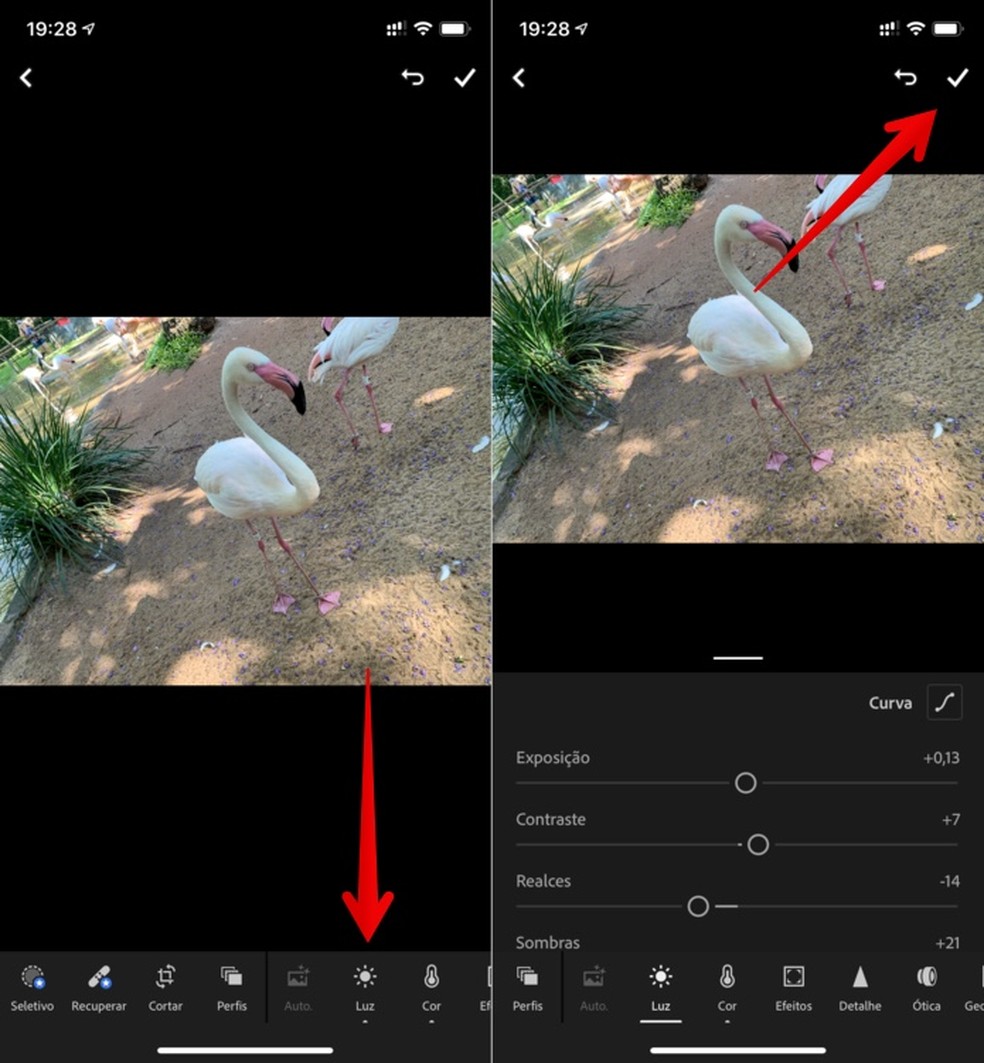
Making light adjustments to a photo in Adobe Lightroom Photo: Reproduo / Helito Beggiora
Step 6. Touch "Color" to change the temperature, adjust the matrix, vibration and saturation. After making the desired adjustments, apply the settings by touching the confirmation button in the upper right corner;
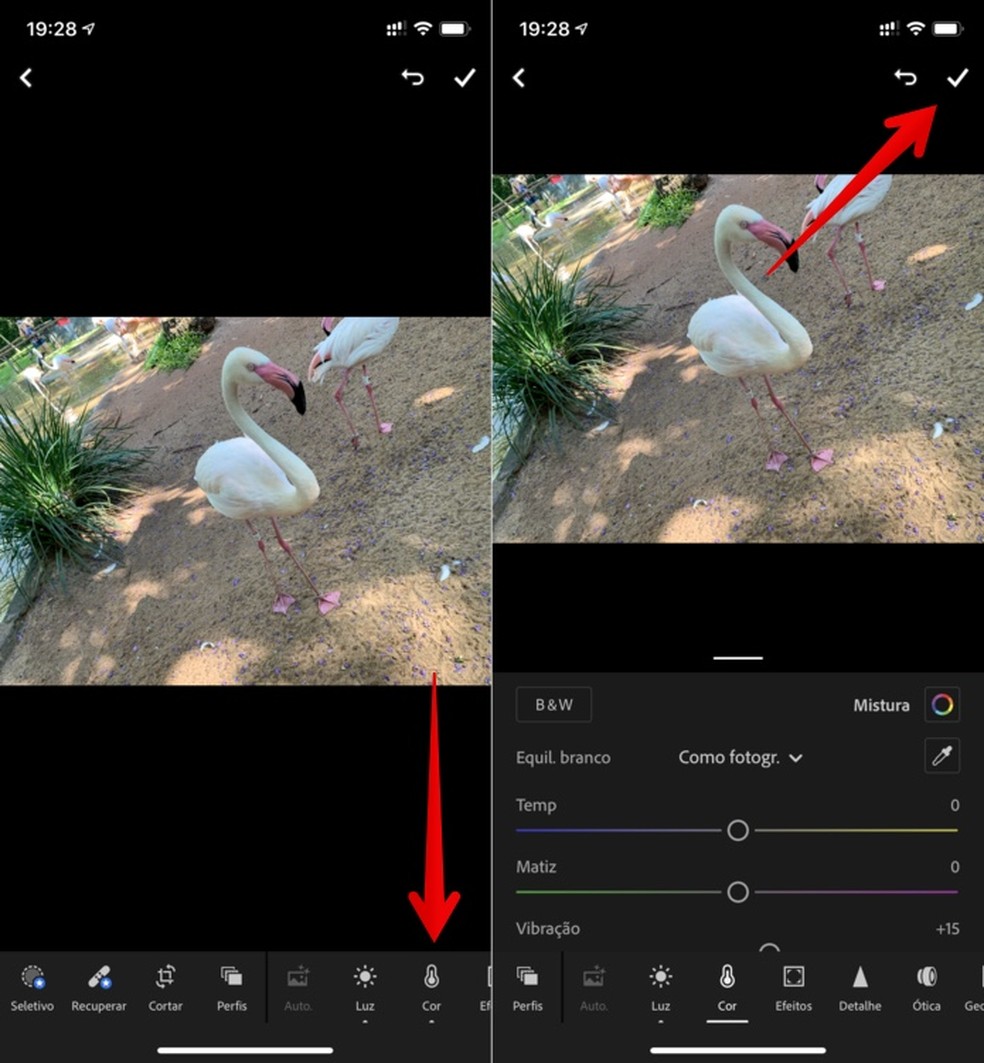
Making color adjustments to a photo in Adobe Lightroom Photo: Reproduo / Helito Beggiora
Step 7. In "Effects", you can apply textures, change clarity, draw, insert and adjust vignette and more. After making the desired edits, touch the confirmation button to apply;
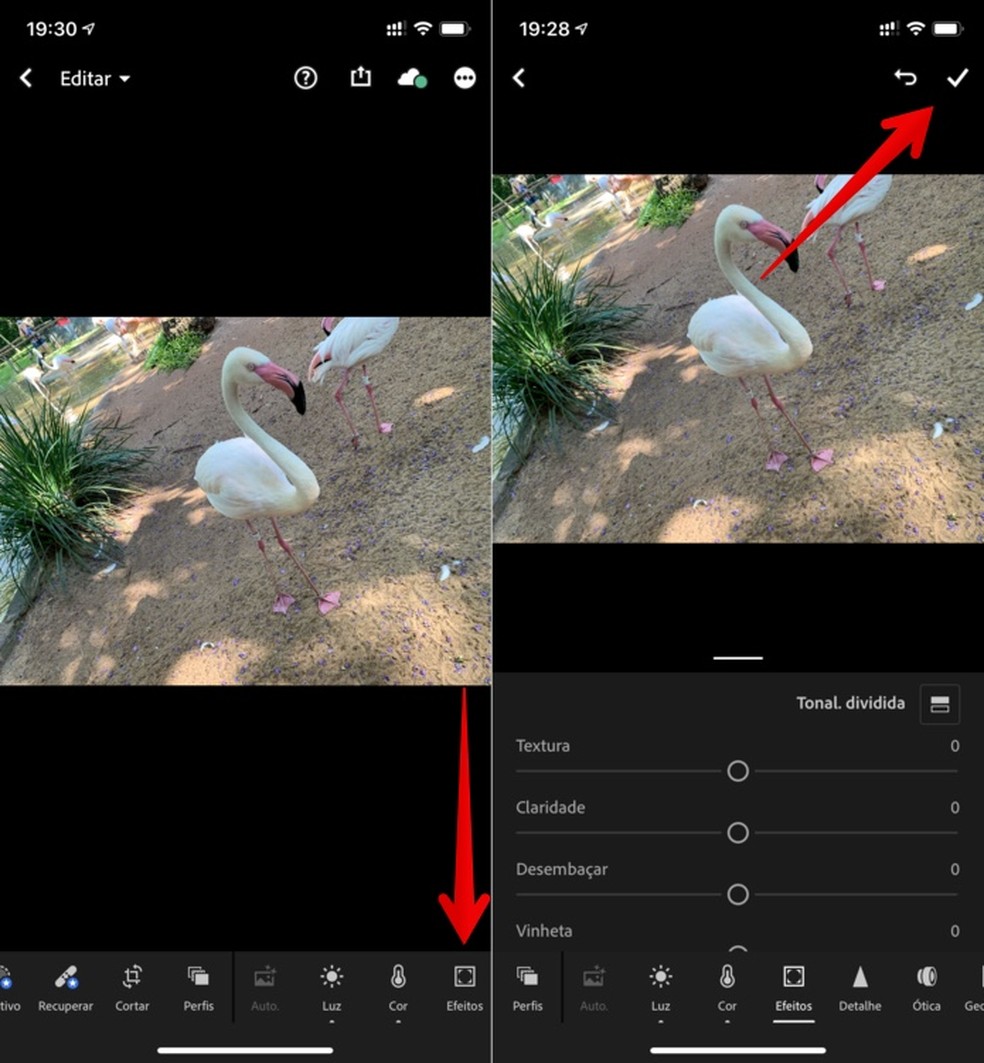
Applying photo effects in Adobe Lightroom Photo: Reproduo / Helito Beggiora
Step 8. Open the options under "Detail" to change the sharpness, mask, reduce noise, change the contrast and much more. After making the desired adjustments, touch the indicated confirmation button to apply;

Changing photo sharpness in Adobe Lightroom Photo: Reproduo / Helito Beggiora
Step 9. The "optical" option allows you to remove the chromatic shift and activate the lens correction. Activate the desired features and touch the indicated confirmation button to apply;
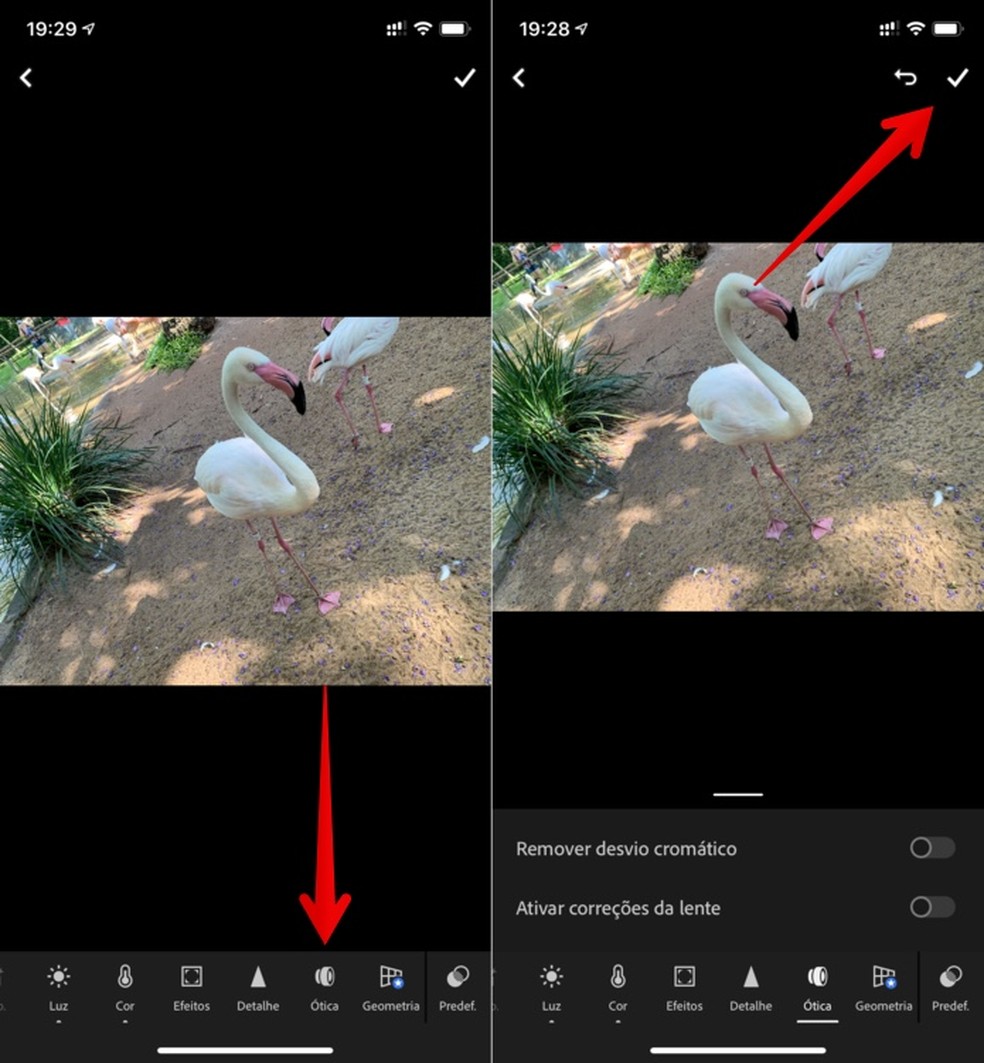
Editing photo in Adobe Lightroom Photo: Reproduo / Helito Beggiora
Step 10. In "Presets", you can apply presets or presets contrast, grainy, sharpness, vignette and others. Touch "Color" to display the list with all options. After making the desired adjustments, tap on the indicated confirmation buttons to apply the changes and save the edited photo;

Editing photo in Adobe Lightroom Photo: Reproduo / Helito Beggiora
Step 11. Returning to the Lightroom home screen, tap again on the photo you edited to open it. Finally, tap on the sharing cone in the upper right corner of the screen to export the file to your phone's photo gallery or publish on social networks.
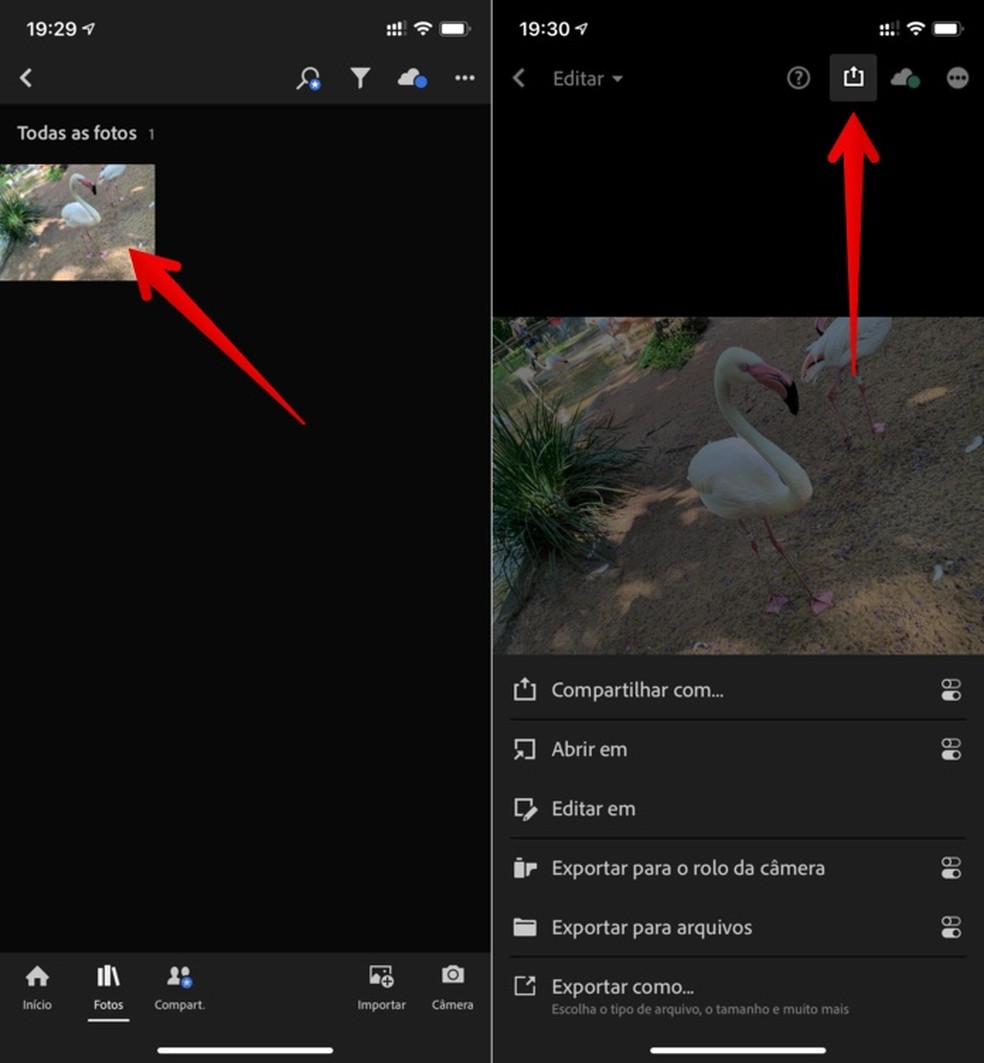
Exporting an edited image in Adobe Lightroom Photo: Reproduo / Helito Beggiora
Ready! Take advantage of tips for editing your photos in Adobe Lightroom CC on your mobile.

How to use Lightroom presets to edit your Instagram photos
