Word allows you to insert photos in the text and move the image in the document. The software allows you to move images so that they do not interfere with the formatting of the text and are arranged in an organized way. In some situations, the action of moving the images with the mouse may not solve the formatting of the document. For this, it is possible to use resources such as grouping elements, editing the layout of images, changing alignments and other editing possibilities. See below how to use Word settings to move images.
How to make Word always open the last edited document

Tutorial shows how to use options to move images in a Microsoft Word document Photo: Carolina Ochsendorf / dnetc
Want to buy cell phones, TV and other discounted products? Meet Compare dnetc
Adding images to a document
Step 1. Open a document and access the "Insert" tab. Then, select the "Image" option to check the upload's source locations;

When to start the tool to add images to a Word document Photo: Reproduo / Marvin Costa
Step 2. You can add the images using the photo browser and opening your computer's file explorer to find the images in your personal files.
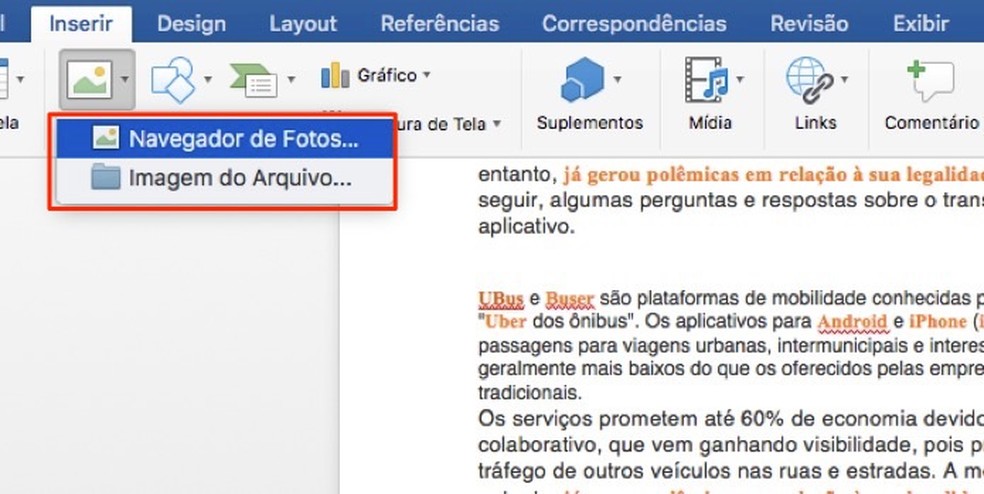
Options for uploading an image in a Word document Photo: Reproduo / Marvin Costa
Moving images using the mouse
Step 1. Tick the image to select it. Then click and hold the left mouse pointer over the image and drag it to another point in the document;

When to move images in Word using the computer mouse Photo: Reproduo / Marvin Costa
Step 2. The image transferred with the same resizing, as shown in the example below.

Image transferred to another location in a Word document using the mouse Photo: Reproduo / Marvin Costa
How to move multiple images simultaneously
Step 1. Word allows you to move several images simultaneously. However, it is necessary to group them for the feature to work. To do this, select the first object and then hold down the CTRL key on your keyboard to select the other images. Then, click on one of them using the right mouse button and choose the option "Group", as shown in the example below;

When to group images in Microsoft Word Photo: Reproduo / Marvin Costa
Step 2. Drag the grouped images using the mouse.

When moving grouped images in a Microsoft Word document Photo: Reproduo / Marvin Costa
How to set the image layout in the document
Step 1. First, click on the image so that it is selected. At that time, resizing options are presented at the ends of the document. Through these points it is possible to click and drag the image to increase or decrease its size. There is also an option to change the orientation of the file at the top of the screen;

When to select an image in Microsoft Word Photo: Reproduo / Marvin Costa
Step 2. With the image selected, access the "Layout" tab in the top menu. Then choose the option "Posio";

When to check layout options for an image in a Microsoft Word document Photo: Reproduo / Marvin Costa
Step 3. Click on one of the text layout options offered by the resource. Note each box shows how your image will be organized in the text;

When to set the layout of an image in a Microsoft Word document Photo: Reproduction / Marvin Costa
Step 4. Keep the image selected. Hold down the mouse pointer over one of the resize points on the image and drag it inside, as indicated by the arrow in the example below;

When to reposition an image in Microsoft Word Photo: Reproduo / Marvin Costa
Step 5. Once this is done, the image will be organized the way you defined it in the "Position" tool;

Image repositioned in a Microsoft Word document Photo: Reproduo / Marvin Costa
Step 6. To see advanced position options for images, access the resource again and select "More layout options";

When to view more layout options for an image in Microsoft Word Photo: Reproduo / Marvin Costa
Step 7. The chart displays complex options for aligning the image to the document. In "Options", it is possible to activate images overlaid on the document. Simply select the resource and press the "OK" button for the configuration to be applied.
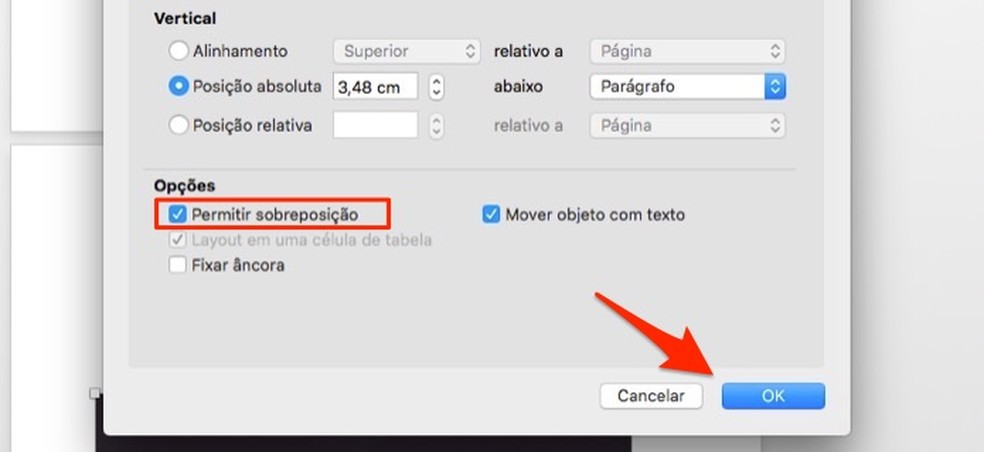
Action to allow overlapping of images in a Word document Photo: Reproduction / Marvin Costa
Aligning the image in the document
Step 1. In the "Layout" tab, select the "Align" option to view the options available for images in the resource;

When to view the alignment options for images in Microsoft Word Photo: Reproduo / Marvin Costa
Step 2. The options allow you to align several images on the document. Use the feature to arrange the image according to the text. In this way, it is possible to create a document that has no errors in formatting media.

Alignment options for an image in a Word document Photo: Reproduo / Marvin Costa
Text wrap options
Step 1. Still in the layout tab, choose the option "Wrap Text Automatically";
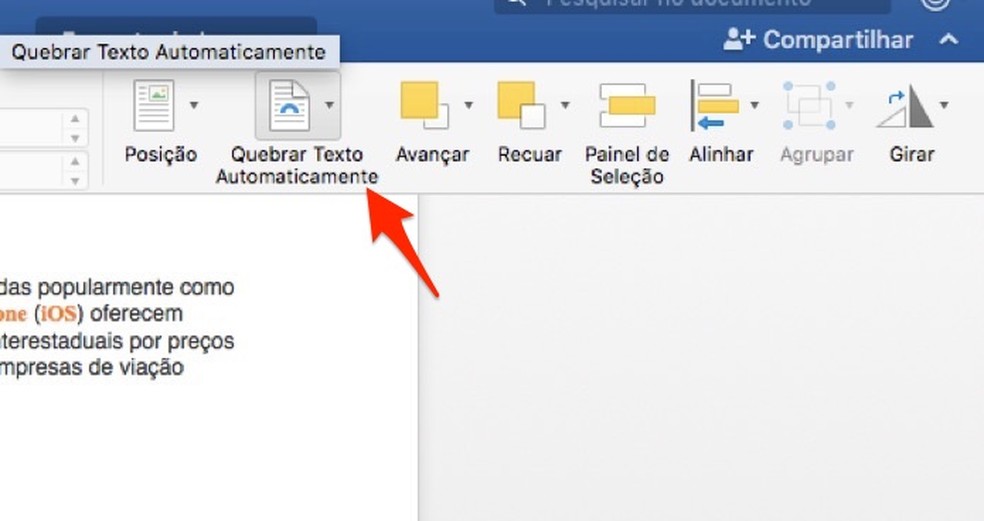
When to view text-breaking options in a Microsoft Word document Photo: Reproduo / Marvin Costa
Step 2. You can choose between options to leave the image behind the text or in front of the text. In addition, use the other options to change the way text and images are displayed in the document.
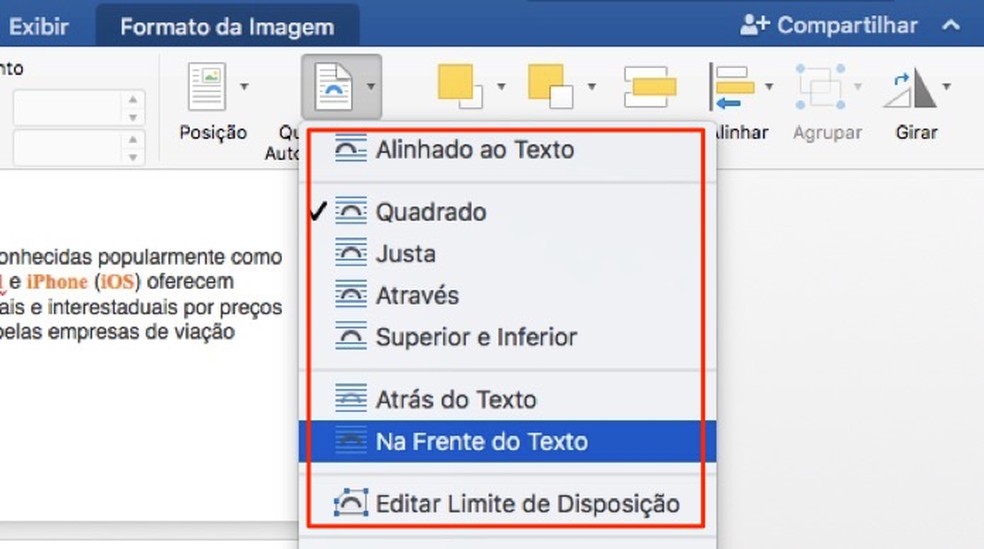
Options for wrapping text in images in Microsoft Word Photo: Reproduo / Marvin Costa
Use the tips to learn how to work with images in a Microsoft Word document.
How to disable the option to align all text in Word 2016? Ask questions in the dnetc forum.

How to insert row in Word
