The dual camera of the iPhones 7 Plus, iPhone 8 Plus and iPhone X allow you to capture photos with a very popular effect, called Portrait Mode. The feature leaves the person or object photographed in the foreground and the background out of focus. Anyone who has the effect, but has no conditions or simply does not want to buy an Apple phone, can resort to a free feature that has a very similar result.
To do this, simply have the LightX app installed on your mobile device and follow the step by step below.

How to make the iPhone portrait effect without the Apple smartphone
Galaxy S9 price starts at R $ 4,299; know all about launch in Brazil
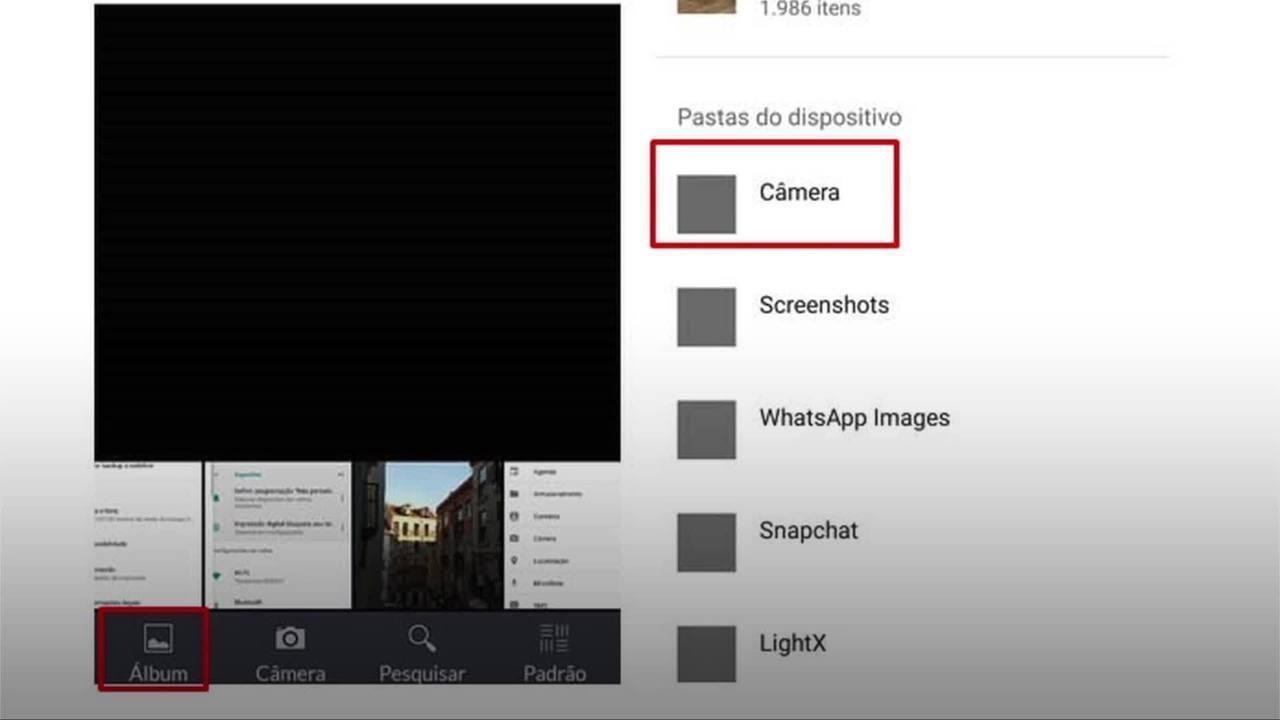
Step 1. Download the LightX app and open it on your phone. Touch the album option, located in the bottom menu of the screen. Search for the photo you want to use and tap on it.
Select a photo in the smartphone gallery Photo: Reproduo / Taysa Coelho
Select a photo in the smartphone gallery Photo: Reproduo / Taysa Coelho
Step 2. Touch the pencil icon to access the tool options and, in the menu that opens, touch the Splash item.
Choose the "Splash" option from LightX Photo: Reproduo / Taysa Coelho
Choose the "Splash" option from LightX Photo: Reproduo / Taysa Coelho
Step 3. To start using the feature, touch the screen and drag your finger over the area you want to blur. As soon as you finish the first layout, a menu with tools will appear. If you did not select all the desired area at the first moment, activate the item Smart selection and continue the process. However, if you have selected more than desired, just choose the Smart Eraser. In that first moment, don't worry about perfection.
Slide your finger over the area you want to blur Photo: Reproduction / Taysa Coelho
Slide your finger over the area you want to blur Photo: Reproduction / Taysa Coelho
Step 4. Tap on the Effect tab. Where it says Brush, drag your finger from bottom to top until you see the Effect option.
V for the "Effect" tab of LightX Photo: Reproduo / Taysa Coelho
V for the "Effect" tab of LightX Photo: Reproduo / Taysa Coelho
Step 5. Tap on the Blur item to apply the blurred effect to the image. It will now be easier to view the area selection made previously. To make new adjustments, access the resources on the Tools tab again.
Select the LightX "Blur" effect to blur the background Photo: Reproduo / Taysa Coelho
Select the LightX "Blur" effect to blur the background Photo: Reproduo / Taysa Coelho
Step 6. Use the already known Smart Selection and Smart Eraser options to select or delete a large region at once. It will now be possible to view the effect applied directly to each area. If you want to select a smaller portion and adjust it manually, drag the tool options from left to right to use the Brush and Eraser.
Use the LightX brush to select smaller areas in the photo Photo: Reproduo / Taysa Coelho
Use the LightX brush to select smaller areas in the photo Photo: Reproduo / Taysa Coelho
Step 7. With the image in the distance, at first glance, it may appear that the entire background is blurred. However, for best results, we recommend using the Magnification feature, which allows you to zoom in and see each part of the photo in detail.
Use the LightX magnification tool to see the photo in more detail Photo: Reproduo / Taysa Coelho
Use the LightX magnification tool to see the photo in more detail Photo: Reproduo / Taysa Coelho
Step 9. Now the time to adjust how blurred is the background. To do this, simply scroll the bar that appears on the screen to the right or left. Once the ideal level is found, tap on the "X" to close.
Select how blurred you want the background of the image Photo: Reproduo / Taysa Coelho
Select how blurred you want the background of the image Photo: Reproduo / Taysa Coelho
Step 10. To finish the process, touch the check cone, located in the upper right corner of the screen. Then, save the edited image by clicking on the floppy disk icon. The photo will be stored in the gallery.
Save the edited photo to LightX Photo: Reproduo / Taysa Coelho
Save the edited photo to LightX Photo: Reproduo / Taysa Coelho
