In the period back to school, many want to make and custom school labels for children's material. The Canva online design platform can help make traditional or thematic labels (unicorn, Disney characters, etc.). With a few clicks, you can create name tags, class tags, and other identifying texts. The editor also lets you apply a colored background and even include the student's photo on the paper. Then simply print multiple items on one sheet, cut and paste them into books, notebooks, and other school items. Here's how to use Canva to create school labels.
How to make school labels in Word

See how to make unicorn school labels in Canva Photo: Arte / dnetc
Want to buy a cell phone, TV and other discounted products? Meet the Compare dnetc
Step 1. Go to Canva's label maker (www.canva/create/label-name/) in your browser and click Start Creating a Named Label.

Access Canva's label maker Photo: Reproduo / Paulo Alves
Step 2. Select a template from the left menu and drag to the design panel to begin editing.
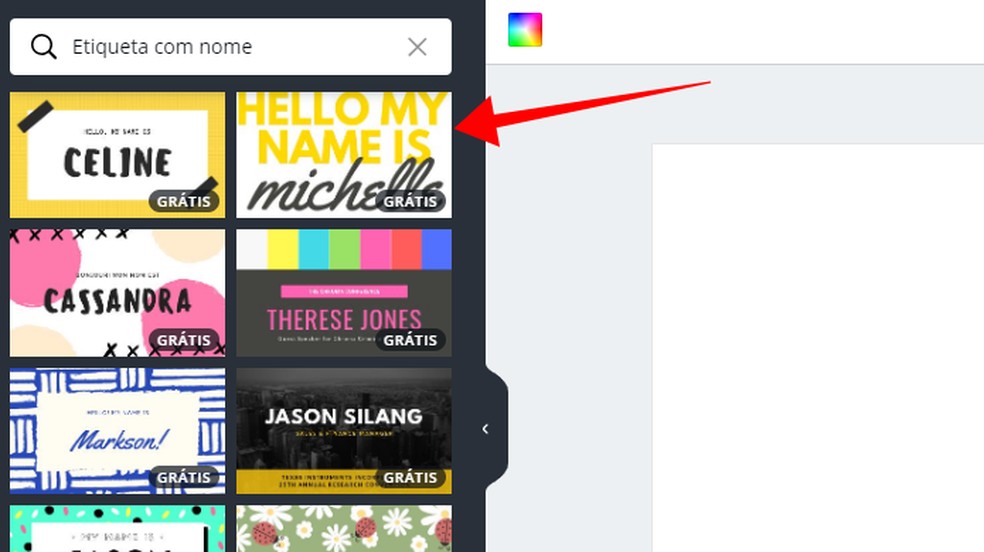
Select a template to edit Photo: Reproduo / Paulo Alves
Step 3. Edit the texts of the person's name tag and other pertinent information. Use the toolbar to change font, size, and color of the writing.
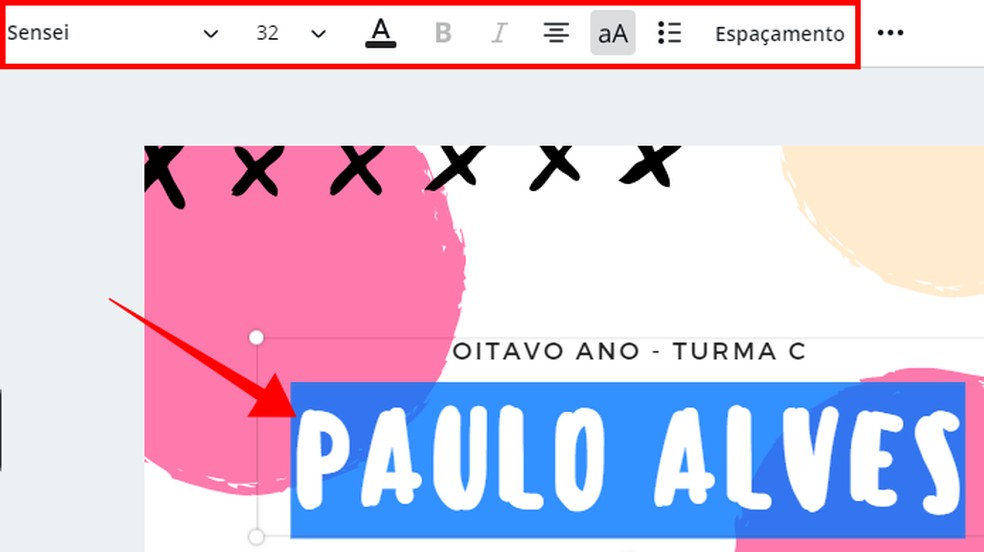
Edit label texts Photo: Reproduction / Paulo Alves
Step 4. Click on the graphics to change the colors.
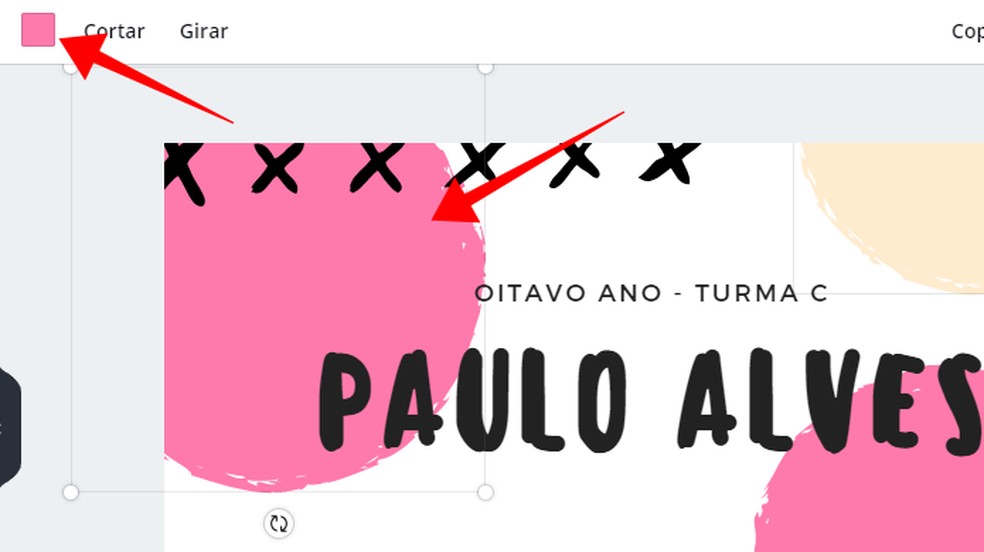
Change the colors of label decoration objects Photo: Reproduction / Paulo Alves
Step 5. You can also add photos from the free Canva bank to illustrate the label or replace the entire background. To do this, click on "Elements" in the side menu and use the search field to search for images with the desired theme, such as "unicorn", for example.
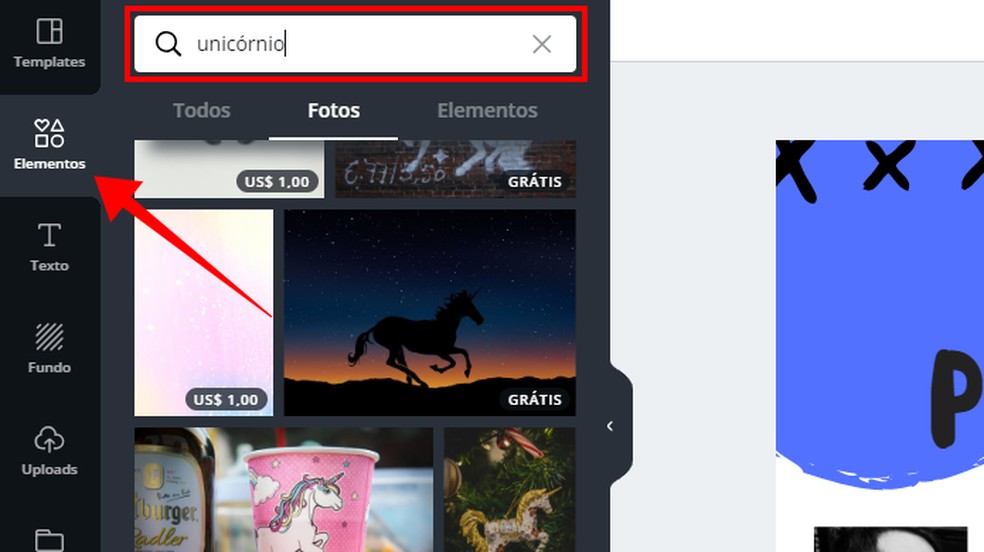
Add free Canva images to your design Photo: Reproduo / Paulo Alves
Step 6. Then simply drag items marked with the "Free" label and drop it into the design area. If you regret it, select the image and click the trash can icon to remove and restore the original layout.
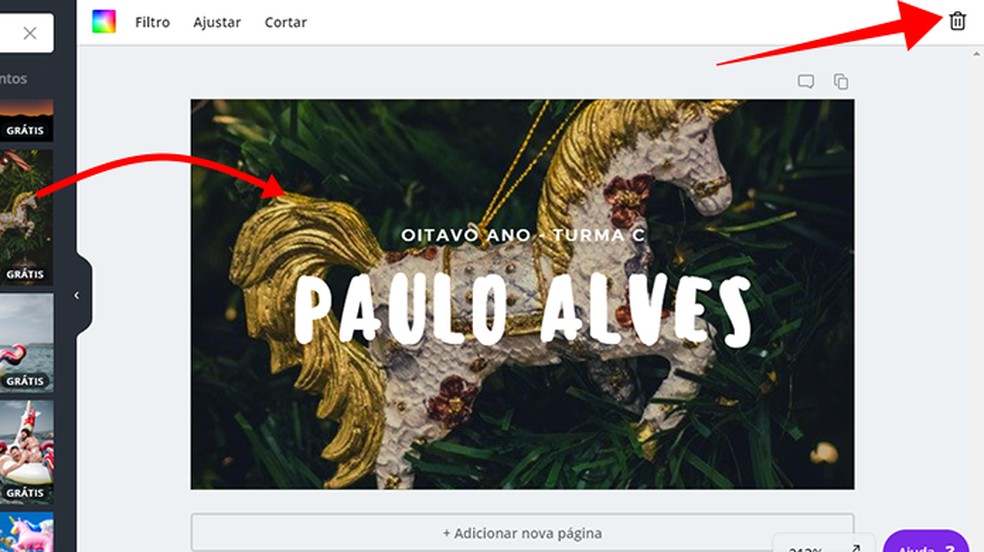
Drag Canva images to your design and use the trash can button to remove Foto: Reproduo / Paulo Alves
Step 7. To illustrate the material with a personal photo, open the Upload menu and transfer a file from your computer to Canva. Drag and drop on your design to use.

Add personal photos Tag Photo: Reproduo / Paulo Alves
Step 8. When you are done making changes, click the download button and select the .png format before clicking Download.
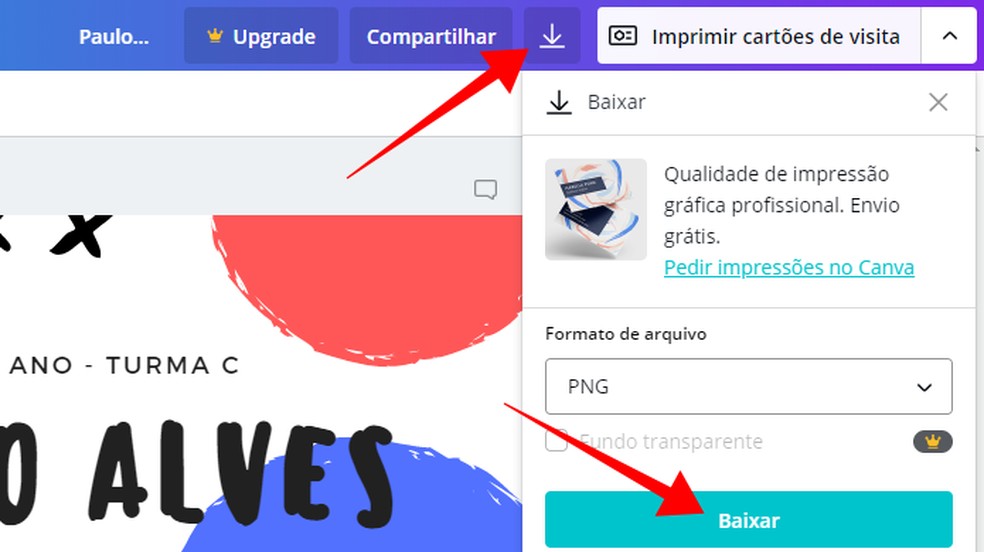
Download the label in .png format Photo: Reproduction / Paulo Alves
How to print multiple per sheet in Word
Step 1. On your computer, open a blank Word document and create a two-column, five-row (2×5) table from the Insert> Table menu.
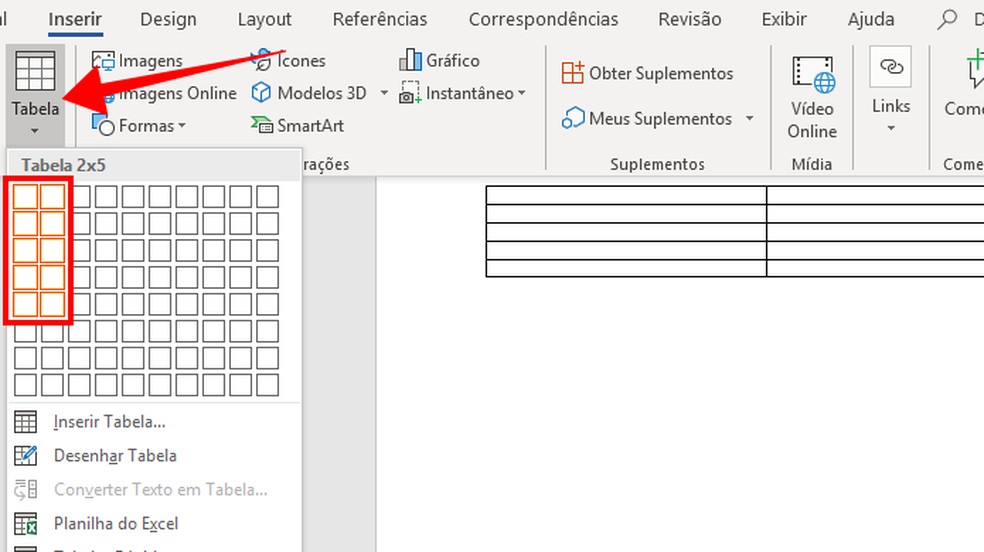
Create a table in Word Photo: Reproduo / Paulo Alves
Step 2. Then go to Insert> Images and import the .ong file created in Canva into one of the table cells.
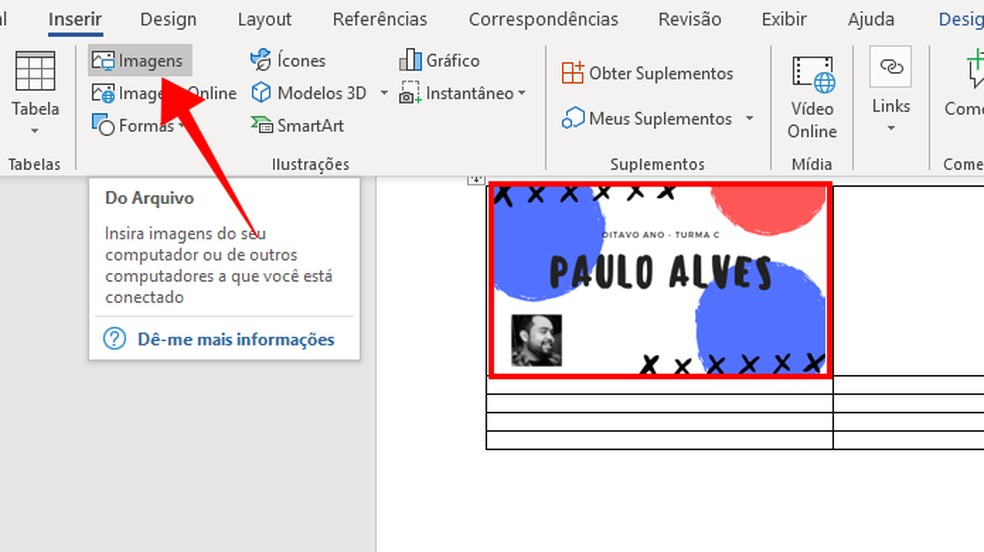
Add your tag to the Word table Photo: Reproduction / Paulo Alves
Step 3. Copy and paste the image to the other cells and adjust the edges of the page so as not to crop the images.
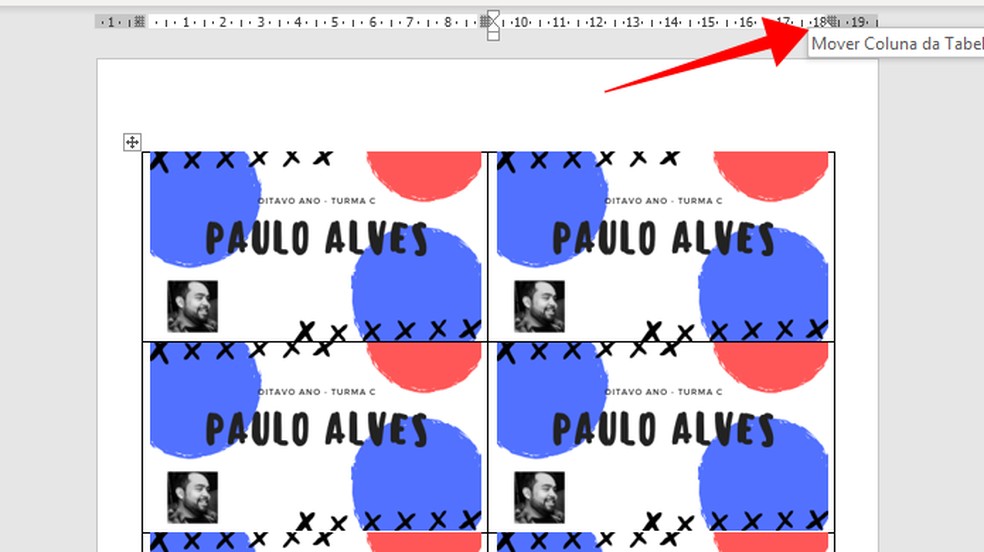
Adjust page margin to not crop table images Photo: Reproduction / Paulo Alves
Step 4. Finally select the table and from the drop down menu go to the borders option and remove all the dashed from the figure. With the grid labels, press Ctrl + P and print as many copies as you need.
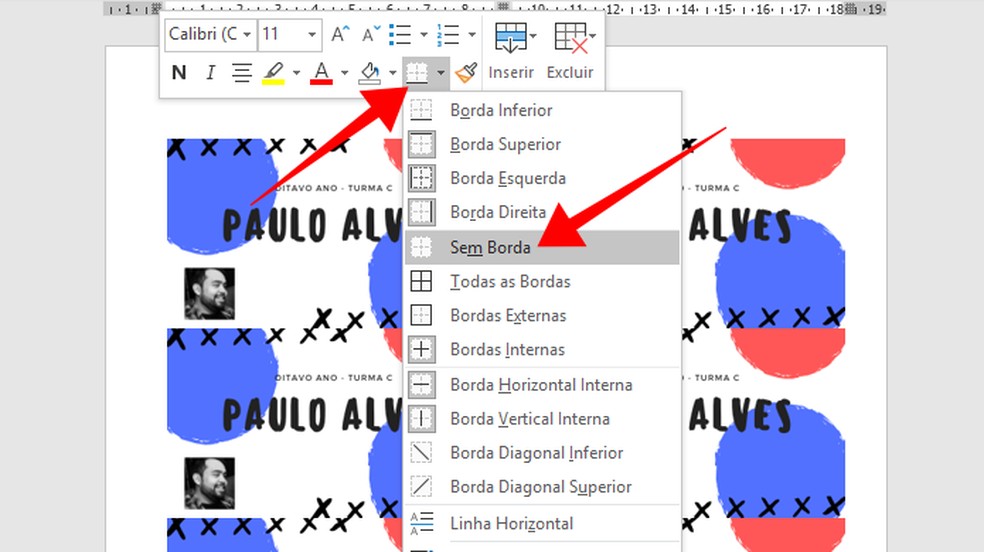
Remove table borders for grid printing Photo: Reproduo / Paulo Alves

How to select all text in Word at once s
