T coming, guys! After months of waiting, the iOS 13 It will be available to the general public later this afternoon (probably around 2 pm, Braslia time).
To get you ready, we have created a complete installation guide for the new system. With it, you will be able to choose the easiest way according to your needs, obviously to apply the update on your devices and get everything ready to leave for the right time.
Come on then?
Compatibility
Below we list all the devices that can receive the new system:
iPhones
- iPhone XS;
- iPhone XS Max;
- iPhone XR;
- iPhone X;
- iPhone 8;
- iPhone 8 Plus;
- iPhone 7;
- iPhone 7 Plus;
- iPhone 6s;
- iPhone 6s Plus;
- iPhone SE.
In addition, of course, the iPhones 11, 11 Pro and 11 Pro Max that come with iOS 13 factory installed.
iPod touch
Remembering that iPads now run a variation of the operating system called “iPadOS”. His first verse (j 13.1) comes out on September 30th, September 24th, next to iOS 13.1.
First of all, backup!
As we always say, backup and chicken soup never hurt anyone (except maybe the chickens). Before you perform such a major upgrade, then it is very important that you save all files, data, and preferences from your device so that nothing is lost if something goes wrong.

Your easiest options are to back up from iCloud or iTunes. In the first case, just go to Settings on your device, tap the option with your name and access iCloud iCloud Backup. There you need to enable the “iCloud Backup” option (if it is not enabled) and tap the “Backup Now” button. After a few minutes (or hours, depending on your connection), it's all over and you can proceed.
The second option is to use iTunes (or Finder if you have already upgraded to macOS Catalina but the steps are basically the same). To do this, simply connect your device to your Mac / PC via USB cable, open iTunes, click on the device icon in question, choose the “Summary” option and click on “Back Up Now”. In this case, the backup will be saved to your computer, not to the cloud so if something goes wrong during the upgrade process, you will need to restore iPhone / iPad / iPod touch by connecting it to your Mac / PC.
Ways to upgrade
Already backed up? So let's take a look now at all the ways you need to install iOS 13 on your device.
OTA Installation (over-the-air)
This is the simplest way to update your device: just go to the Settings on it and tap General Software Update. The update for iOS 13 will be listed there, and you only need to follow the instructions to complete the process.

If your device does not have enough space to download the update, the system will temporarily delete some apps to perform the update but do not worry, as everything will be properly restored with your data once the process is finished.
Install via iTunes (or Finder for macOS Catalina)

Another simple way to update your device by connecting it to your Mac / PC via USB and opening iTunes / Finder. The warning that an update is available should appear automatically, but if not, just go to the "Summary" area and click the "Check for Update" button. Then follow the onscreen instructions and wait for the process to finish.
Manual installation
The third option is to manually download the update package from your device and apply it to iTunes. This method is useful if you have several identical devices at home as you only need to download the file once and do not have to wait for the download on each device.
In the list below, click the option for your device to download the appropriate file:
To apply the update, simply connect the device to the computer, open iTunes / Finder, go to the “Summary” option and click the “Check for Update” button while holding the key (Option) on Mac or Shift on PC. In the window that opens, locate the downloaded file and select it. Then follow the onscreen instructions and wait.
And the installation clean?
The last option is not an alternative to the paths listed above, but an extra "step". The installation cleans up the easiest way to have your “brand new” device even if it's already a few years on the road, since essentially the new system will be installed from scratch when it is turned back on, the device will behave as if it had been turned off. without any previous files or preferences.
That's good for a number of reasons: In addition to ridding your device of unused system files and other elements that can make it cumbersome, a clean install can be a good opportunity for you to "start from scratch" – select which apps carefully. , photos, files and data will be saved to the reset device.
Of course, it's not something you have to do often. Maybe once every 3-5 years? You are the boss.
Care Required
For starters, the clean install requires you to double-check after all, remember, everything will be deleted! that all your important data is saved. ICloud takes care of that for almost everything on your iPhone or iPad, so just go to ICloud Settings (your name) and check which of the following items are active.
- Photos;
- Email;
- Contacts;
- Calendar;
- Sticky notes;
- Grades;
- posts;
- Safari (information such as bookmarks, browsing history, etc.);
- House (their devices and settings);
- Health (all data stored in the app);
- Wallet (Apple Pay registered cards, tickets, etc.);
- Game center;
- Crab;
- keys (passwords you use in Safari).
Going down a little on this same screen, you can also check which third party apps are using iCloud to store their own data and make sure to leave the option enabled on all those whose data you want to restore after the clean install.
Finally, remember that several other applications (such as Google or Telegram, for example) use their own servers to maintain their data. In such cases, you need not worry: just log in to them after the system reinstallation and all your information and files will be there as they always were.
Others, like WhatsApp, don't work that way and you necessarily have to back them up in iCloud in order to rescue everything. So stay tuned!
That done, we can proceed with the clean installation which can be done in two ways.
By the device itself
The easiest option is to do a clean install on your device by simply upgrading it normally by following the steps of any of the above methods and then restoring it to its factory settings.
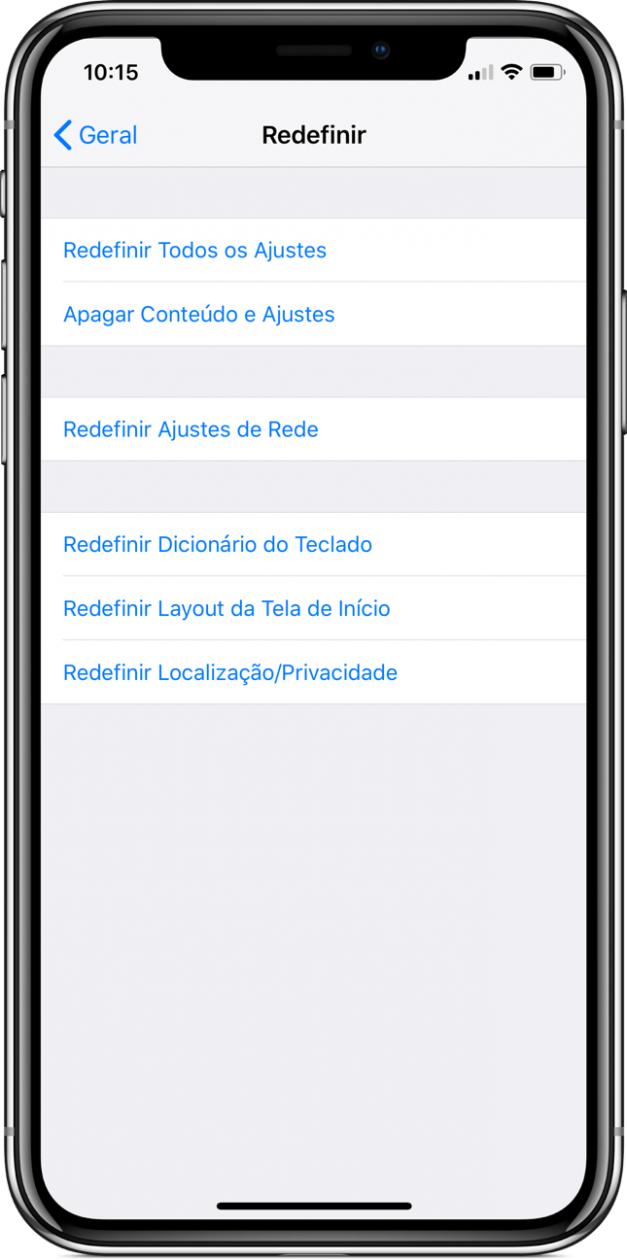
To do this, just go to Settings General Reset and select the option “Erasing Content and Adjustments“Well, destroy everything in your device and return it to the state of nature, as if it were coming out of the box. After this process, simply follow the onscreen instructions to reconfigure it and retrieve your data and files.
By Mac / PC
Also perform the clean install by your computer. If you are running macOS Catalina, the process is done by Finder; In any earlier version of MacOS or Windows, the software used iTunes. Either way, the steps are the same.
First, download the IPSW file for your device by following the links available above in the “Manual installation” section.
Then connect your iPhone or iPod touch to your computer via cable; then open iTunes or Finder and click the icon for the device.
Official Image: https://support.apple/en-us/HT204204
"data-medium-file =" https://.uol/wp-content/uploads/2018/09/14-update-ios-itunes-600×241.jpg "data-large-file =" https : //.uol.br/wp-content/uploads/2018/09/14-update-ios-itunes-1260×506.jpg "src =" https://.uol.br/wp- content / uploads / 2018/09/14-update-ios-itunes-1260×506.jpg "alt =" iOS Update by iTunes "class =" wp-image-641157 "srcset =" https://.uol / wp-content / uploads / 2018/09/14-update-ios-itunes-1260×506.jpg 1260w, https://.uol/wp-content/uploads/2018/09/14- update-ios-itunes-300×120.jpg 300w, https://.uol/wp-content/uploads/2018/09/14-update-ios-itunes-600×241.jpg 600w, https: // .uol/wp-content/uploads/2018/09/14-atualizacao-ios-itunes.jpg 1560w "sizes =" (max-width: 1260px) 100vw, 1260px "/>
In the "Summary" tab, click "Restore iPhone" while holding the key. In the window that opens, select the downloaded IPSW and follow the onscreen instructions to install the new system.
Keep in mind that this option, unlike iCloud backup, does not bring back applications and settings you may have made on your device, such as font size, keyboards, alarms and other things. Therefore, you need to manually reconfigure these settings and download the apps you want.
Good (re) installation! And, as usual, leave doubts, impressions and experiences below in the comments.
Update 9/19/2019 2:44 PM
We updated the post with the direct download links for the IPSW update files. Enjoy!
