Burn-in effect (or phantom screen) is the name given to a permanent discoloration of part of the smartphone screen, caused by the irregular use of pixels. Prolonged use of still images can create a permanent shadow or ghost of that image on the display. In this article you find out how to fix this problem.
What does the Burn-in effect?
The phantom screen occurs when phosphorus compounds that emit light to produce images lose their intensity with prolonged use. In addition, irregular use – only part of the screen illuminated for a long time, for example – can burn this image on the display, which becomes visible all the time.
Samsung, for example, in an attempt to avoid such a problem in the Galaxy line, offers the Always On feature always on the move on the lock screen, because if it chose to show the time and notifications in a static way, the display could be marked.
The problem is common and affects mainly AMOLED screens – although LCD displays are also not completely free of this bug. Smartphone models where the navigation bar brings up the virtual buttons permanently are usually victims of this bug.
This problem is related to the device hardware
This problem is related to the hardware of the device, in this case, the screen. In this way, if your device is showing such a defect, contact the manufacturer of the device, or the store where you bought it and ask to change the device or, at least, its screen.
As this is a problem that can be identified in the first few weeks of using the device, most likely this type of service will not generate costs. Remember that if you try to change the screen manually, you will lose the warranty.
Now, if your smartphone is showing the Burn-in effect on the screen and you no longer have a guarantee and do not want to pay for technical assistance, you can use some solutions to restore the device's image quality, mainly in the form of applications, available on Google Play. Check out three of them:
Screen Burn-in Tool
The principle of the app is simple: a sequence of primary colors is displayed on the entire surface of your device's screen, so that the burnt pixels are restored.
In fact, this was also the original function of computer screen savers: that dynamic image that appears when the screen is idle makes the pixels exercise and not remain illuminating the same area of the display forever. The automatic process and in our tests lasted 26 minutes.
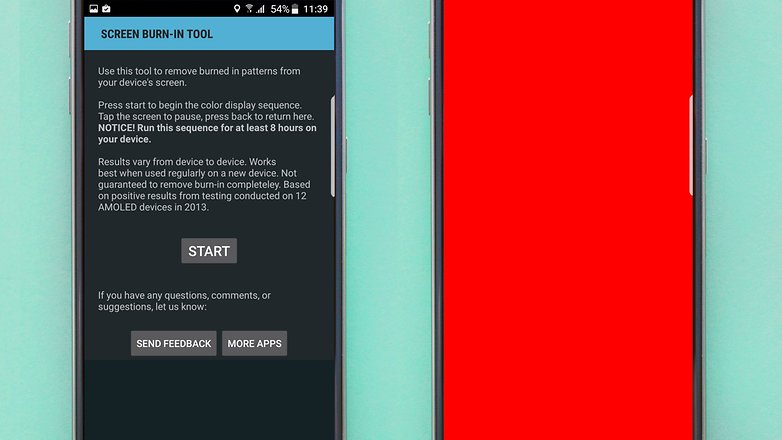
Screen Burn-in Tool: simple process to repair the "ghost effect" / AndroidPIT
AMOLED Burn-in Fixer
Compatible only with Android smartphones that have Lollipop or higher as an operating system – since it uses the Inverted Colors / Negative Colors functionality – this app tends to force the pixels reached by Burn-in, causing them to display colors again correct.
The process is automatic and can take between 15 and 25 minutes to complete. In our tests, it lasted 19 minutes.
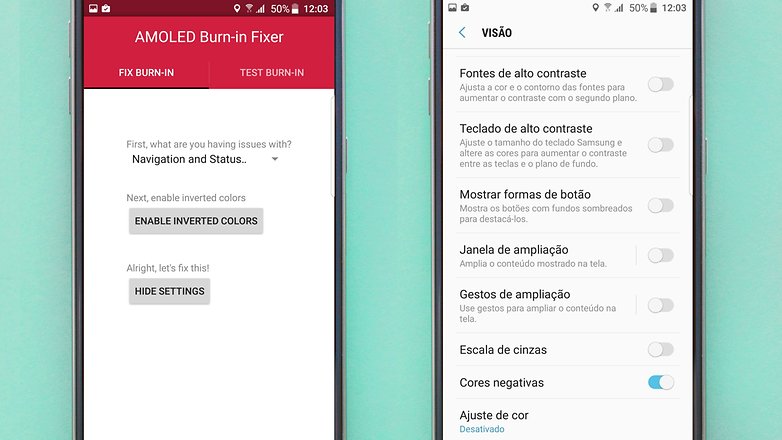
AMOLED Burn-in Fixer: exclusive for Android smartphones with Lollipop + / AndroidPIT
In addition, to check if the phone's display is suffering from Burn-in, the AMOLED Burn-in Fixer performs a test on the screen. It uses color sets that show the user where the pixels affected by the problem are located.
Screen Adjuster Free
Using Screen Adjuster Free, it is possible to configure the emission of colors on the screen (usually between shades of green, red and blue), and decrease the power of each of them, alleviating the Burn-in effect.
After downloading Screen Adjuster Free, you can balance the colors until you see the point where the ghost screen problem is fixed. So, there is no specific formula, you will have to configure the colors in the eye yourself. If you use this app, leave the adjustment list in the comments below that solved your problem, so more users can try to do the same.

Screen Adjuster Free is quick and easy to use / AndroidPIT
After adding the values, click on the "Adjuster OFF" button to apply your configuration. You can also activate this option right at the beginning and check in real time how the image appears on the display. To return to the previous settings, just deactivate it by clicking on "Adjuster ON". This process is the least time consuming among the three suggestions presented in this article.
Has your smartphone ever had this problem? Did you use another application to solve it?
(tagsToTranslate) burn-in effect (t) screen shadow (t) tutorial (t) app (t) amoled (t) lcd (t) screen (t) burn-in Moto G (t) burn-in Moto G4
