Google Forms is a powerful form tool that can also be used to create online proofs. The test mode allows teachers to create questions with wrong and correct alternatives, in addition to assigning scores to each question. The platform organizes student responses in spreadsheets and graphs that help to understand performance by student or question. If the user wishes, it is possible to automate even the delivery of grades to students. See how to create online assessments with the Google service.
How to create a survey in SurveyMonkey
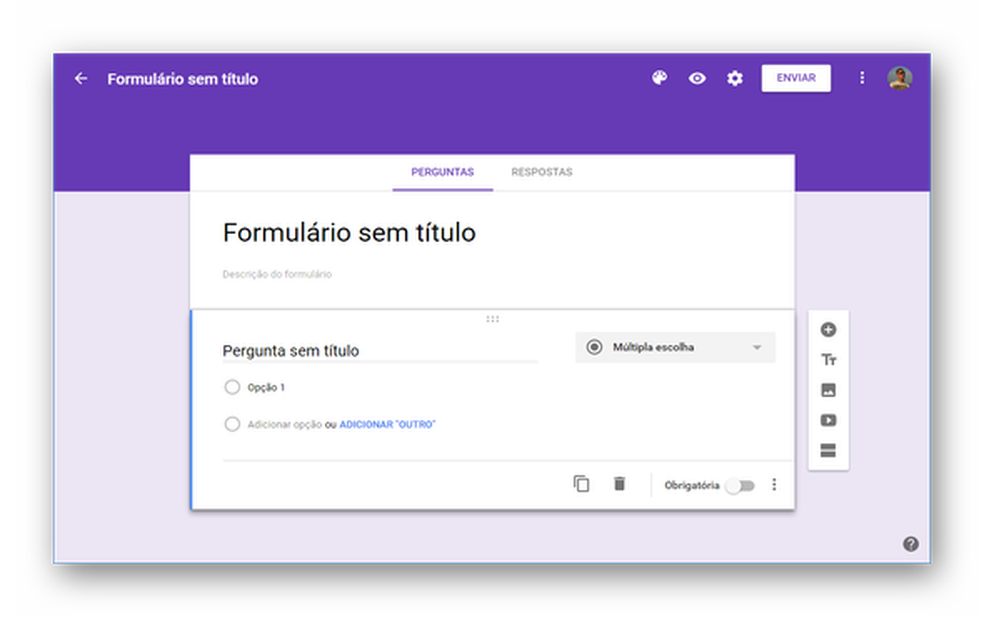
Google Forms allows you to make questionnaires with punctuation
Step 1. Access Google Forms on the web and generate a new form;
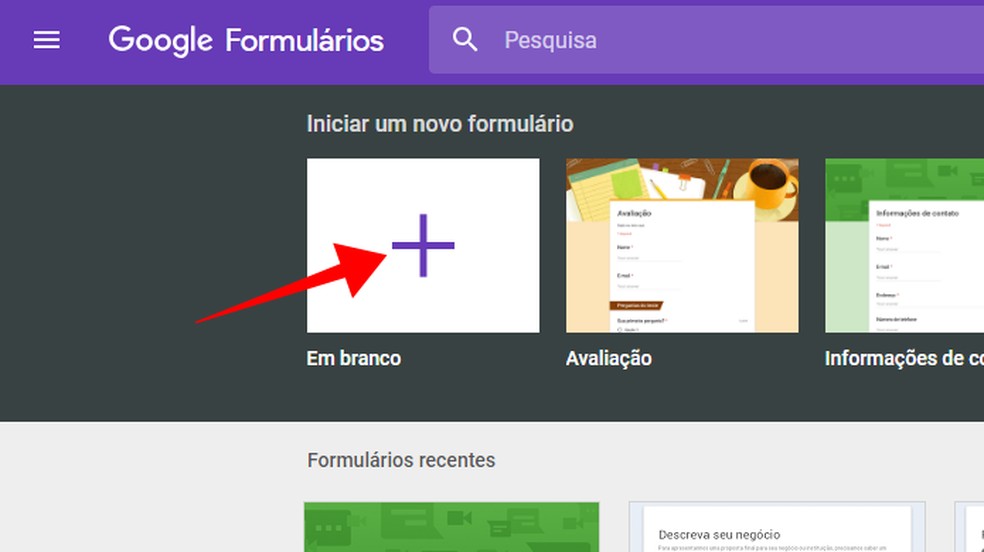
Create a form in Google Forms Foto: Reproduo / Paulo Alves
Step 2. Access the form settings, in the upper right corner;
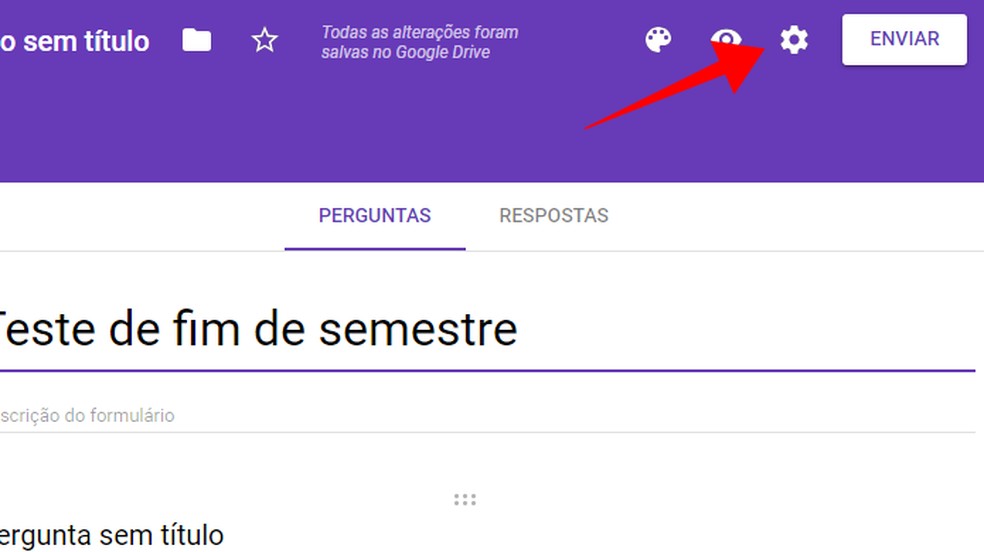
Configure your form in Google Forms Photo: Reproduction / Paulo Alves
Step 3. Check the option Limit to 1 answer to prevent the student from sending more than one answered test;
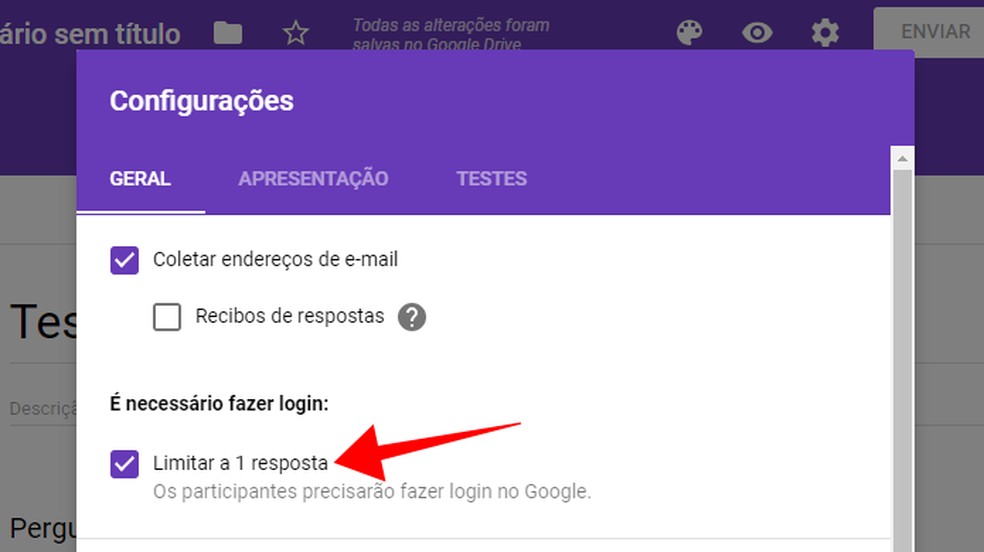
Allow only one answer per person Photo: Reproduo / Paulo Alves
Step 4. In the Tests tab, turn the Create test key and choose how to send the note. In tests with multiple choice questions only, it is possible to send the grade right after the student sends the answers. If the test contains answers that need correction, check the option Later, after the manual review;
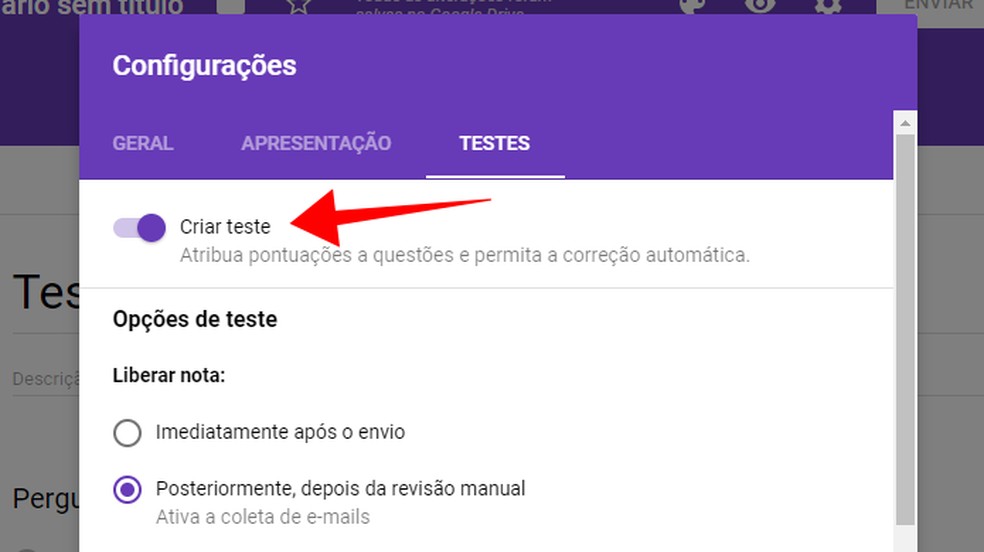
Activate the Google Forms testing mode Photo: Reproduo / Paulo Alves
Step 5. Scroll down the page to see the information that the student can access after completing the questionnaire. Save the changes;
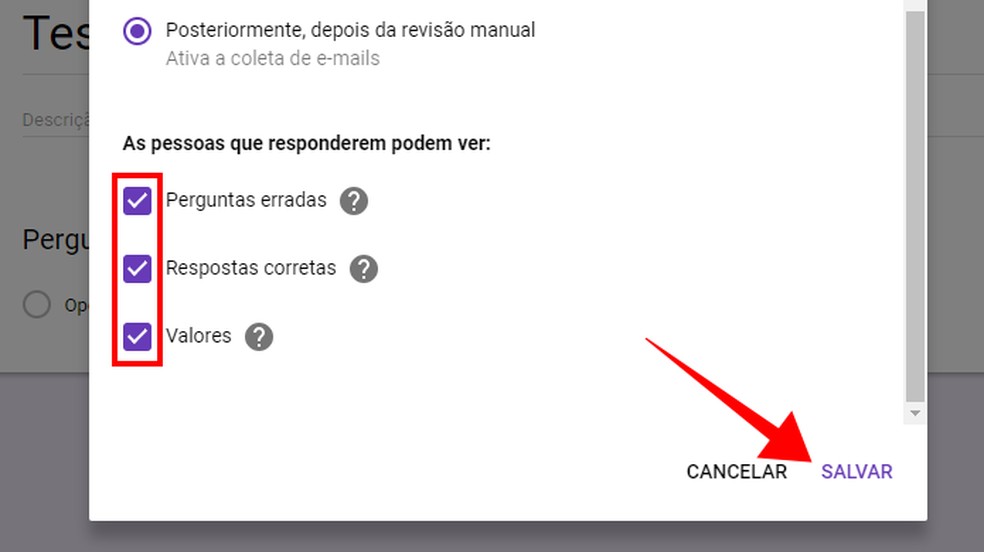
Choose what Google Forms will show the student when finishing the test Photo: Reproduo / Paulo Alves
Step 6. Create test questions and answers. Choose the type of answer in the right menu and always check the Mandatory key in the lower right corner;
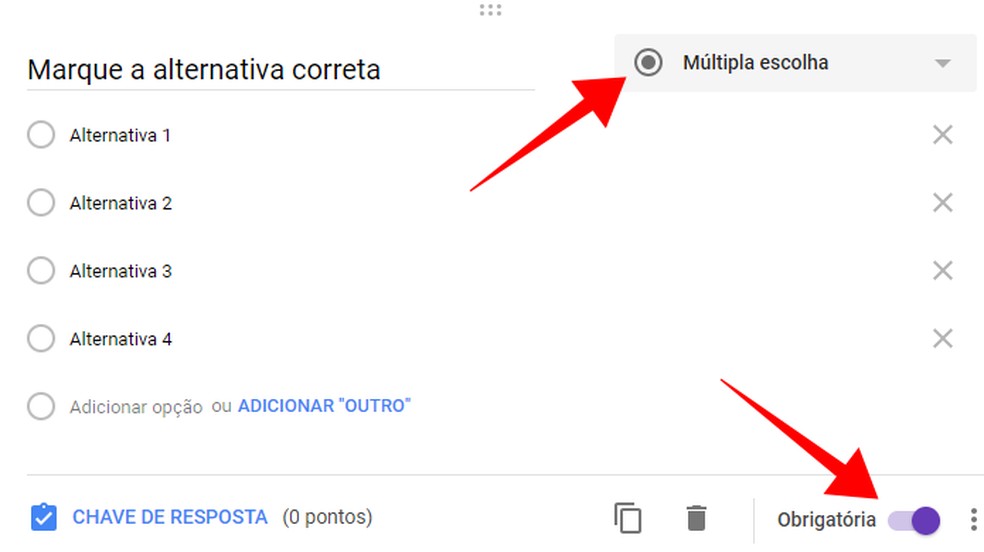
Create mandatory questions in Google Forms Photo: Reproduo / Paulo Alves
Step 7. Use the photo upload button to create image-based surveys. At the end of each question, access the option "Answer key";
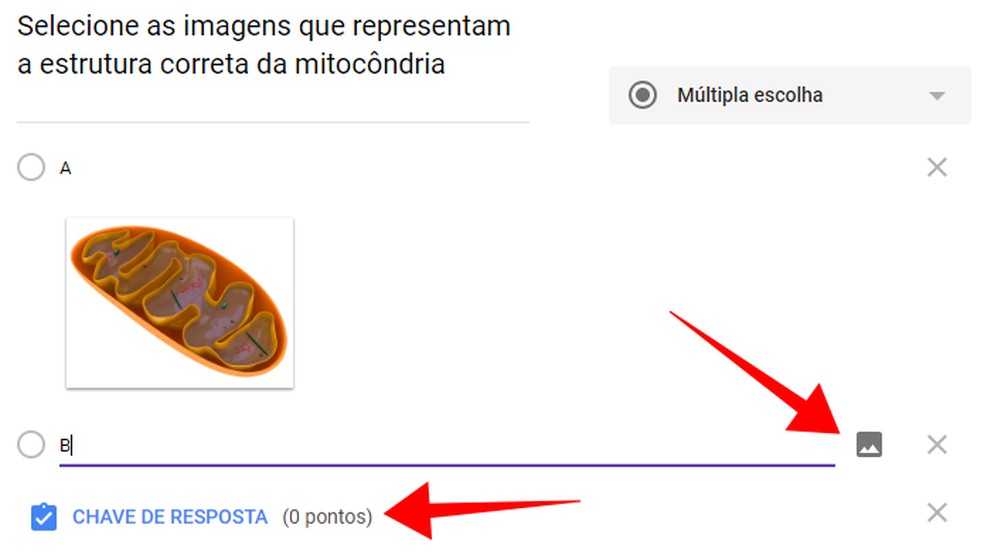
Create quests with images Photo: Reproduo / Paulo Alves
Step 8. In the Answer key menu, define the correct alternative and the question value in points;
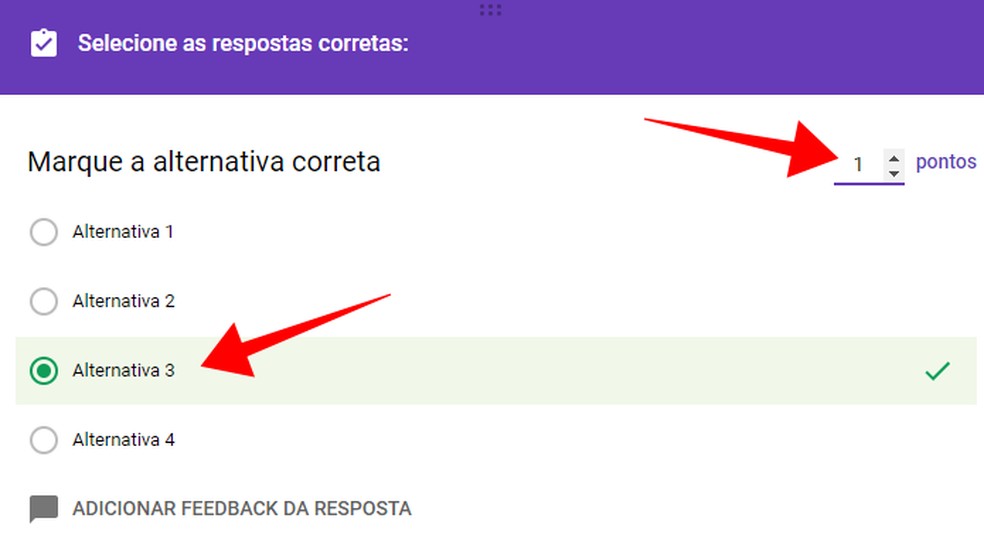
Set score and correct answer Photo: Reproduo / Paulo Alves
Step 9. At the end, click the send button to share the test with students by email;
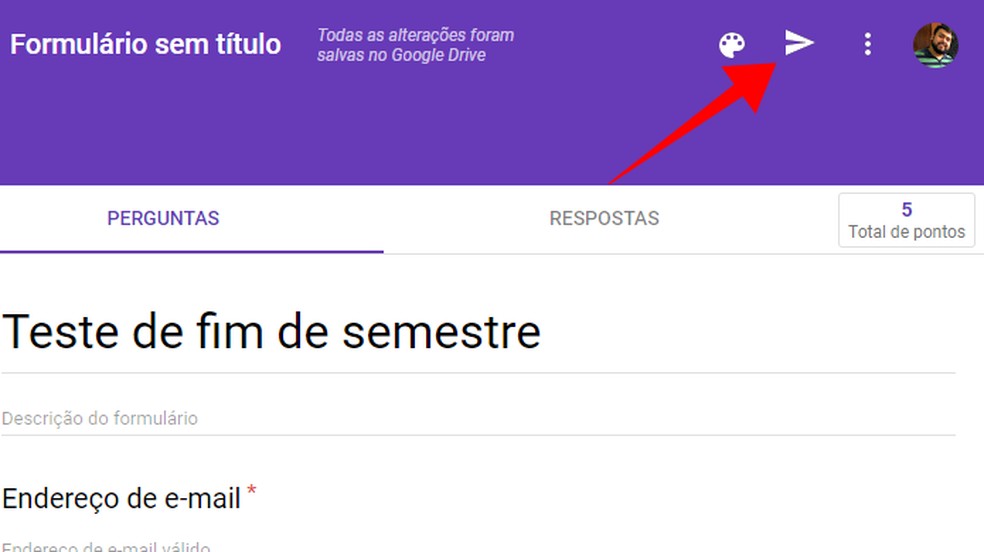
Send the test online to students Photo: Reproduo / Paulo Alves
Step 10. As the evidence is delivered, Google renews everything in the Answers tab. See general graphs, by student and by question. At the end of the evaluation period, turn off the Accepting responses key and click on the green button to create a spreadsheet with the results.
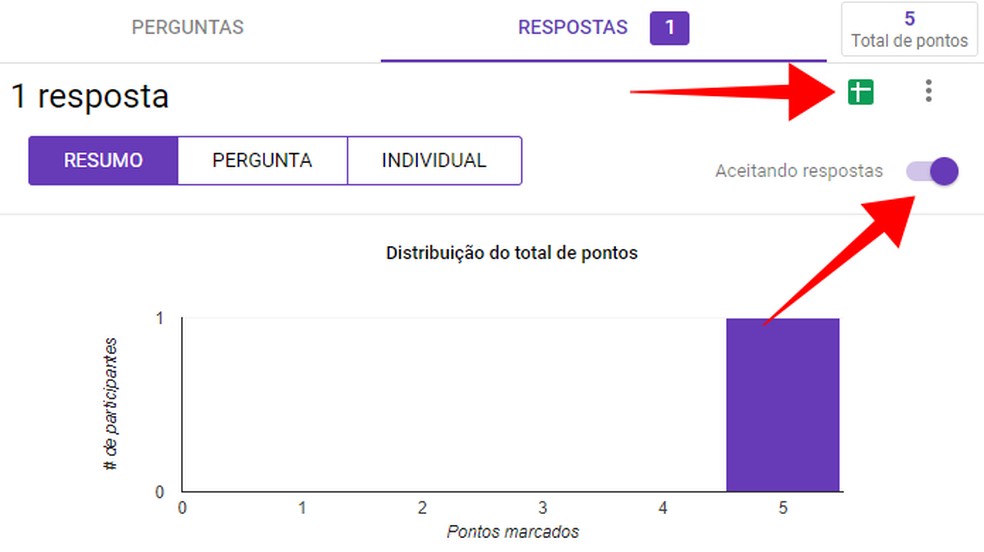
Monitor the results, finish the test and generate a spreadsheet Photo: Reproduo / Paulo Alves
