It has been 30 years since its creation, and no one has yet invented a better way to compact and share multiple files than the good old format ZIP: just take all the files you want, put them in the package and send to whomever you want as one.
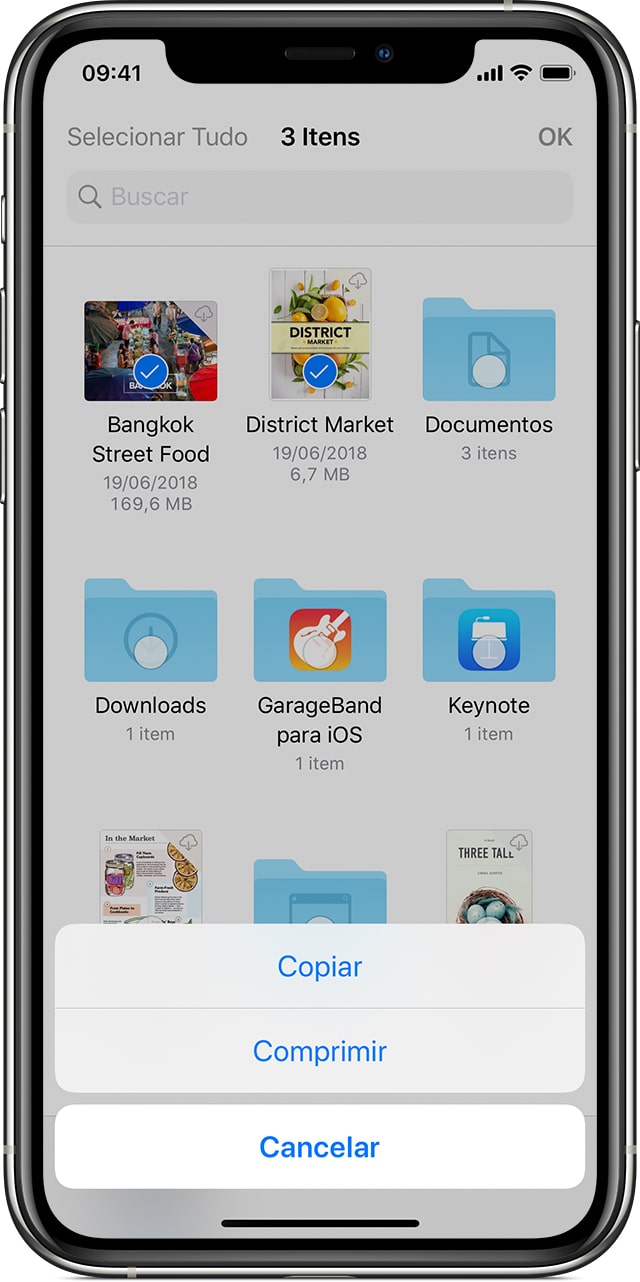
Apple took a while, but it finally brought support for native compression (and unzipping) of ZIP files on iOS 13. And this is exactly what this article is for: remember that in the current system, you no longer need third-party applications to deal with compressed files – just use the app Files (Files).

Files
in Apple
Version 1.3.3 (555 KB) Requires iOS 11.0 or superior
Fortunately, the process of compressing files is very simple. Below, we show the path of the stones.
- Open the Files app on your iPhone or iPad.
- Make sure that all the files you want to compress are in the same folder, to make the process easier.
- Touch the “Select” option in the upper right corner and touch all the files you want to add to your ZIP file.
- Touch the three-dot icon in the lower right corner and select “Compress”.

Ready! Your compressed file will appear in the same folder where you performed the action – from there, you can rename it and share it however you want. Remember that iOS (like any system) does not delete the original files after compression, so do so if you want to free up space on your device.
It is worth remembering that, alternatively, you can also touch and hold a file or folder in the Files app to quickly compress it – the option “Compress” will appear in the corresponding contextual menu.
For unzip a ZIP file on the iPhone or iPad, just perform the same process: tap and hold the file in question in the Files application and select the option “Unzip”. All the files it contains will appear in the same folder – and you can, if you want, delete the original ZIP file to free up space on your device. ?
