O iOS 12 has been released and you really want to install it. But you stop and think that, I don't know how many years ago, you have been installing system over system and that iPhone or iPad is already behaving strangely because of these all overwritten codes.

You may feel that the device has slowed down, that the battery is lasting less than it should, that a certain application is behaving strangely, among other things. This may be happening because, along with your information, the backup also takes files from the general system. And these files may have a problem (corrupted, for example); Or maybe you have been doing this process for years and there really are a lot of files there that just shouldn't exist anymore.
How about, then, enjoy the arrival of this new version of iOS to give that internal clean on your device, leaving only what matters?
What do I get by doing a clean install?
In addition to getting rid of those system files that are no longer of interest and may be having (corrupted) issues, this is a great way for you to really go out and see which apps you use, by doing a general cleanup of what you have installed on iPhone / iPad and how you organize it all on the device.
That is, besides gaining a faster operating system, you will probably reorganize everything. And the best part is that very important information (such as emails, contacts, calendars, etc.) you can put on your device without much more effort later on.
What do I lose by doing a clean install?
The first thing you lose is the ease and comfort of installing a new version of iOS simply by tapping a button. In addition, you must reinstall all applications you use manually. And if any app doesn't save data to iCloud or your own server, you will lose that information.
So it is very important that you make sure that all the content you don't want to lose (your photos, WhatsApp and Messaging messages, that stage you hit in a particular game, etc.) is properly saved to iCloud or your own cloud. Serbian.
Below, I will give you some important tips so that you keep precious information on your device and get rid of everything else. Let's go?
Step 1: Backup!
There is no way to be different. Will you do the installation clean and quickly regret it? Would it be nice to have a full backup of everything to get all those apps and information available the way you're used to anyway?
To back up via iCloud from the iPad / iPhone / iPod touch itself, see Settings (your name) iCloud iCloud Backup, enable the iCloud Backup option and tap the Backup Now button. Obviously, you need to have space available in your iCloud account for this; If your plan is free, 5GB, I tell you that you hardly have enough space and that you will probably have to migrate to a larger one.
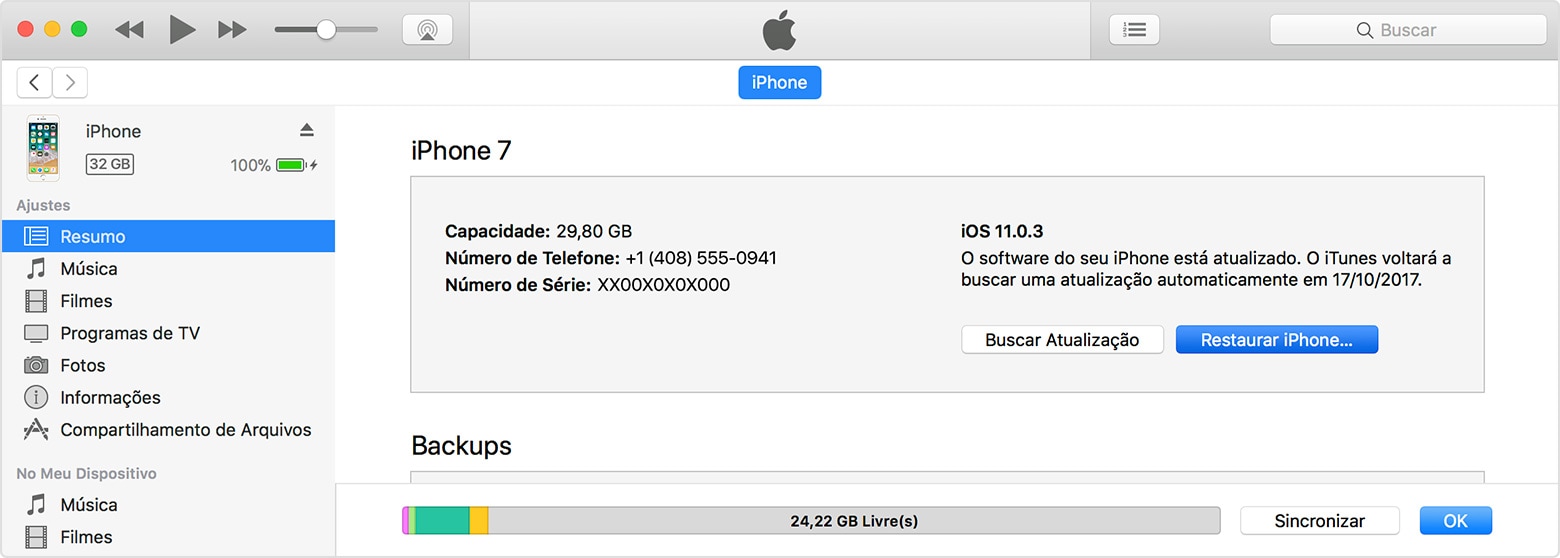
If you prefer to back up to your own computer instead of saving everything to the cloud, connect your gadget to your Mac / PC via your device's USB cable and open iTunes. In it, click on the device icon, choose Summary option and click Back Up Now.
Step 2: Saving Important Information
If you have an Apple ID and use the iCloud service, be aware that much of your important account information is automatically saved to the cloud, even if you don't have the backup option enabled. Of course, it all depends on whether you chose to enable and store this data in the cloud or not.
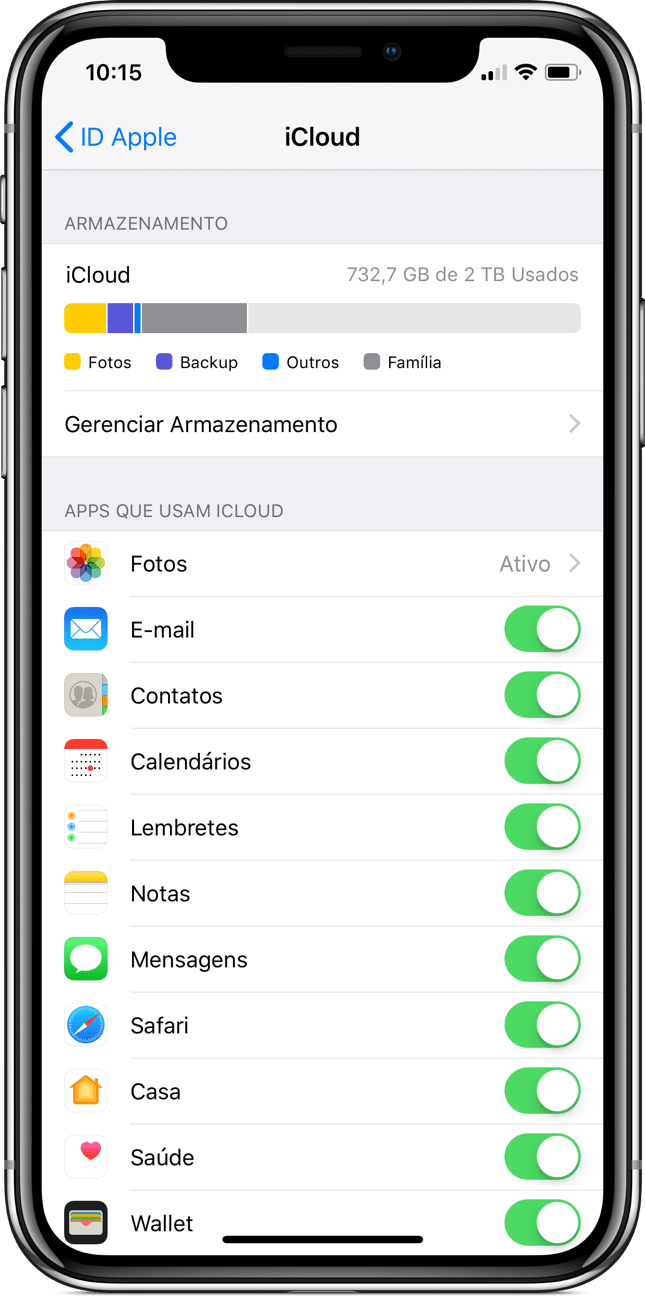
Here's the list of items you can save to iCloud in a very simple way (at ICloud Settings (your name)):
- Photos
- Contacts
- Calendar
- Sticky notes
- Grades
- posts
- Safari (information such as bookmarks, browsing history, etc.)
- Home (your devices and settings)
- Health (all data stored in the app)
- Wallet (Apple Pay registered cards, tickets, etc.)
- Game center
- Crab
- Keys (passwords you use in Safari)
That is, even by erasing your entire iPhone / iPad and doing a clean install without pulling a backup, you will already have this information on your device without any problem.
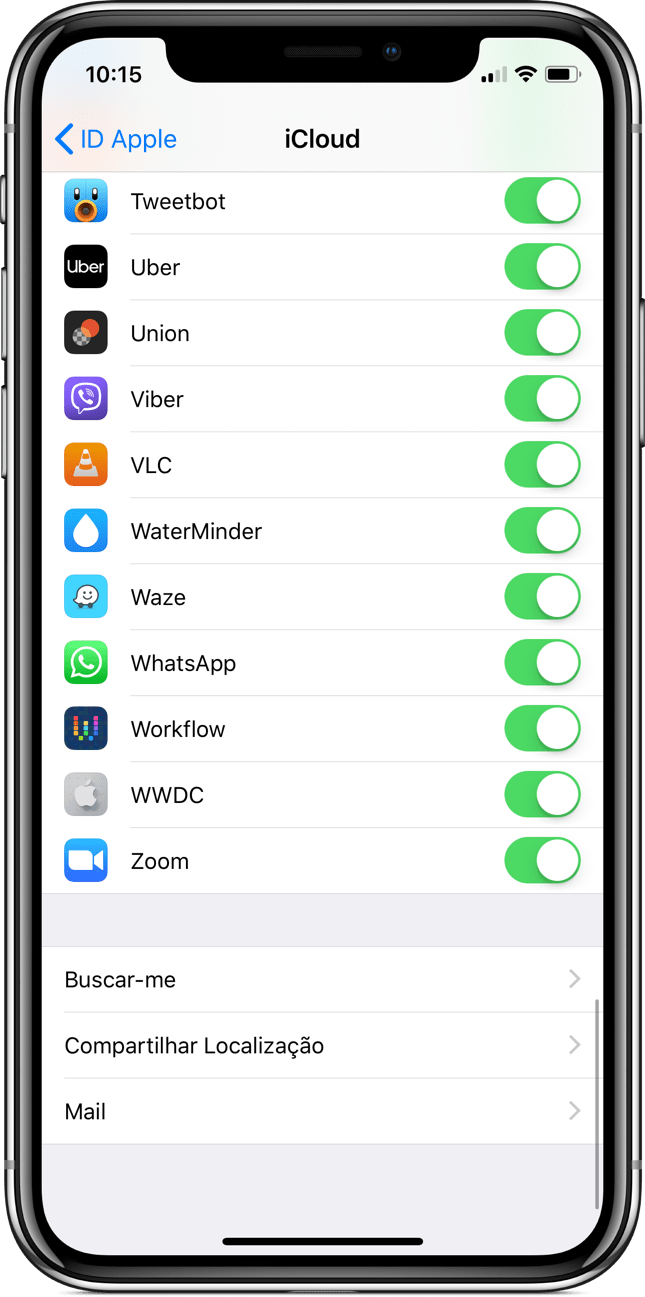
In addition, many applications may use Apple's service to store their data in the cloud. Going ICloud Settings (your name) And by sliding the screen down, you can see a list of current applications that store data in iCloud (such as WhatsApp as long as you enter WhatsApp's own settings and enable the backup option for messages in iCloud). This means that by deleting the contents of your iPhone and doing a clean install, if you choose to reinstall one of these applications, you will have your data readily available again. 😊
Other apps, such as Telegram, save the information to your own server. When you install the app and log in to it, it will pull all your message history automatically. Some games also save your progress on the developer's own network, just create an account (login / password) to keep everything properly.
The truth is that each app or service saves data differently, according to company or developer policy behind the app. So, before embarking on this clean install journey, it's good to make sure how that app works that you consider indispensable so you don't lose its data.
Doing the clean install from Mac / PC
Before you begin, make sure you are running the latest version of iTunes:
- macOS High Sierra or earlier: Open the Mac App Store and click the "Updates" tab;
- macOS Mojave or higher: v in System Preferences Software Update.
This done, connect your device to your Mac or PC using the cable. Then open iTunes and click on the phone icon.

Now click on "Summary" and then "Restore iPhone."
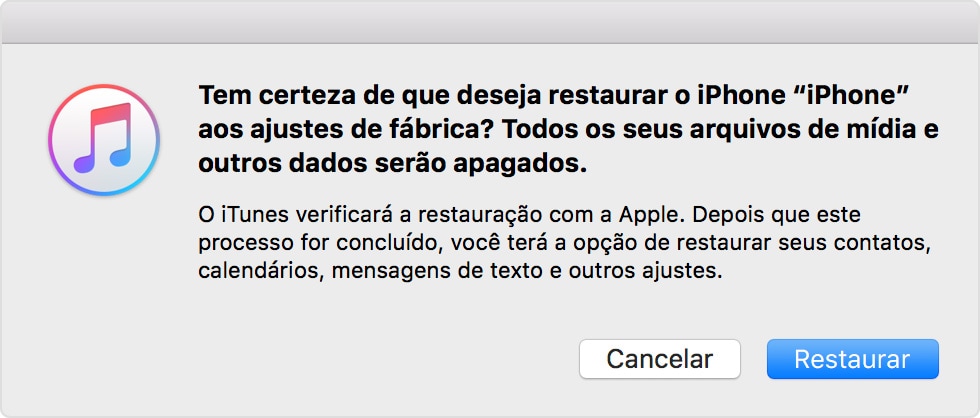
By doing this, iTunes will ask if you are sure you really want to restore the device to factory settings.
If you already want to make sure to restore directly to iOS 12.0, download the IPSW file for your device from the links below:
A, when you click "Restore iPhone," do so by holding the key, and a, select the downloaded IPSW.
Follow the onscreen instructions until the device has the new system installed. By entering your Apple ID information, you can activate all of the options I commented above (photos, emails, contacts, calendars, etc.) and within minutes have all that information available back on your device.
However, unlike iCloud backup, this option does not bring back the applications and various settings you may have made (font size, set alarms, configured keyboards, and many other things). So you now have to go to the App Store and download all the apps that interest you again.
Installing clean from your own iPhone or iPad
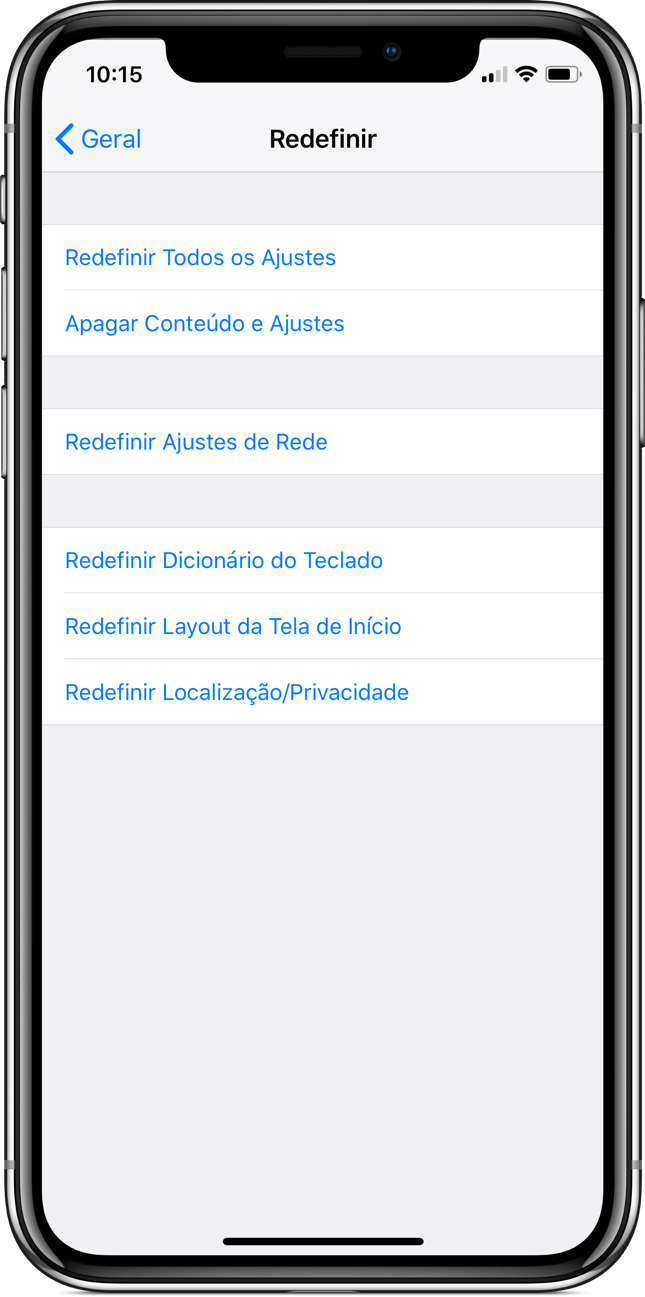
First, install iOS 12 normally from the device itself by going to General Settings Software Update. With the new system properly installed, you need to go into Settings General Reset Delete Content and Settings to get your device back to factory settings.
From there, just follow the initial settings shown on the screen, log in with your iCloud account and retrieve the important information commented above. Then, with that done, you should go to the App Store and download the apps that interest you.
· • ·
Good (re) installation! 😉
