THE iPad nowadays it has become a fascination for young children, so much so that many parents let their children be distracted and even educate themselves with the Apple tablet or even with the iPhone.
But along with its advantages, there are also dangers. After all, the iPad is a great communicator with the internet, which can leave the little ones exposed to various types of information not appropriate to their age. What to do to stay calm and leave the device with them, making sure that they do not fall on websites that you do not want them to see?
Fortunately iOS offers a way to block websites on iPhone and iPad and only allow access to those you trust.
Everything is relatively easy and quick to set up, requiring no more advanced knowledge. In system restrictions, there is an option to restrict websites and it will apply to any iPhone or iPad application (and not just Safari). And you can still choose whether you want the system to just prevent adult content in general (which doesn’t always work, as some sites can circumvent this) or just allow sites listed by you.
The cool thing about this solution is that you are not prevented from accessing with the iPad (or iPhone) any website that you forgot to add to the list. In this case, a notice informs you that that site is restricted, but that you can immediately allow access to it by entering your password. To do this, just tap on “Allow Site”.
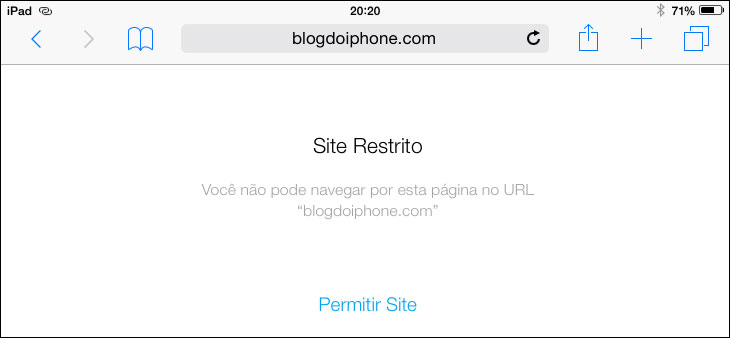
But it is important to note that, when you do this, the site is included in the list of allowed and can be accessed without a password thereafter. You will have to remove it from the list again.
See how to do it step by step:
Step 1: Open System Settings
Touch the System Settings icon on the application screen.
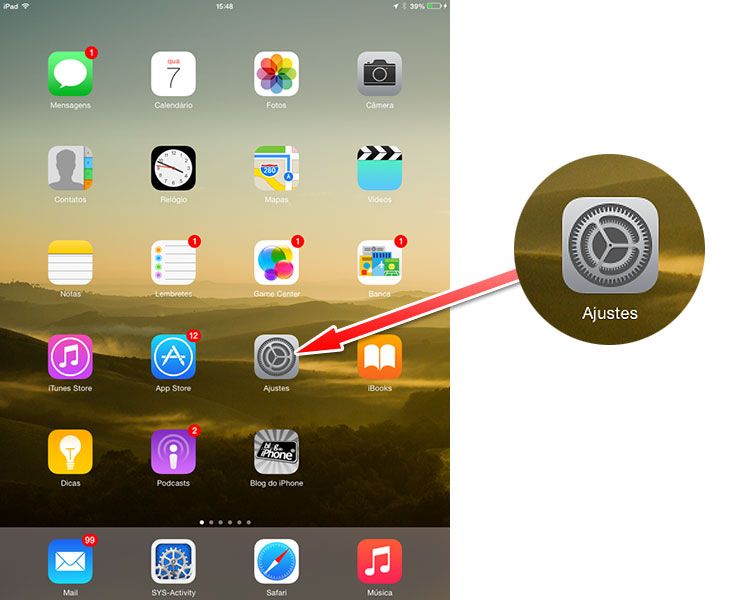
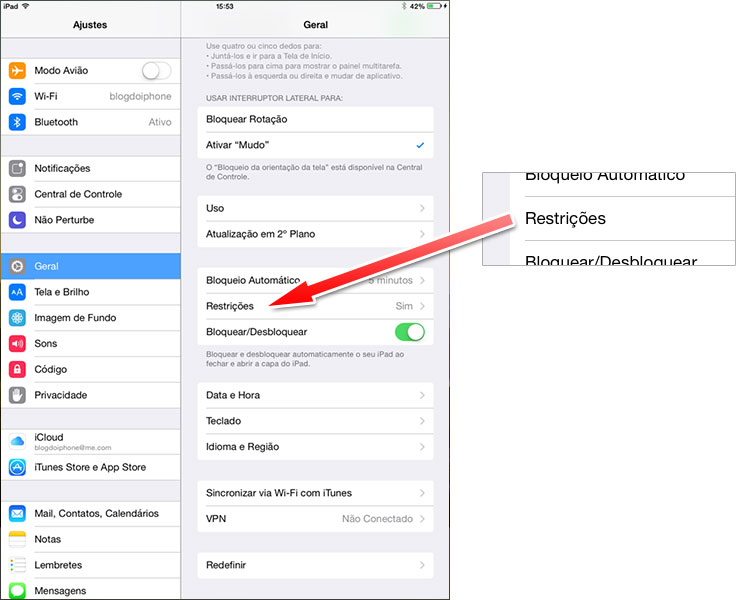
Step 2: Restrictions
Touch the General option and look for the Restrictions menu.
Step 3: password
To access the Restrictions, you need a password (which has nothing to do with the one you unlock on the device’s screen). If you’ve created it before, just enter it, if not, activate the restrictions and create one that your children don’t know (because if they do, this tutorial ends up being useless).
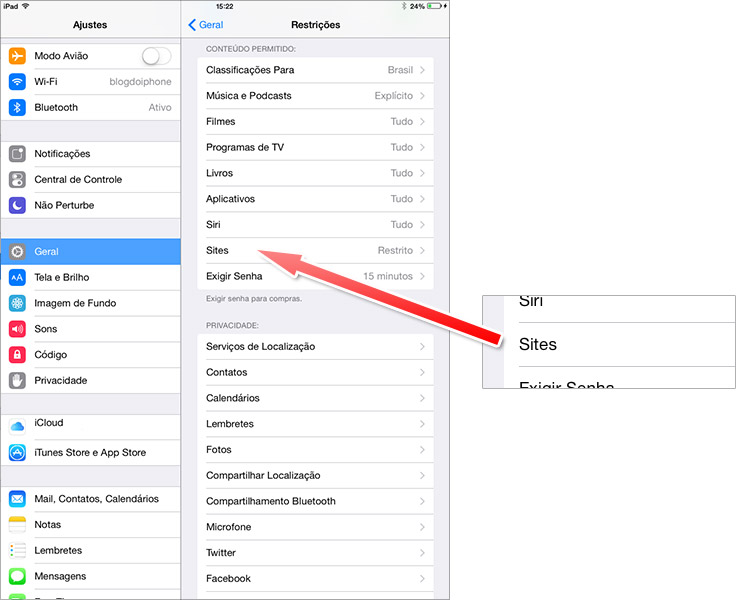
Step 4: Sites
In the third block of settings you will see a call “Allowed Content“. Search for Sites. This is where you will determine which internet pages the device will be able to access.
Step 5: List of sites
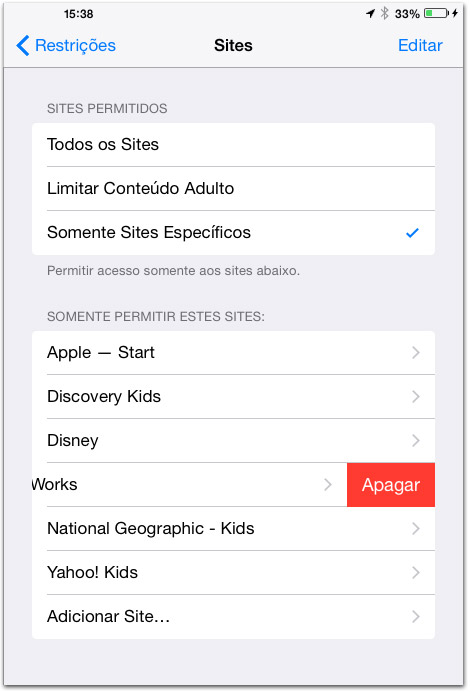
You will see three options. The first releases the query for all sites, without restriction. The second limit is only for those that do not contain adult content (as we said, it does not always work with all sites). And the third is the one we have indicated and that allows you to determine a limited list of sites that can be accessed by iPad or iPhone. Then choose “Specific Sites Only“.
Step 6: Define your sites
The system already presents a suggestion of sites for children, but you can add yours and delete the ones you don’t want to leave. Tap on “Add Site…” and add all the ones you’ll let your kids access via the iPad. Don’t worry if you forget any, then you can add and delete them normally.
Okay, now you can rest easy (or quiet) with your kids using your iPad or iPhone. But remember that they are always much smarter than we adults imagine and they will always try to observe you by typing the password to try to discover it. So be very careful when typing it. ?
