We live talking here about alternatives to Mailis an email client native to Apple's ecosystem, but the truth is, for users who don't need extra features or specialized tools, Apple's solution is more than enough. And it even has some features that run away from the basics: VIP sendersFor example, they are very useful in a number of situations.
But what are VIP senders anyway? Well, the name itself says: they are people (or email addresses) that are important to you, for a number of reasons so important that they deserve to be highlighted in their own Inbox, with quick access when writing messages and the ability to custom notifications. They can be your closest family members, your bosses, your contacts (if anyone still flirts by email, of course) you send.
Fortunately, it's very easy to set up VIP contacts on your Mac or iPhone / iPad.
At the iOSYou can simply tap the sender of any email to get all your information. Below the contact details, being on the “Add to VIPs” option just tap it and you're done. Similarly, you can tap a sender already marked VIP and tap the "Remove from VIPs" option to remove it from this privileged role.
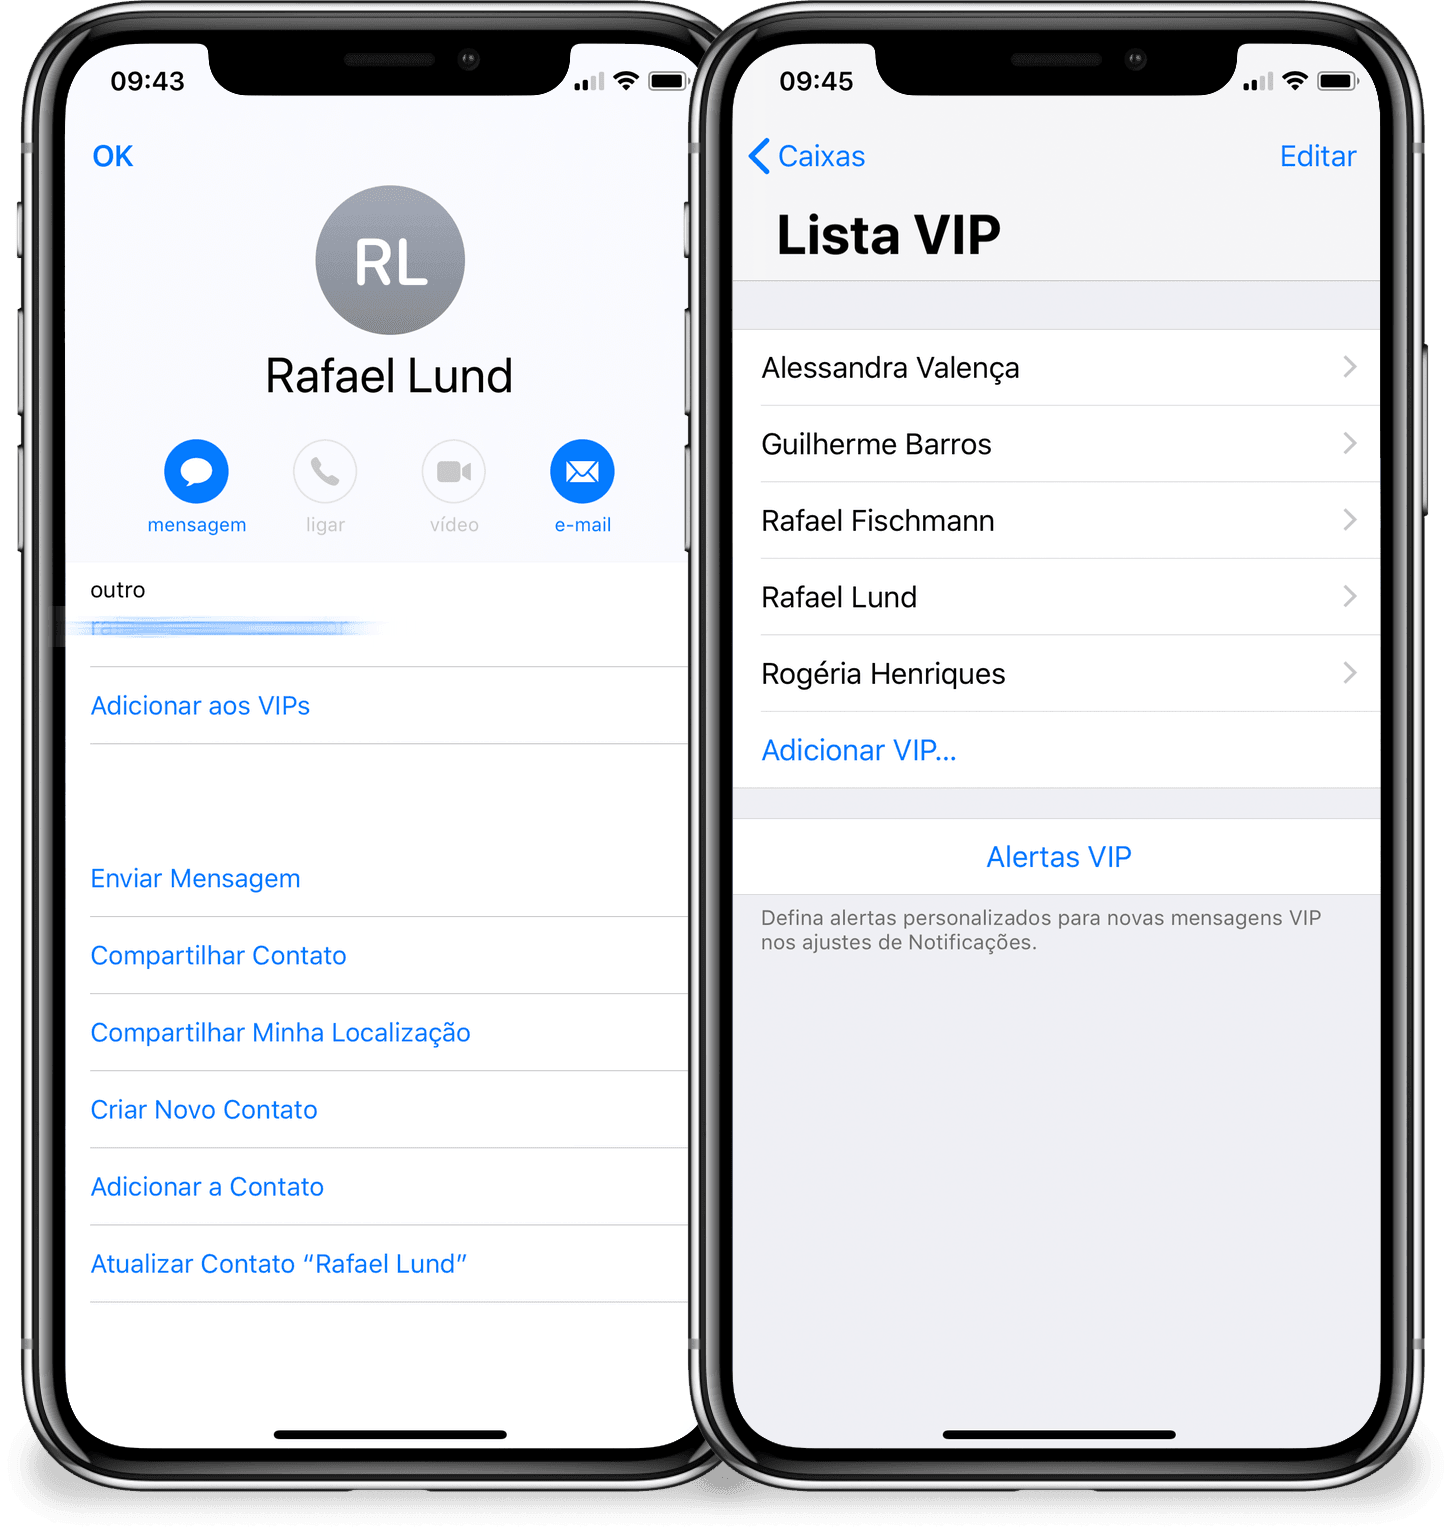
Still in iOS Mail, you can access your Inbox list and tap “VIP” to see all your senders marked with the star. There, you can tap “Edit” to remove unwanted ones from the list, tap “Add VIP” to select all contacts you want to put there, or tap “VIP Alerts” to set up special notifications every time a message arrives from a from these senders.
At the macOSThe thing is very similar: In the Mail app, just right-click the sender of a message and click "Add to VIPs" or "Remove from VIPs", depending on what you want to do and the status of the contact.
Ready! 😉 Now, the likelihood that the message of that important contact will get lost in the mountains of trash we receive every day is significantly better especially if you also take advantage of personalized notification options. Enjoy!
