When a new Apple product hits the market, iFixit runs to put his hands on it in order to do its traditional disassembly. After all, a repair company needs to know the new launches in a much more intimate way than we, mere users.
How HomePod it was no different. The company has already opened Ma's new smart speaker.
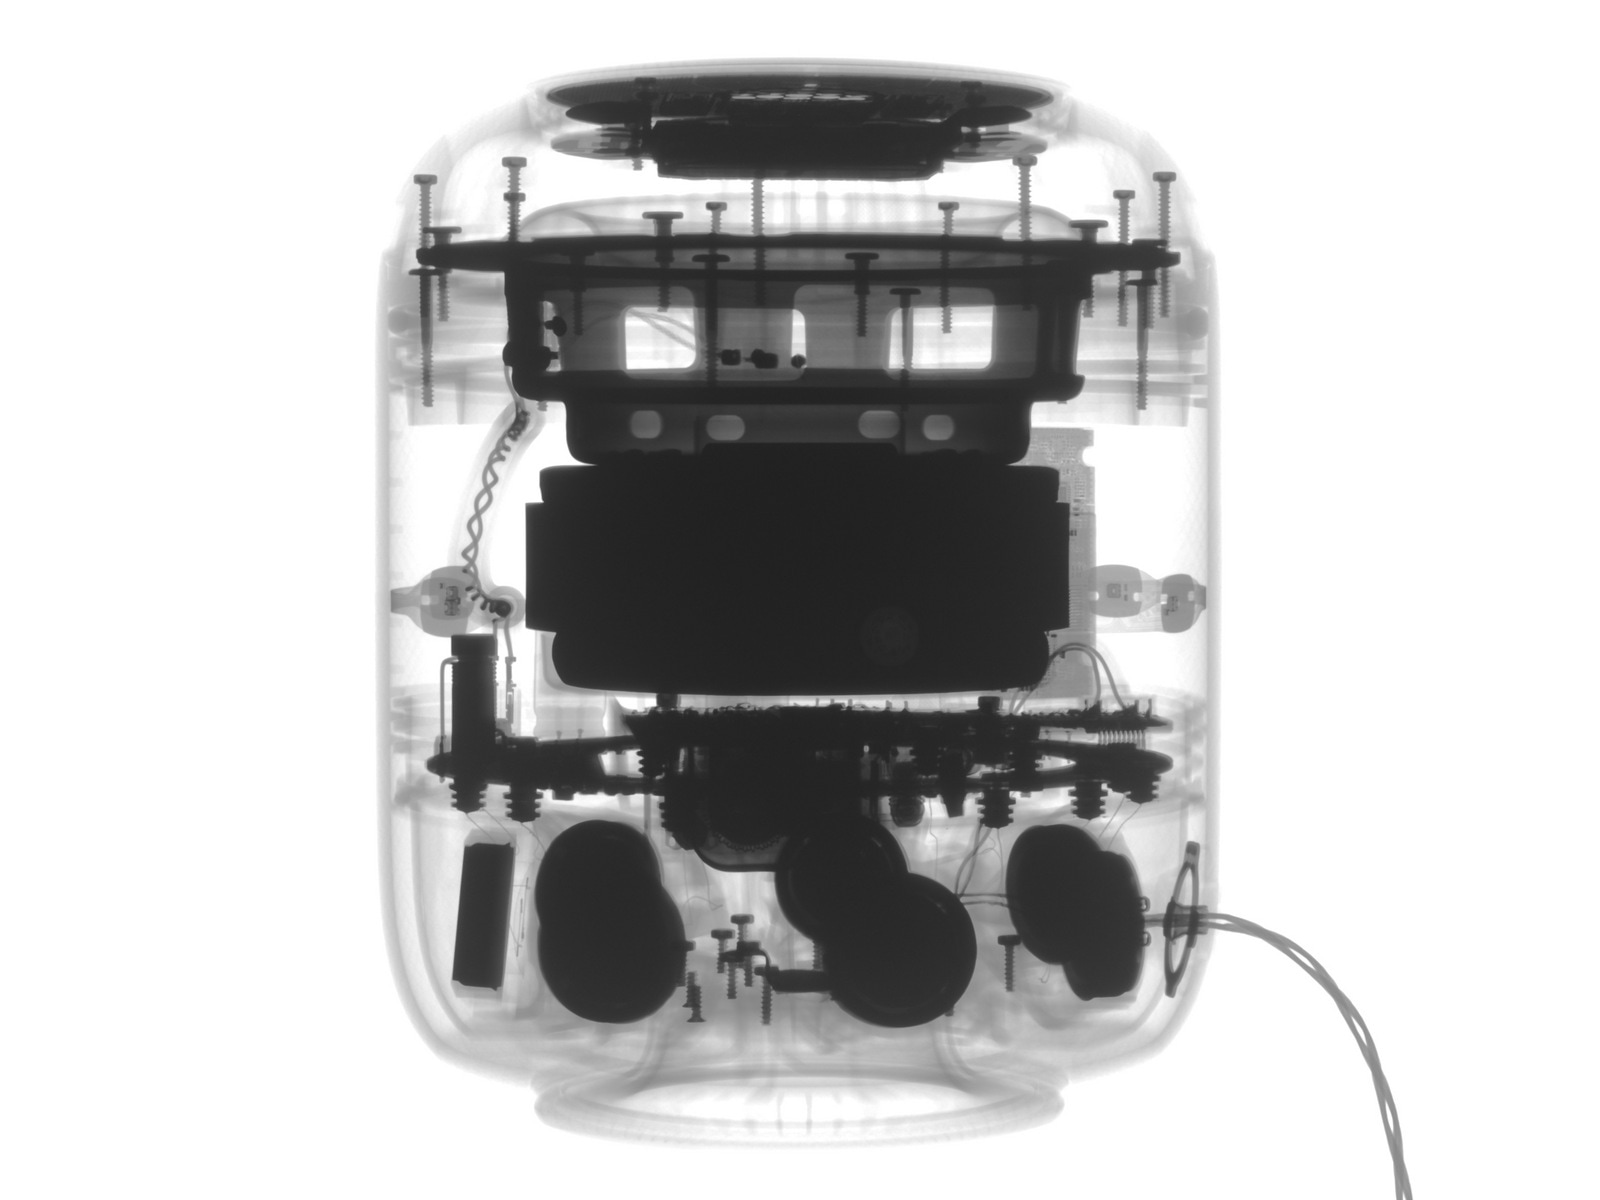
The first thing they noticed when doing an X-ray of the product was that, right behind the back cover, there are some Torx screws. Then they concentrated there to take the speaker apart.
Surprisingly, a 14-pin connector appeared! Apparently it is used to test and / or program the loudspeakers during assembly, who knows it may serve for something related to maintenance, too.
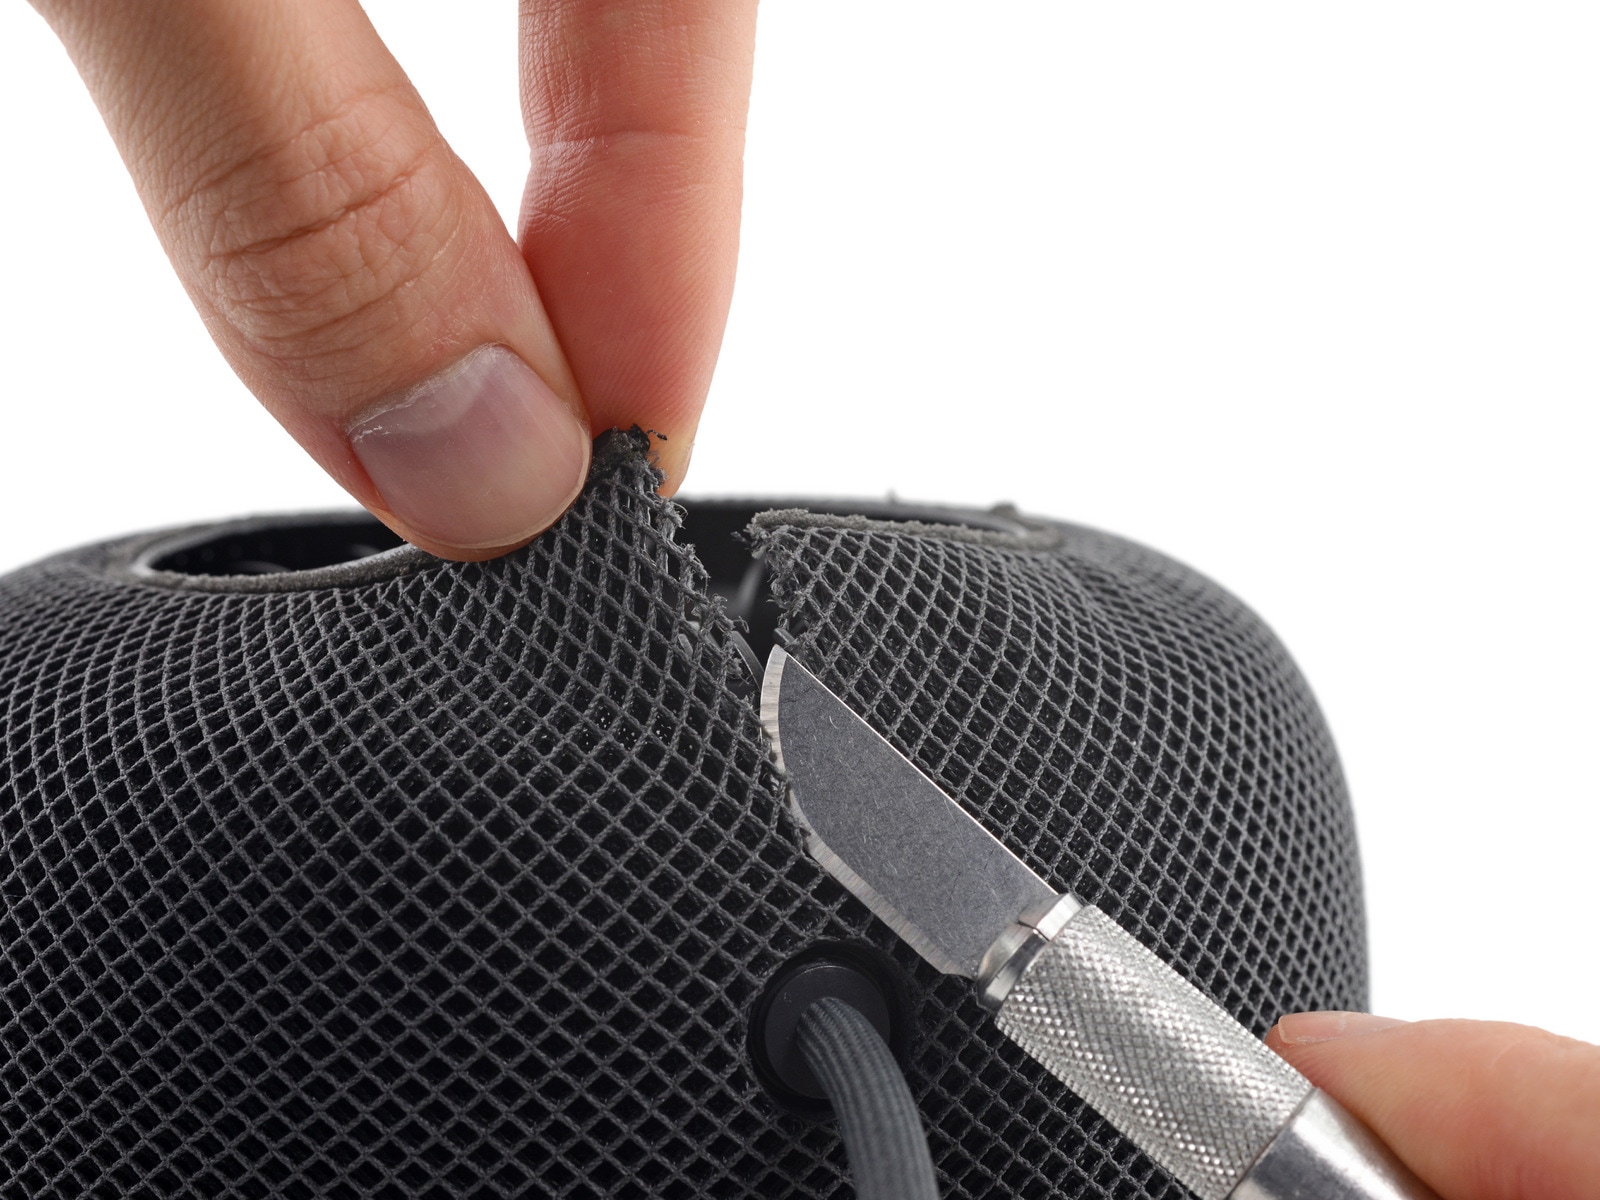
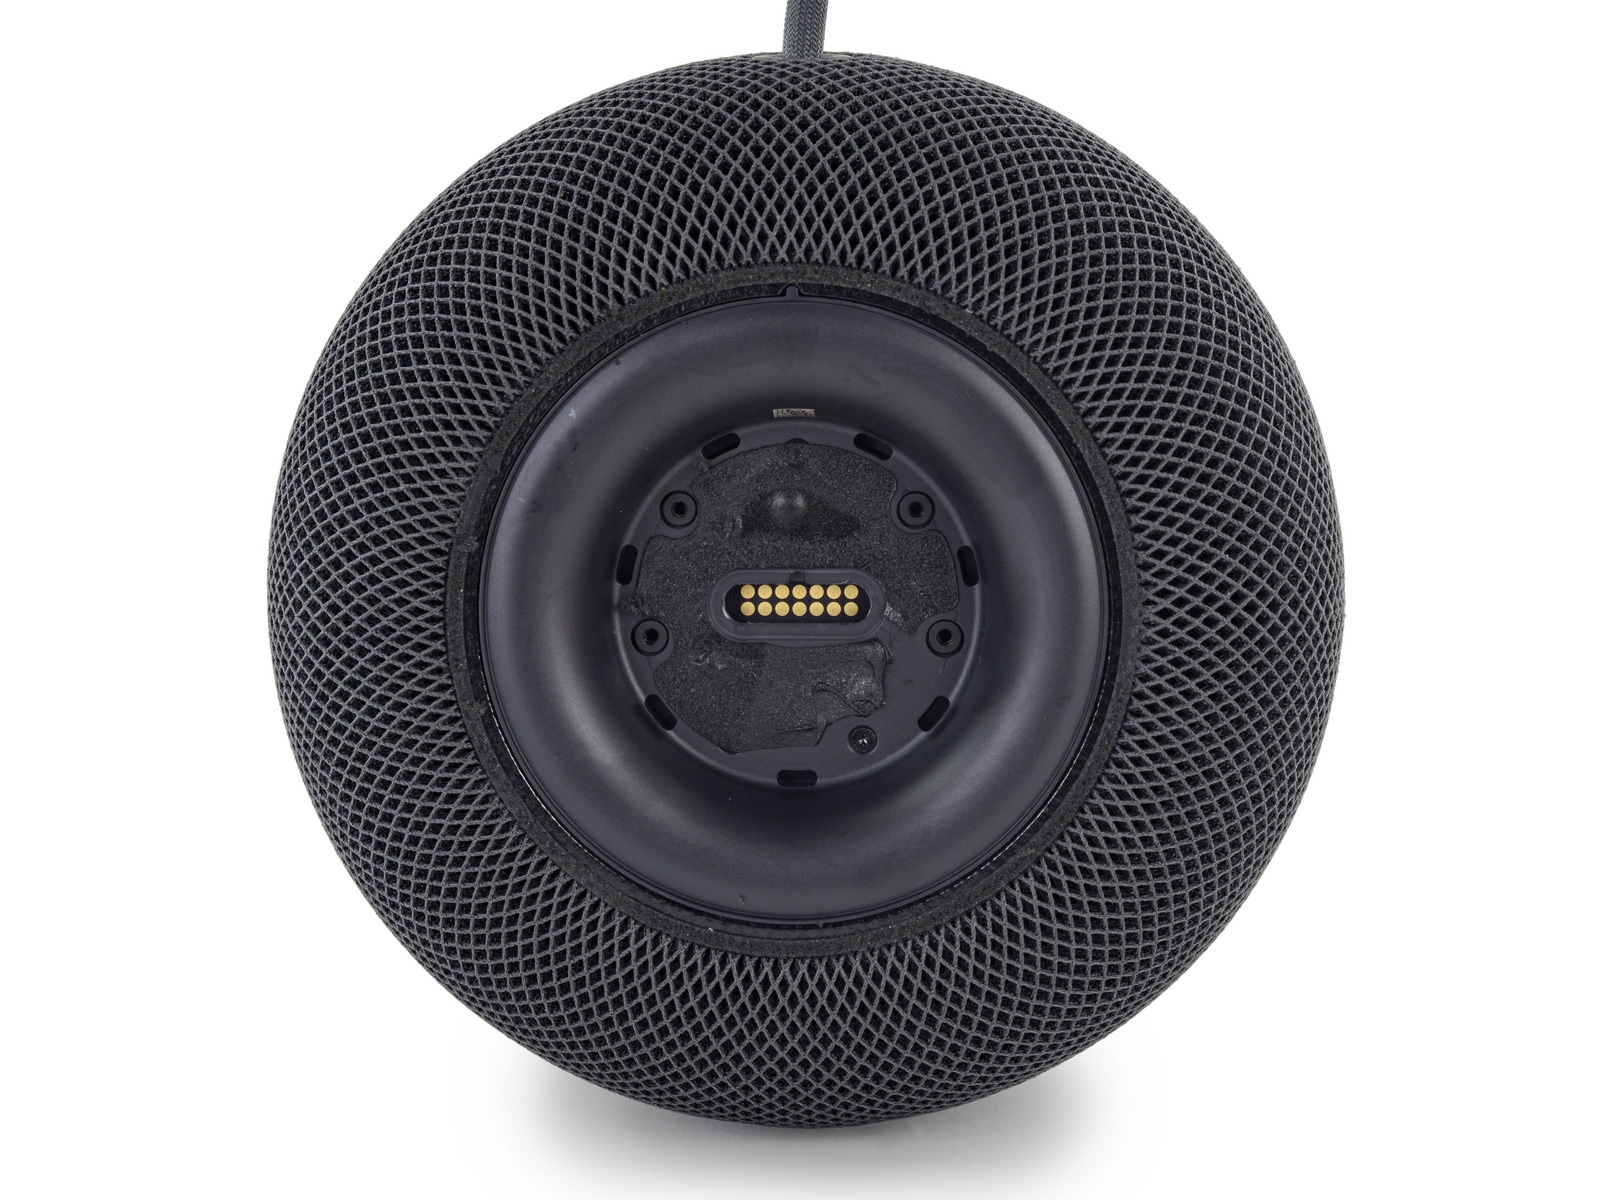
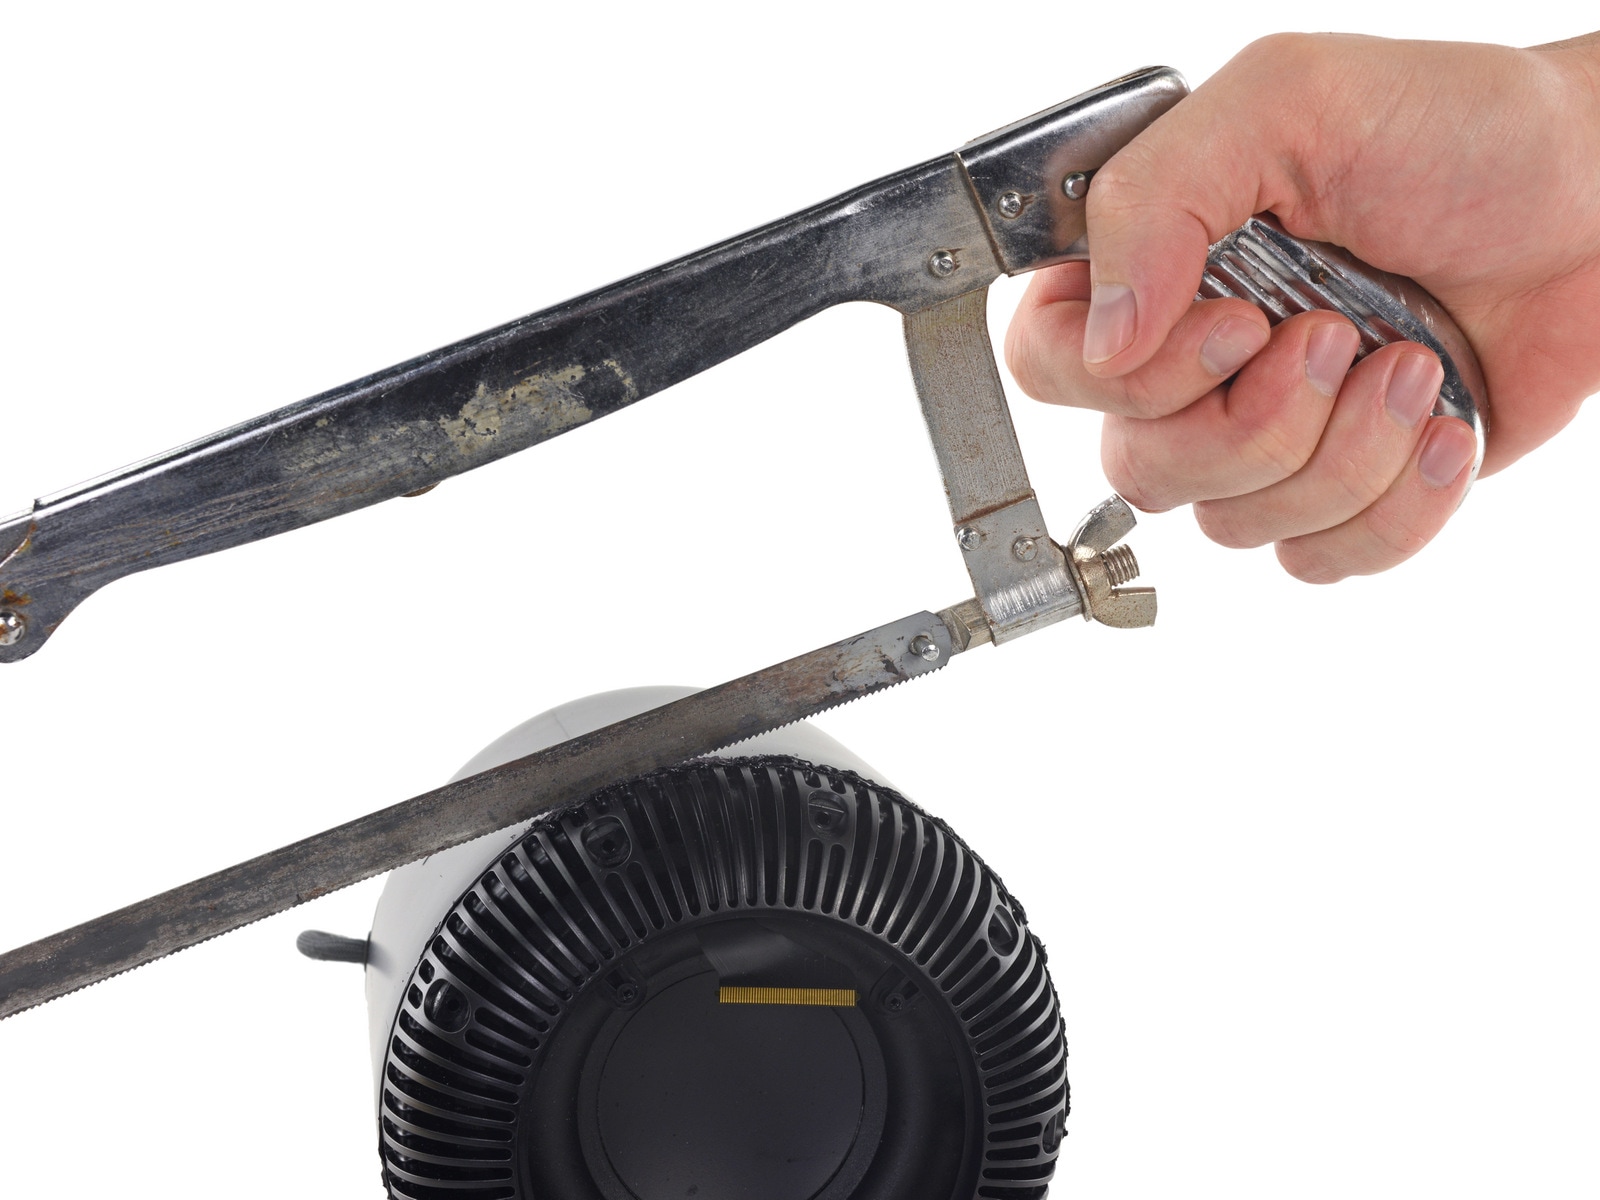
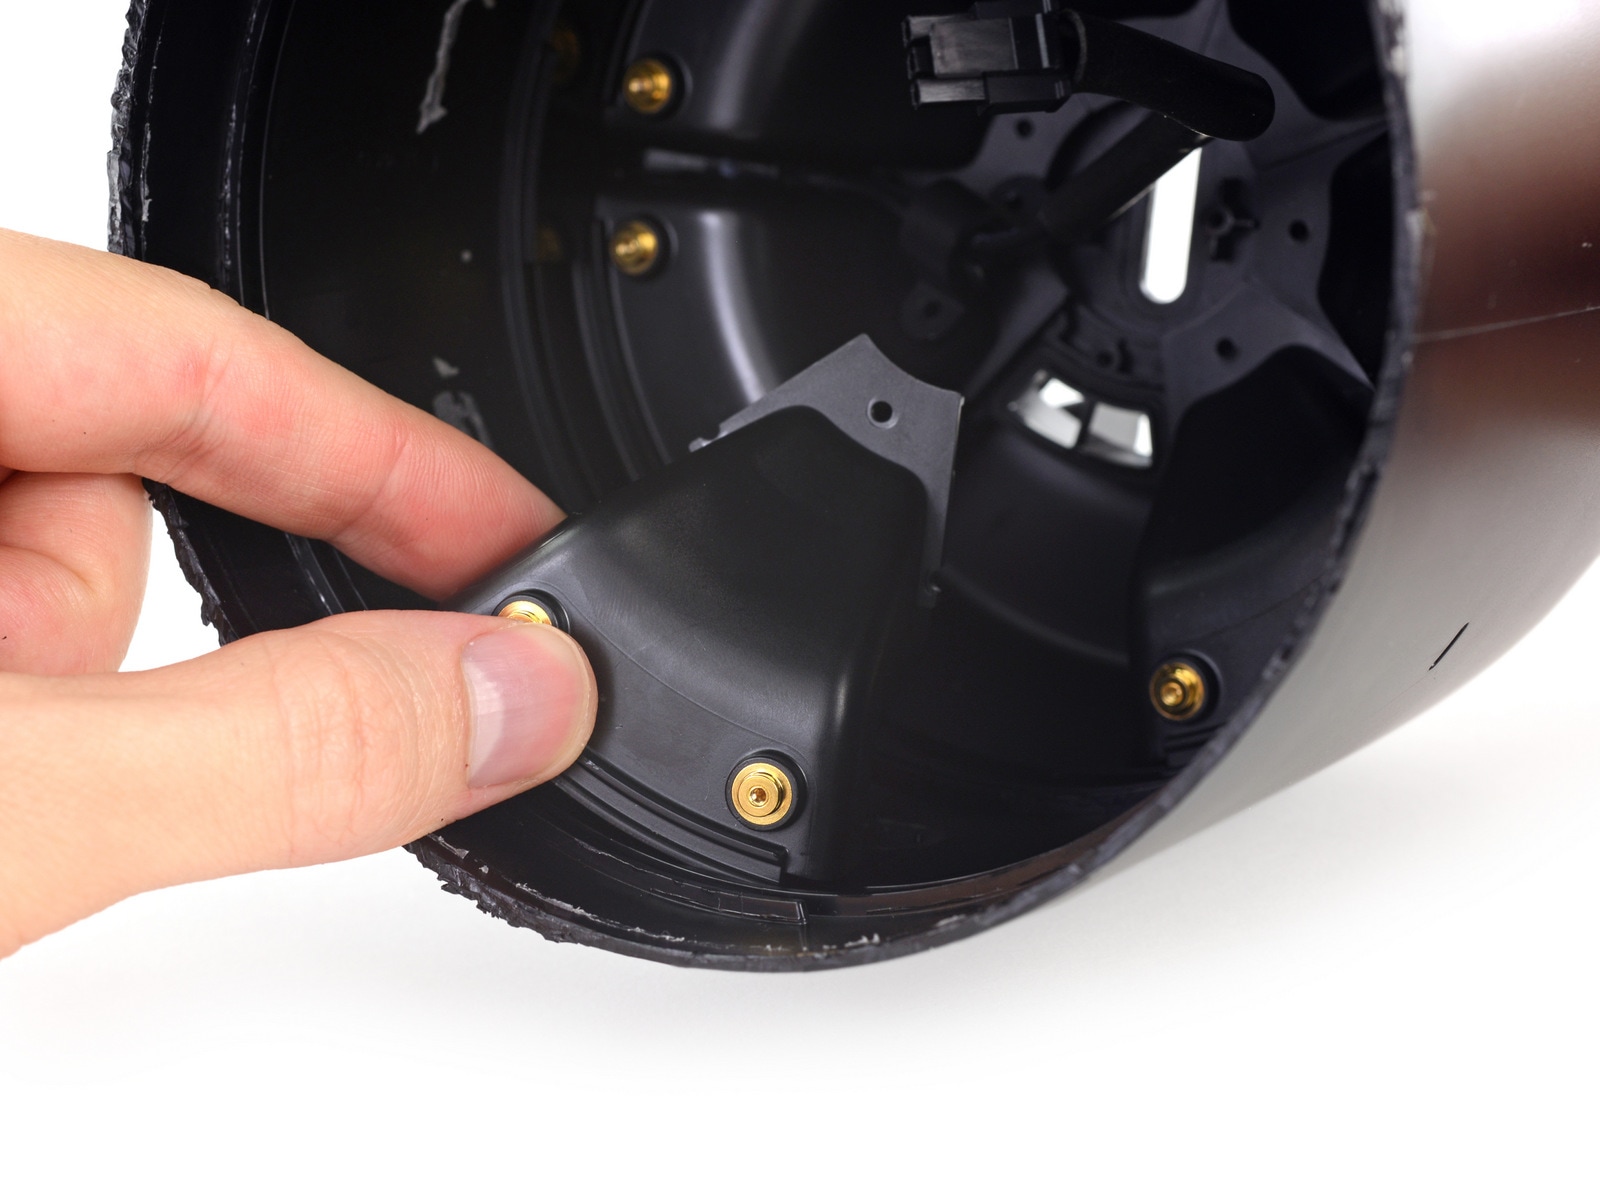
They tried, but even unscrewing and trying to access the bowels from the bottom of the HomePod, all they found was plastic and more plastic. So, the way was to cut the speaker mesh.
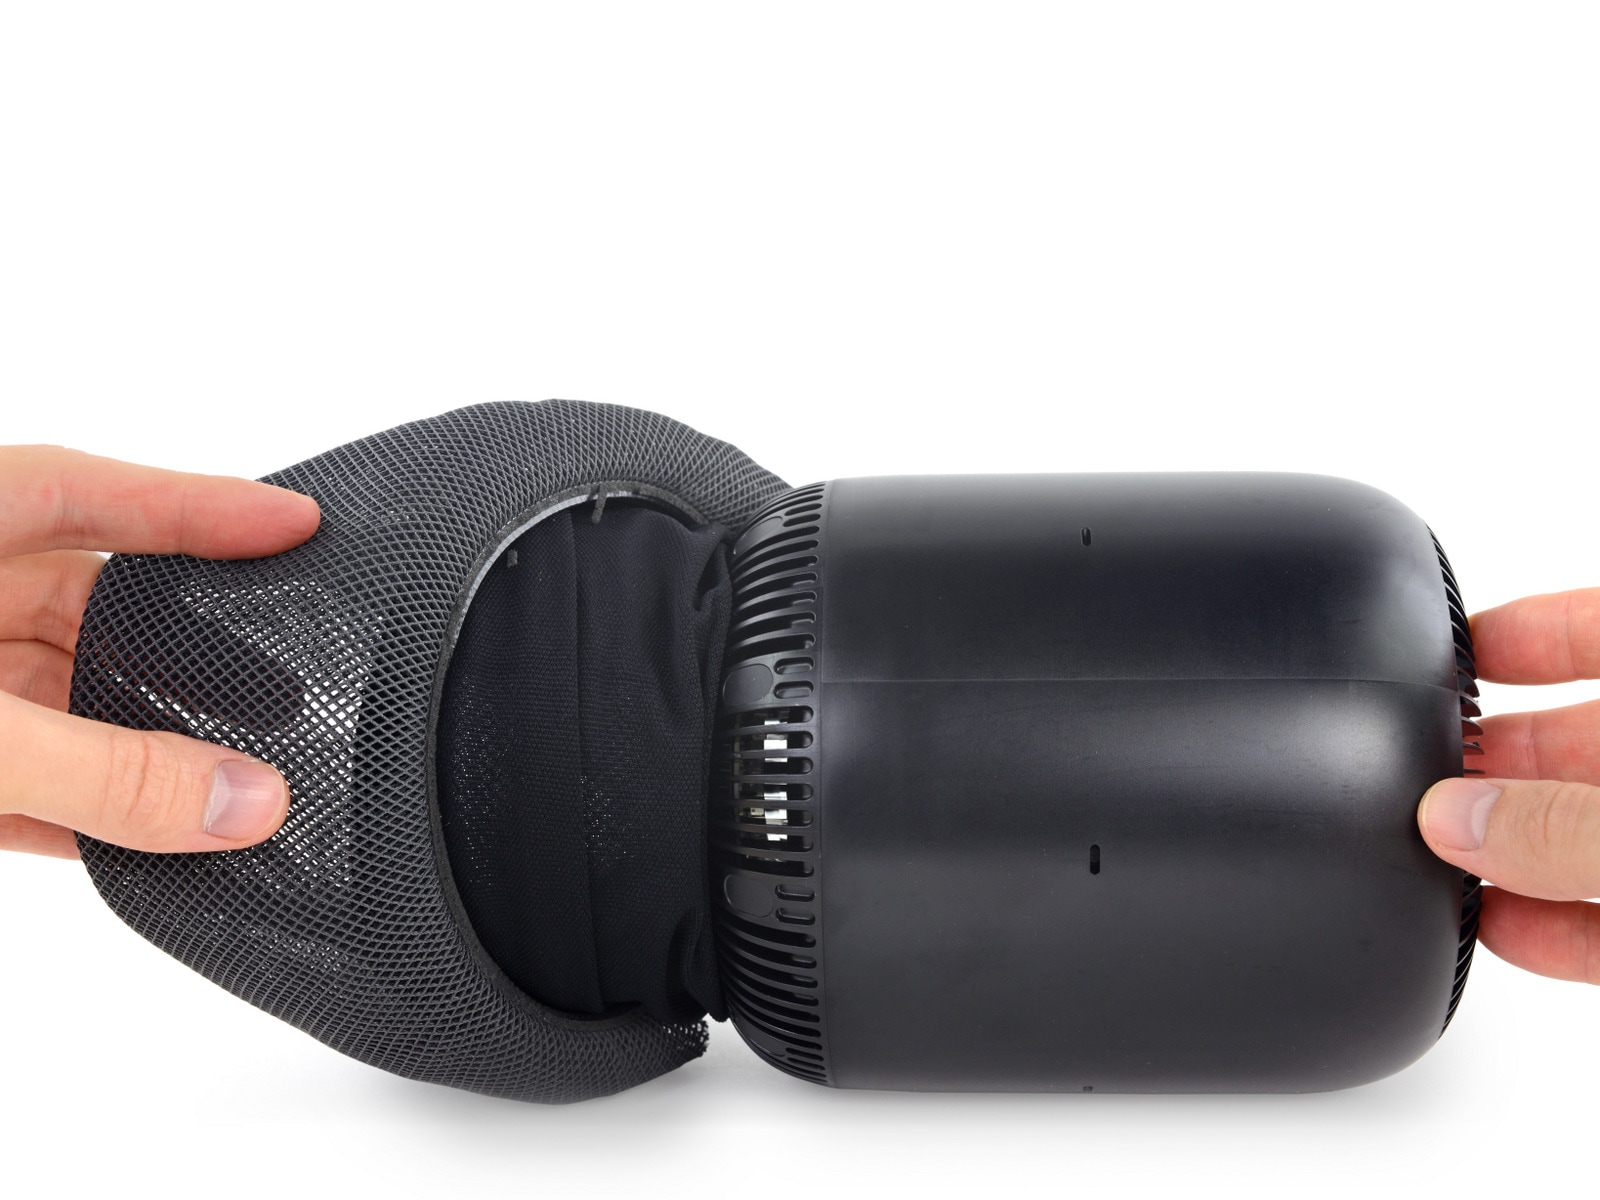
Underneath the outer fabric, by the way, there is a whole thinner and more flexible fabric.
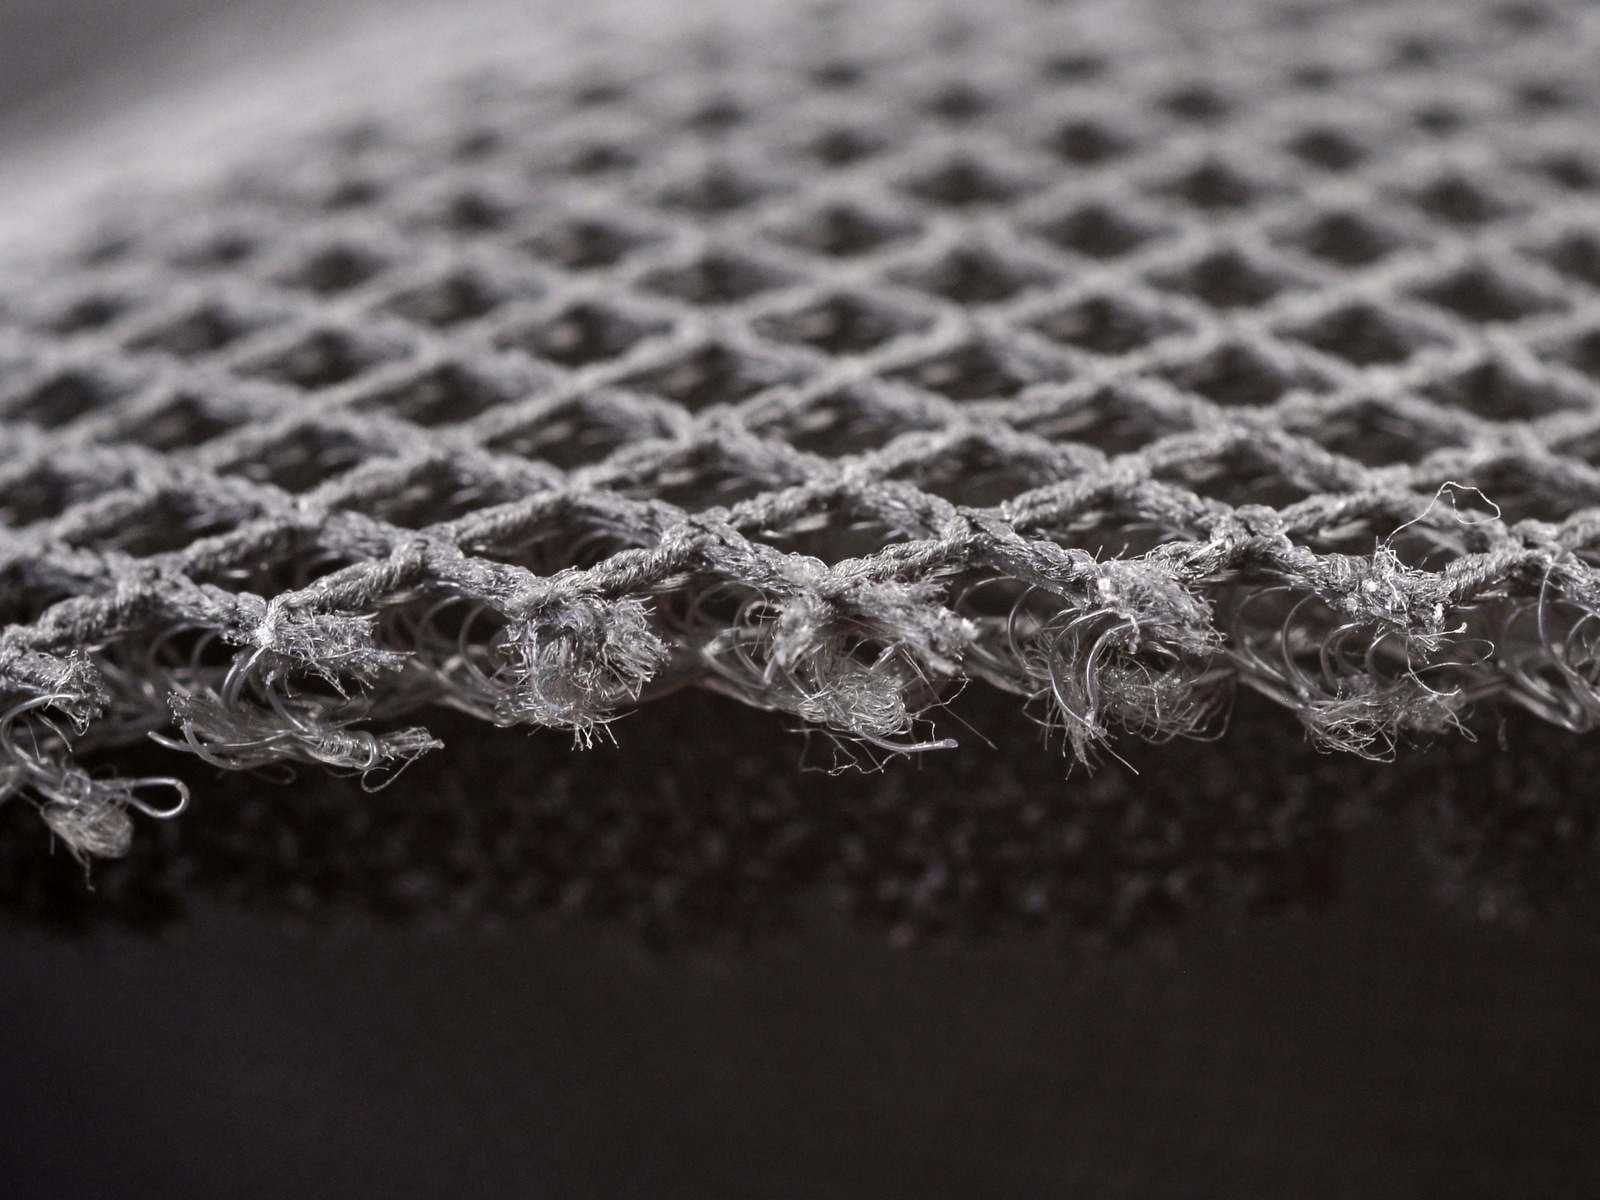
A curiosity about the outer mesh is that it consists of a layer with small stiff coils in the middle. This type of construction allows sound waves to travel through the fabric, with little or no reflection, while keeping dust away from internal components.
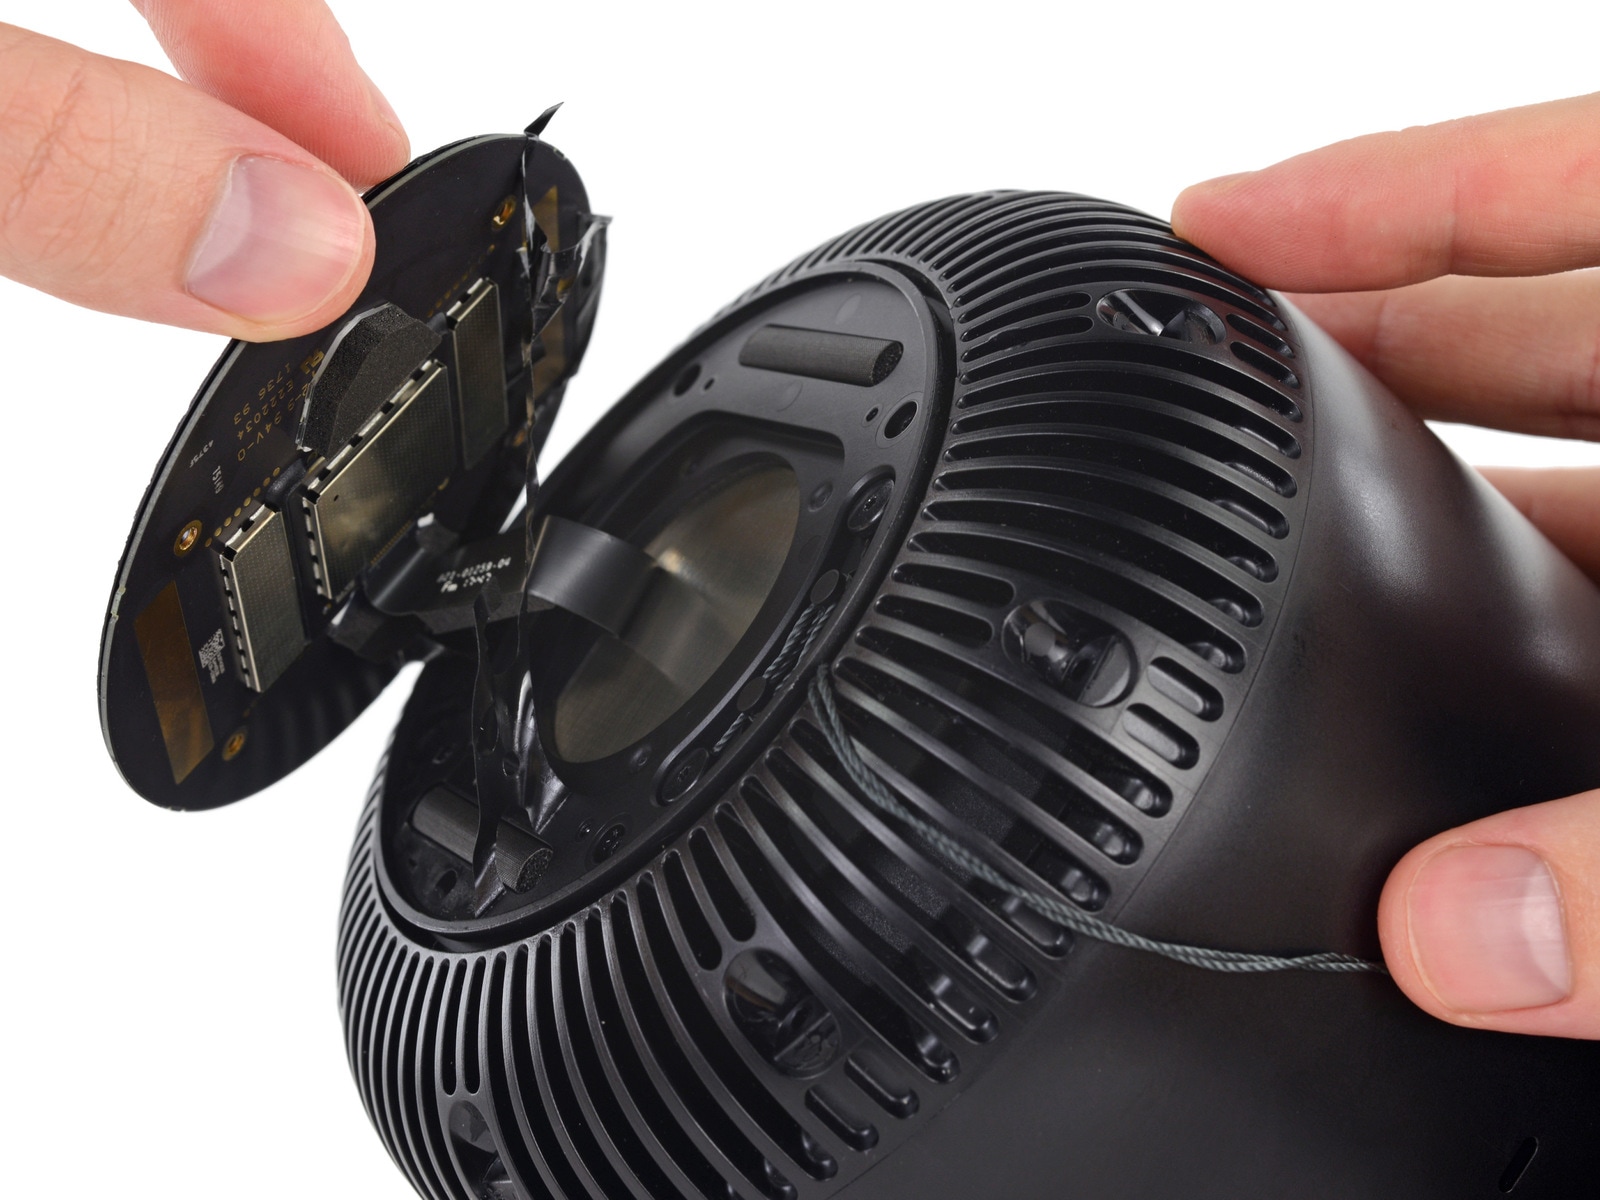
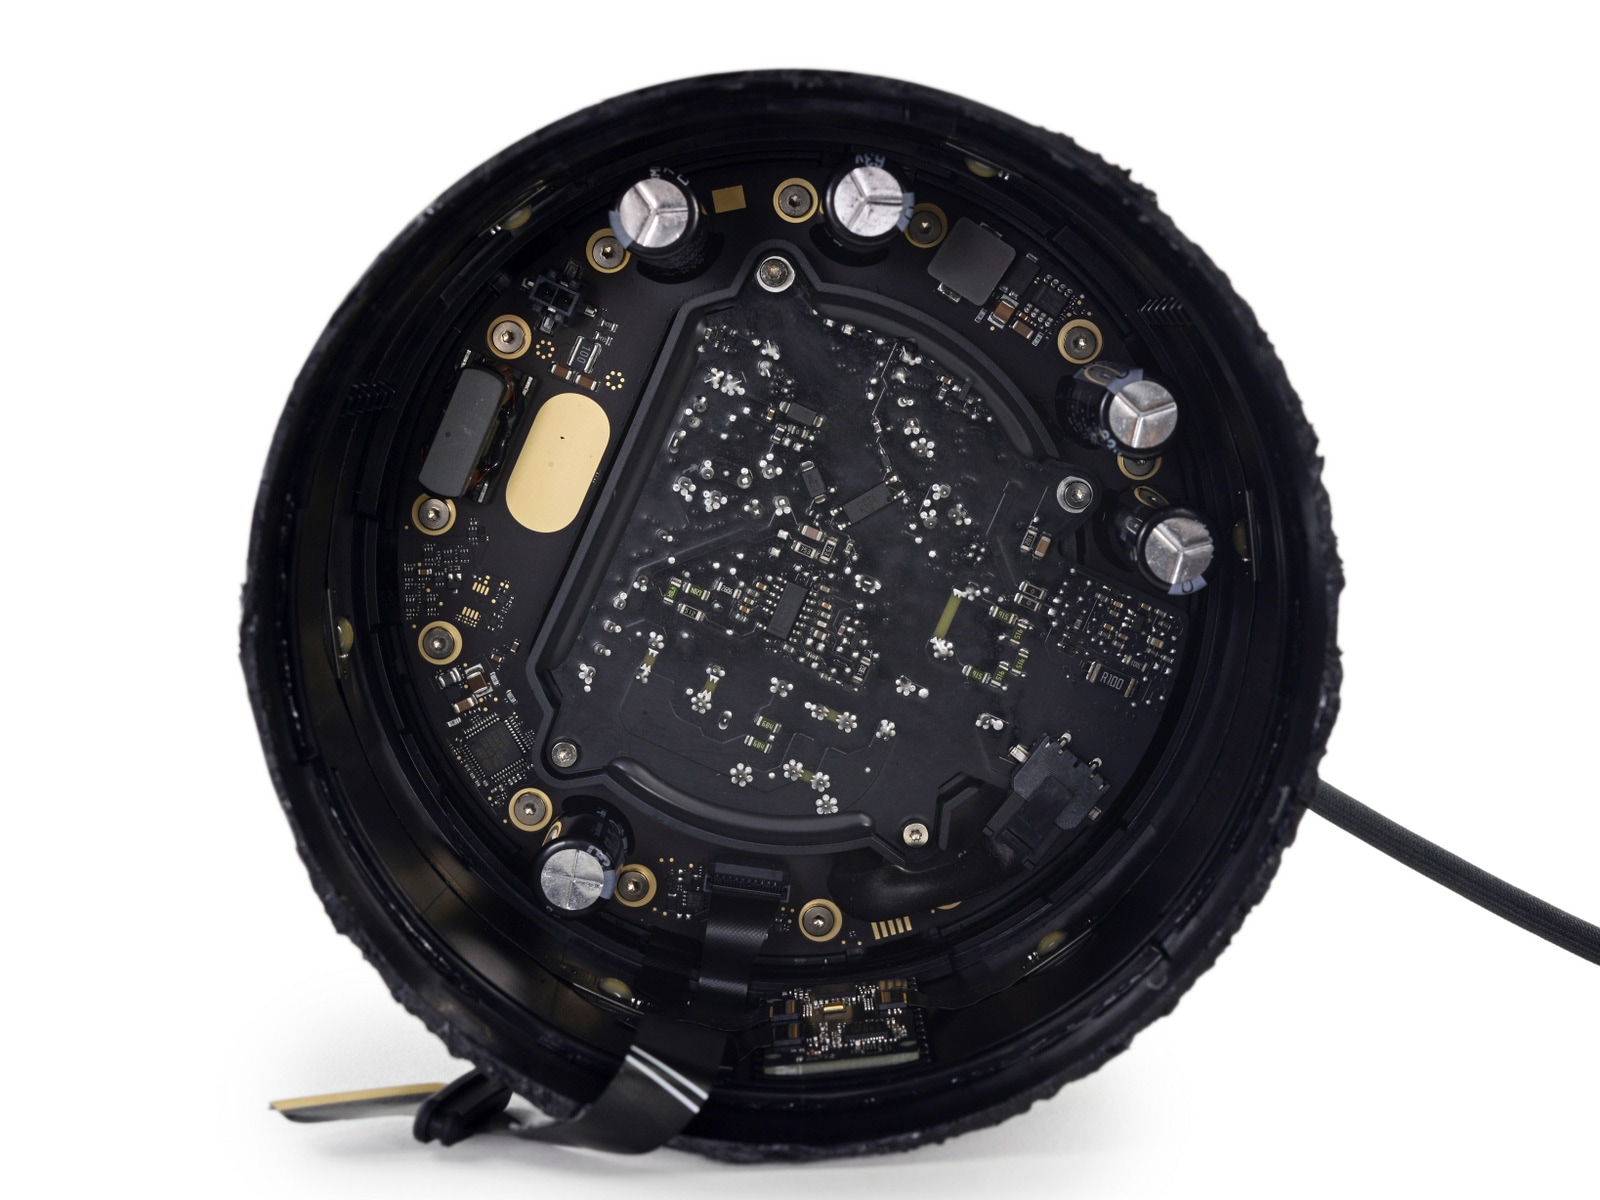
After a lot of glue and protections, they finally managed to access a card and a cable. l who are driver Texas Instruments TLC 5971 LED and Cypress SoC CY8C4245LQI-483.
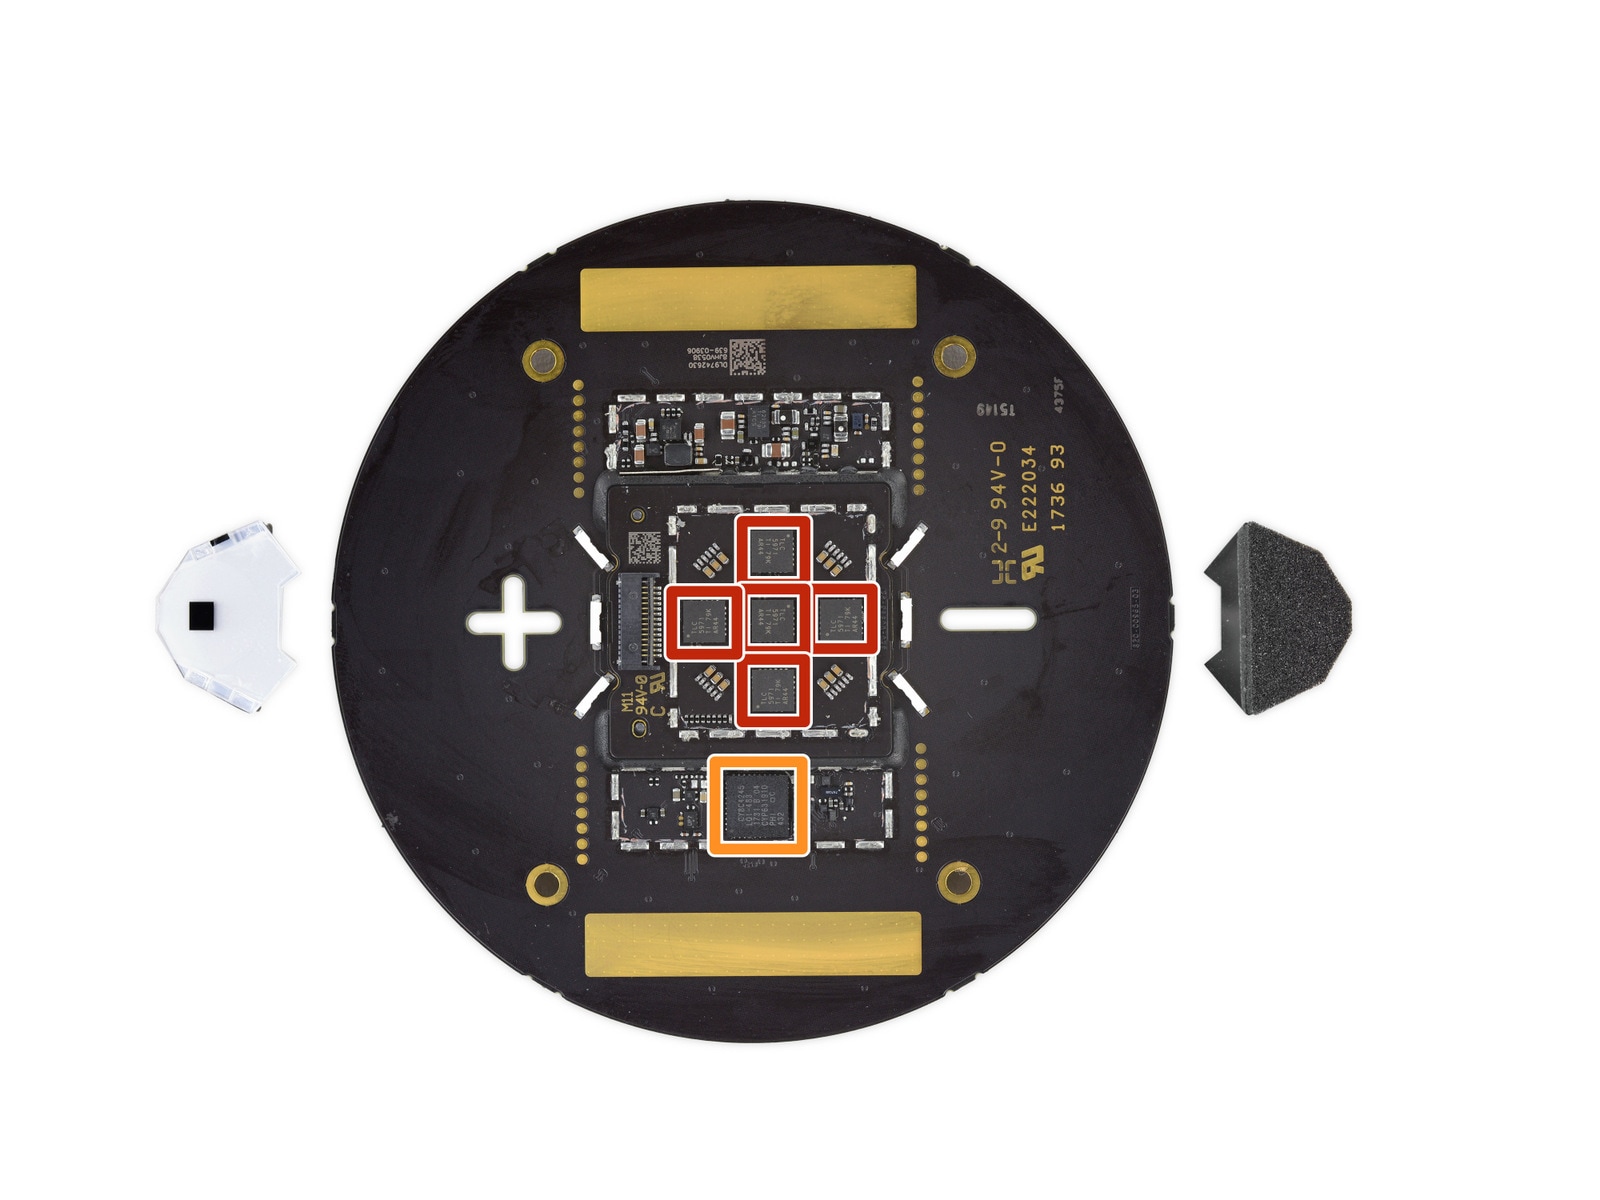
Digging deeper, another sign. In this one we have the A8 with apparently 1GB of RAM, 16GB of Toshiba NAND flash memory, a possible Wi-Fi / Bluetooth module and more! Interestingly, the back of the card has some prepared locations for some chips, which are not there so they suggest that perhaps the HomePod has undergone some last minute design changes.
When opening the cylinder, we have a view of the woofer.

IFixit stated that the m in this woofer quite large for the size of the HomePod. That's because the bass depends on the ability to move a lot of air. Although this is traditionally done by increasing the diameter of the cone, Apple has increased the travel of the voice coil (to 20mm p-p), which in turn requires a larger hand. That way, the diameter of the speaker remains small, but it can still move enough air to deliver quality bass notes.
The construction of the HomePod suggests that Apple, at some point, tried / thought of making a more “modular” product (an internal circular part implies that you could unscrew and separate the control components /woofer From tweeters/ power supply. But, no: there is even a lot of adhesive and glue inside, making it clear that the product was not made to be opened by users.
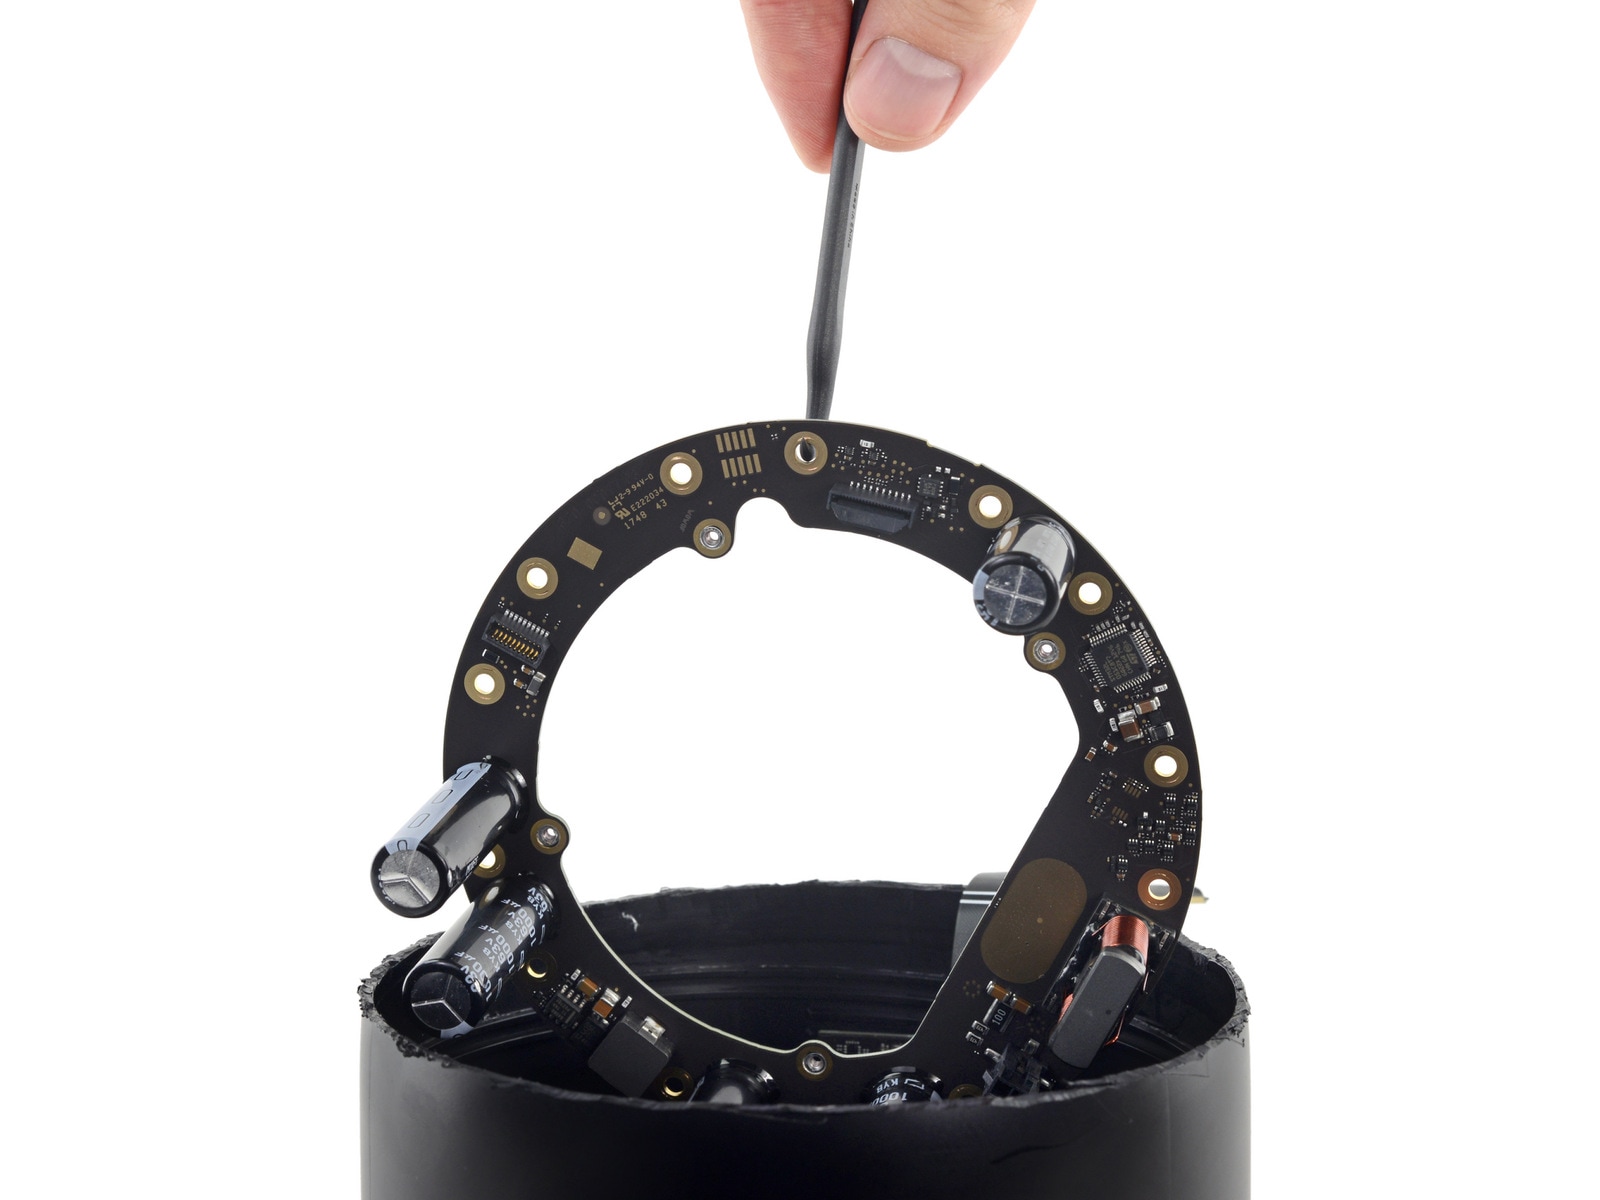
Going deeper we have the two-part power supply, composed of an internal block that handles the conversion between alternating current and direct current (AC / DC) and an external ring that distributes power to all eight speakers. The board's hardware is full of epoxy, probably to prevent vibrations from causing any damage internally.
Here, too, the STM32L051C8T7 ARM microcontroller from STMicroelectronics is located. the audio amplifier 98-0431, from International Rectifier PowlRaudio, among other components.
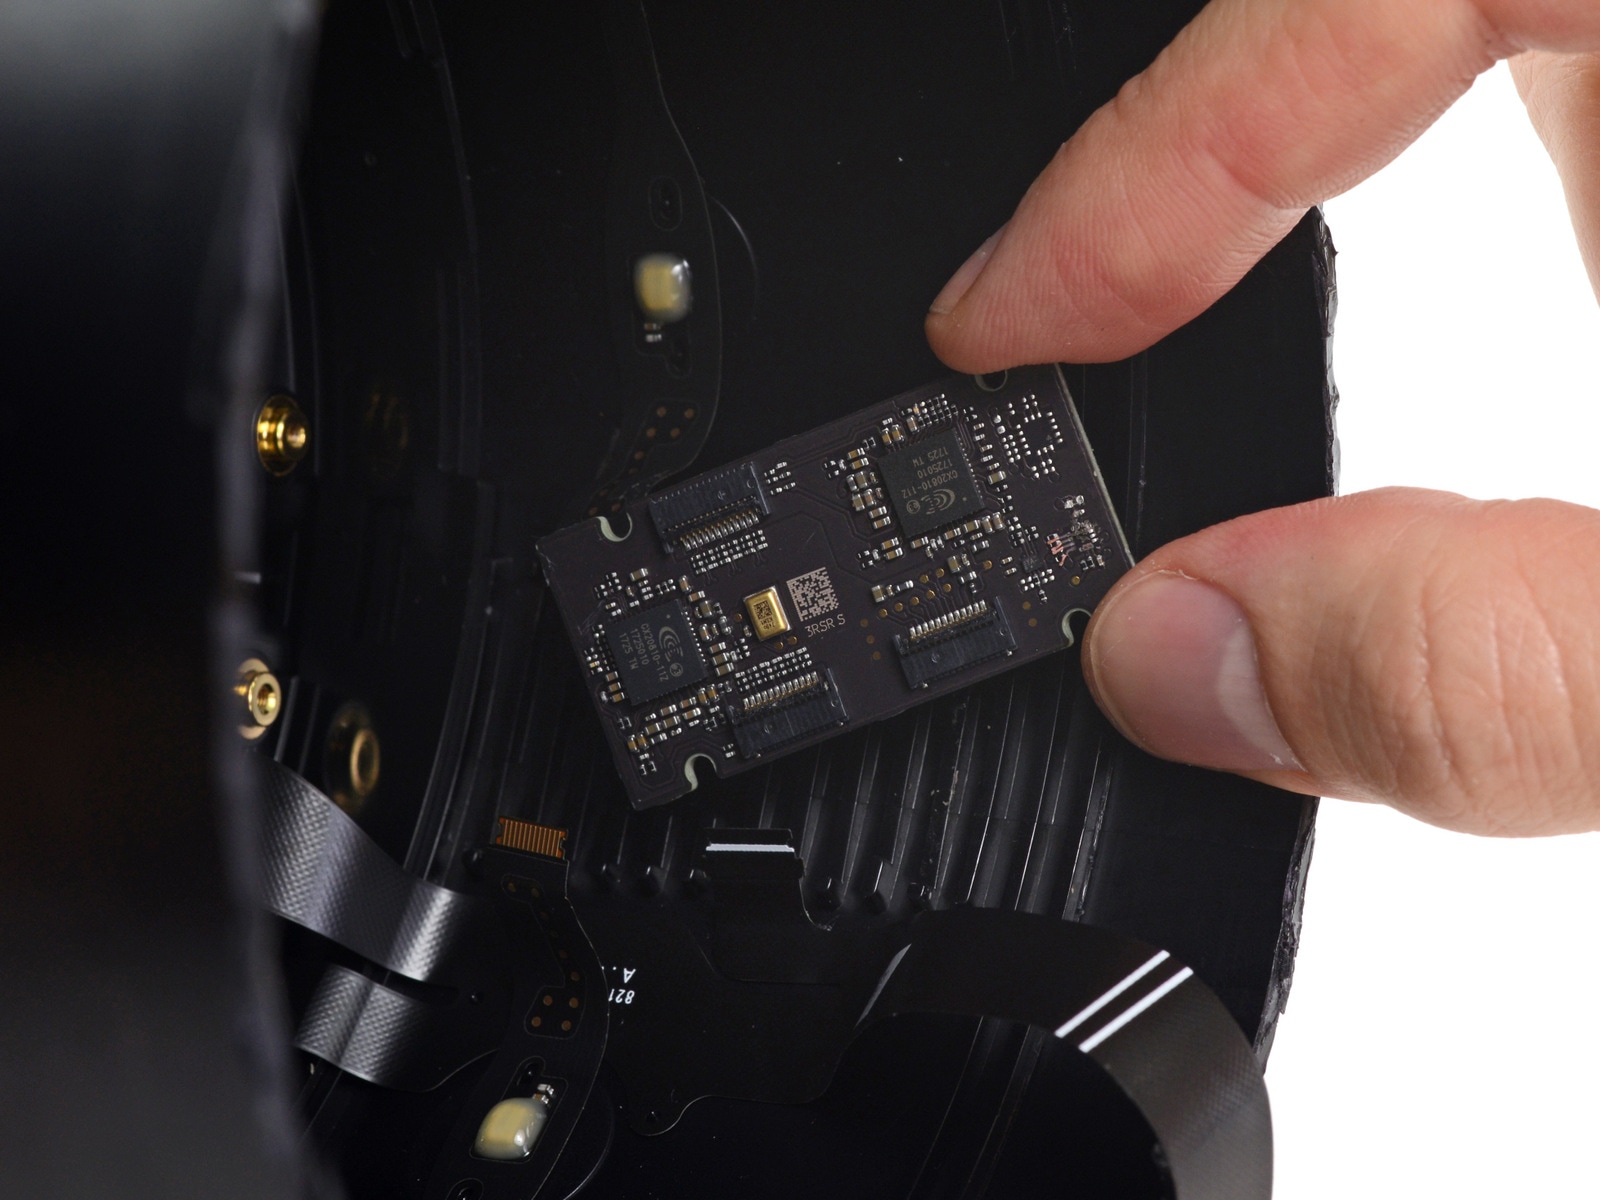
After transposing yet another adhesive barrier, two more ADC Conexant CX20810 chips, from Synaptics (for the microphone matrix). They are probably low frequency microphones for calibrating the woofer that microphone essentially listens to the woofer and, through some processing, it adjusts it to obtain the best possible performance, keeping the bass levels in tune with other frequencies.
Here we can see the tweeters, which receive energy from the gold screws. The little horn folded in front of the tweeter It is a trick that audio design engineers use to increase the efficiency of a speaker and control the direction of sound. the same concept used on the gramophone.
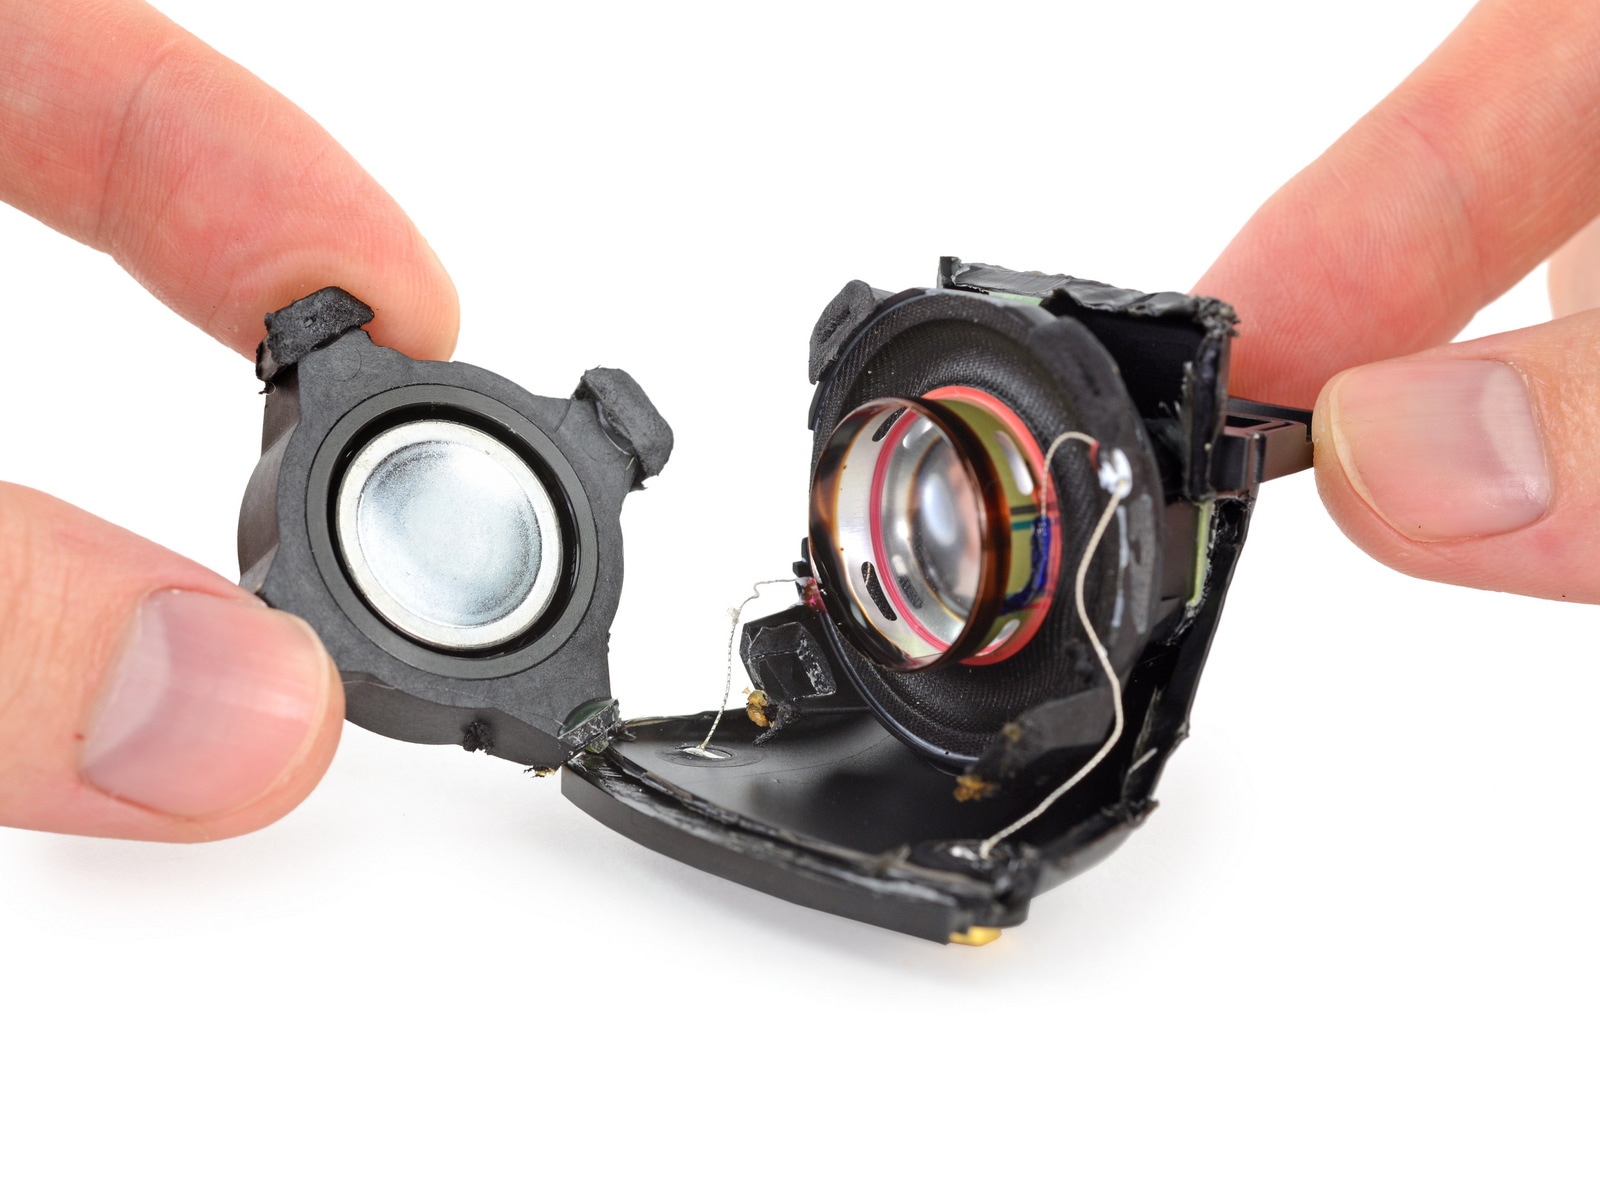
The openings on the sides and the four holes on the back of the tweeter prevent air pressure from building up behind the dome as it moves. Reducing the pressure prevents the dome and the music from distorting while the tweeter moves forward and backward thousands of times per second.
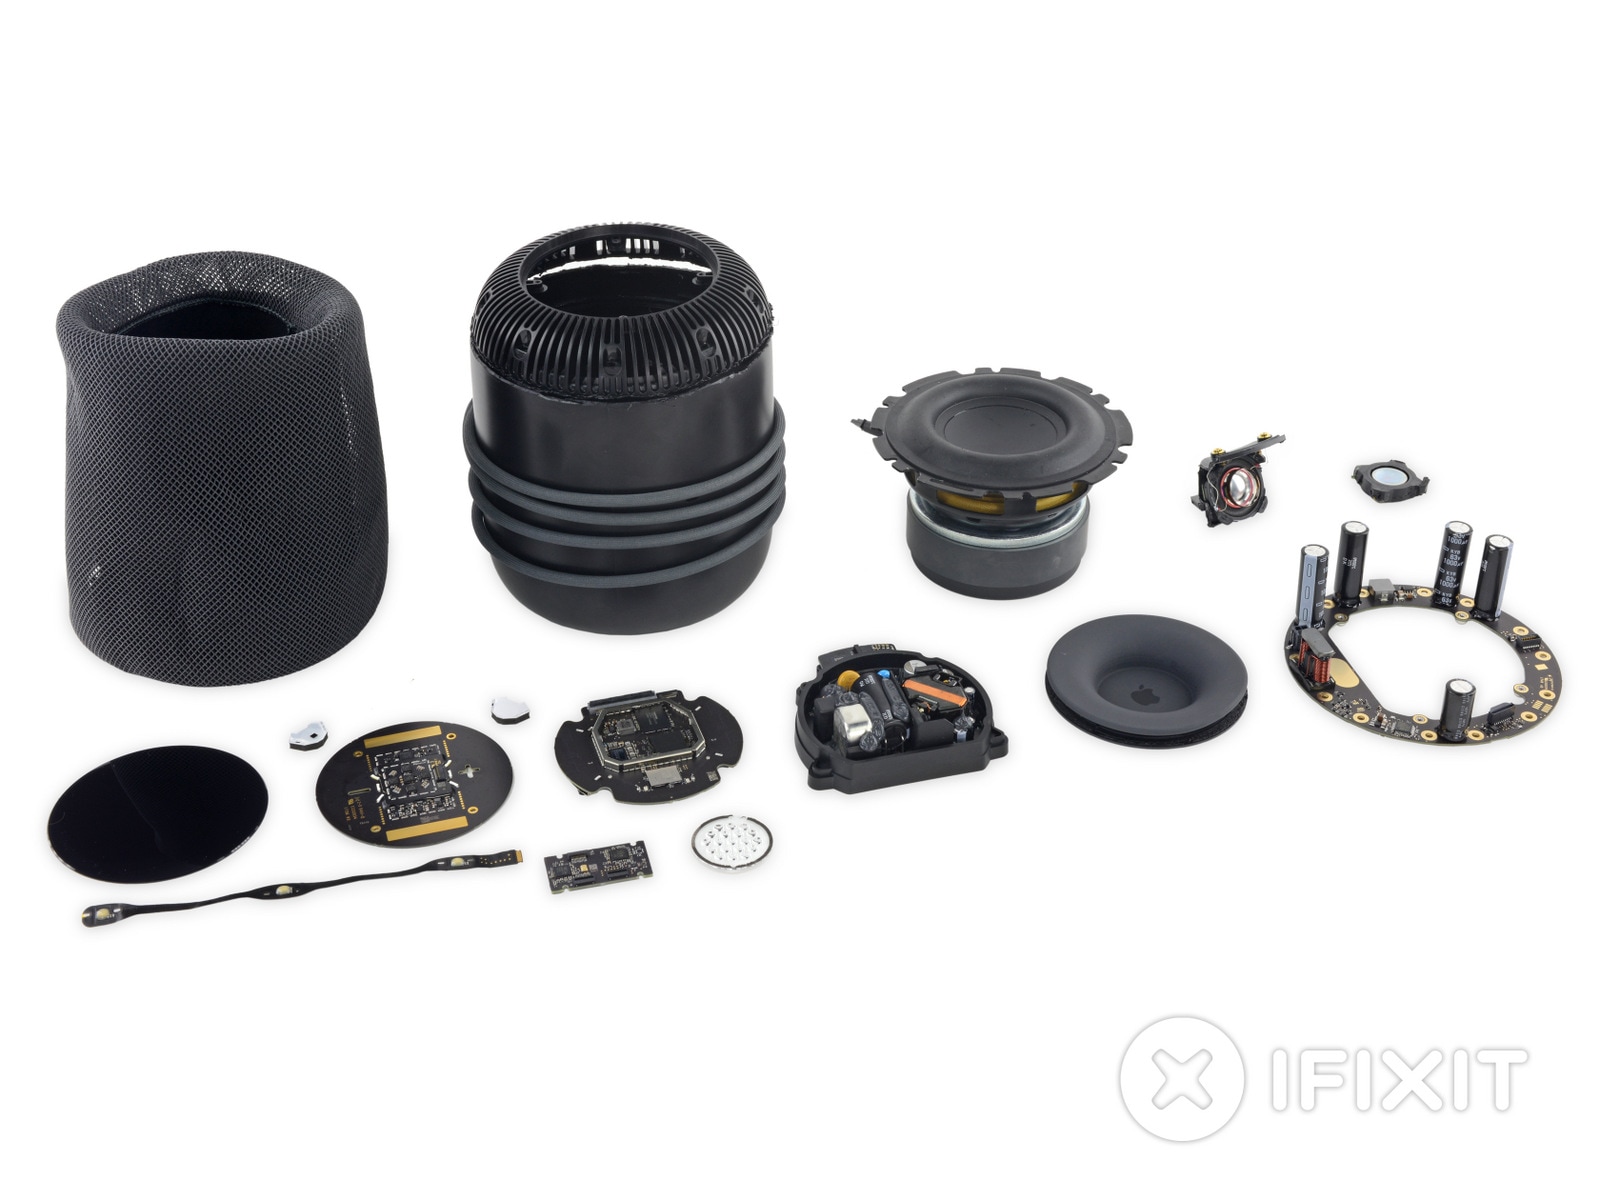
And here is HomePod and its insides.
The repairability score given by iFixit could not be different: 1/10. Of strengths we have the construction of the device as a whole (which is very strong and should not give any type of headache to users), the outer fabric mesh that, despite the lack of seams, can be removed without damage, Torx screws (a known standard) and the extremely intelligent use of conductive screws, which minimizes clutter in stacked multiple layers of components.
On the negative side, we have the very strong adhesives that protect the entrance cover, the microphone arrangement, the rubber foot and the main entry point at the top of the device that seems designed to be unscrewed, but not. That is, even if there seems to be a non-destructive way to open this bug, there is no (or at least iFixit didn’t succeed).
Update 02/13/2018 s 12:23
To the curious, here is the video with the disassembly:
