This is iOS's most famous photo editing app, which came to Android a year ago. It's a very prestigious app (which won an award for best iPad app of the year 2012). With Snapseed we can edit photos very simply and with a result that could be qualified as professional. If you want to know what are the strengths and weaknesses of this app, read our detailed review.
Functions & Usage
When opening the application you may find the amount of options and the numerous explanations about each one excessive, but don't worry. If a word can define this app, simplicity.
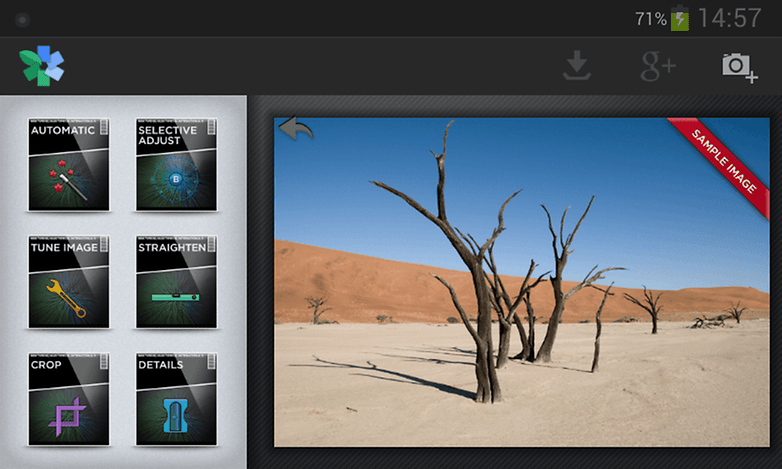
I recommend leaving your device horizontal when you open the app (unless you want to edit photos taken vertically), so that you not only get a larger view of your photo, but also better view the filters and options. However, you will see on your screen a top bar with various options, the image to be edited in the center and the different effects and filter options on the side or bottom (depending on the orientation of your device).
With this template image you can test all functions. AndroidPIT
In the top bar, following the application icon you will find three other icons: a down arrow (to save the image), the Google+ icon to share the image on this social network and a camera, which we will click to do a photo that we will edit later or select an image from the gallery.
In turn, the editing options bar offers numerous icons with their names, as in Instagram. The main difference is that Instagram gives you the option to apply filters, in case Snapseed always you can adjust options such as brightness and contrast control, exposure controls (saturation) or colors, shadows, and ambience, which improve contrast in midtones.
Application dynamics are always the same (or very similar) for each type of configuration. By sliding your finger over the image from top to bottom, you will be offered different options (such as contrast or color correction) and by sliding your finger from left to right, you can increase or decrease the value of each category.
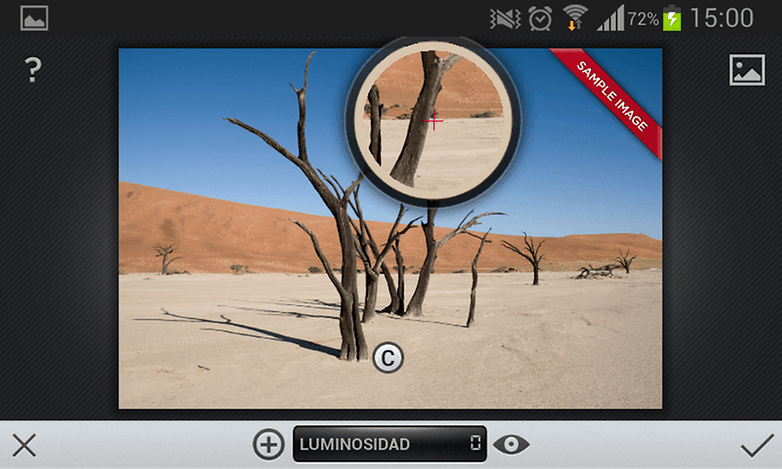
At the same time, clicking on the screen, many editing options will show us a magnifying glass with which we can select the image area we want to editand may even modify the brightness, contrast and saturation at different points of the same image. In any case, we can always select the default values in each category or return to the initial values.
With the magnifying glass we can select the area to be edited. AndroidPIT
Once the retouching is completed, we have the option to crop, send or rotate our photo, and can use many proportions, and even move from the vertical horizontal.
As I mentioned earlier, the app offers way of creative tweaking filters like "Black & White" or "Vintage" among others, which will allow us to give our images a unique and different look. The only function I missed in the app was to reduce image noise.
Another advantage of Snapseed over Instagram is that Instagram does not compress photos, allowing users to view them in full size (6MP – 20MP) and in high definition.
Screen & Controls
Snapseed offers a wide variety of functions that can in principle be somewhat labyrinthine. We may get lost when we start adding different filters and effects on the same image. However, when we continue using the application we will know which effects we like best without having to experiment. In addition, the options offered by the application can be known through the different tutorials that we can always access by clicking on the "Show Overlay" option.
Speed & Stability
During this test, Snapseed showed no blocking or delay despite the multiple processing options it offers. In the function of the filter to be imaged, the application takes a while to generate the selected effect, but the wait times are never too long.
Price / Performance Ratio
Snapseed can be downloaded for free from our AndroidPIT or Google Play apps section. The numerous possibilities it offers without having to pay a dime make this application almost a must download.
Final Verdict
Snapseed could be defined as a mix between Photoshop and Instagram, as it offers numerous image editing possibilities (without being considered a professional Photoshop editing program) and at the same time offers numerous filters to provide our photographs with an original and different finish quickly.
In my opinion, the most interesting features that brought us smartphones were the ability to send messages for free and take photos for immediate sharing on social networks. In that sense, Snapseed is one of those apps that can't be missed on our smartphone as it gives us the ability to make any photo a special photo without having to spend a dime.